04
2012The Making of a Self-Portrait
The Agony of Upgrading
Way back when Nikon upgraded the SB800 Speedlight to the SB900. I can’t remember what time of year this was, but I do remember that I only had one SB800 and had seen the merit of having a set of 3 or 4 (I had been reading Joe McNally’s Excellent “The Moment it Clicks”. I already had a set of Bowens studio strobes, but was attracted to the portability and possibilities of using mini-strobes on location. I couldn’t afford the purchase at that point, and within 6 weeks you couldn’t buy an SB800 anywhere. When I bought my D3 I also got an SB900 (with a plan to buy a few more along the way), but as with so many things, it never happened. I have achieved some interesting effects with one of each, so what the heck.
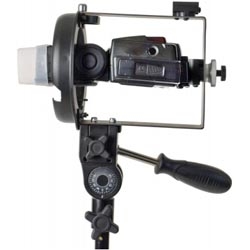
But then Nikon does it again. It’s Christmas and the SB910 comes out. £120 more per item than the SB900 and a gentle evolution rather than a barn-storming game-changer. So what to do. I certainly didn’t want to become an owner of 3 different types of flashgun so I made the decision to buy 2 more SB900s before stocks vanished again. A side issue is that I have also invested in the Flex-TT5 system and there is no guarantee that the SB910 would even work with the new Speedlight. Now I do use my Bowens light-shapers, including a grid-spot, with my speedlights via a cunning device made by Interfit – the Interfit INT326 Strobies XS Bracket, but did not want to spend any more money this close to Christmas, and the Bowens grid spots are not cheap!!
So, What to Do?
I thought I’d make some. I thought how hard can it be? I was about to find out. I thought things through. How large do I want these grids. What would be a good base from which to manufacture? How would I attach the grid to the flashgun? After some reflection I decided to make them as small as practical, and a push fit. This is what I came up with.
Making the Grid-Spots…
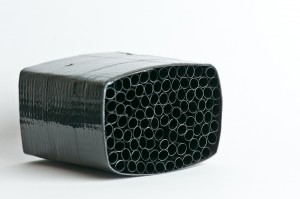
Stage 1. Gather together the components which in this case consisted of:Black cardboard, black drinking straws, gaffer tape, sellotape and UPVA glue.
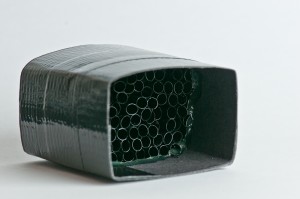
Stage 2. Make the shell. This was done by cutting a 3 inch strip of black card from an A4 piece and wrapping it around the head of the Speedlight. I pulled this tight and secured it with a small piece of gaffer tape. Next I creased the corners to help maintain the shape whilst it was still in-situ on the strobe.
Stage 3. I cut, what seemed like 100s, of 3cm lengths of black drinking straw. There are various ways to do this, but I cut a cylinder of cardboard to size and then used this as a template to cut several straws at once.
Stage 4. Lay the straws in a long level line. I used a piece of gaffer tape stuck to the side of the table (much to the distress of my wife who gave me a stern telling- once she realized so be careful). This held the straws in place whilst I placed a long piece of sellotape over the top of the straws. Once in place gently free the ends of the straws from the gaffer tape edge and flip over so that the sellotape is down on the table. Place a second strip of tape over the top and trim the ends.
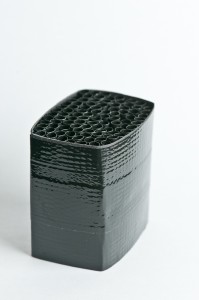
Stage 5. Remove the cardboard shell from the Speedlight. Fold the strip of straws back and forth to form a shape that will fit into the shell and press it down inside to be flush with the outer edge. Finally glue the straws in place round the edge with UPVA glue and leave overnight to set.
Grid Spot for SB900
The Making of a Self-Portrait Revisited
So what has all this got to do with making a self-portrait? Well, you may have noticed that the picture in About looks heavily vignetted, and have assumed that this was done in Lightroom or Photoshop. Well not so. It was taken using the above Grid Spot on one of my SB900’s. The SB900 was on a stand to camera left at about 45 degrees and pointing downwards. Behind me was a window with daylight providing the rim light edging my hair and left cheek. The ambient was a stop and a third below the exposure on my face. Et Viola! Cheap and cheerful but none-the-less effective.


Recent Comments