Feb
22
Kingfisher Diving Supplement
How do Kingfishers Dive for Fish?
This Kingfisher diving supplement adds to my post from yesterday A Few Days Out. I’ve examined my images from the Dumfries and Galloway shoot very carefully and I have realized something else important that I wish to share.
To recap:
- The Kingfisher eyes up the fish from the side of the tank
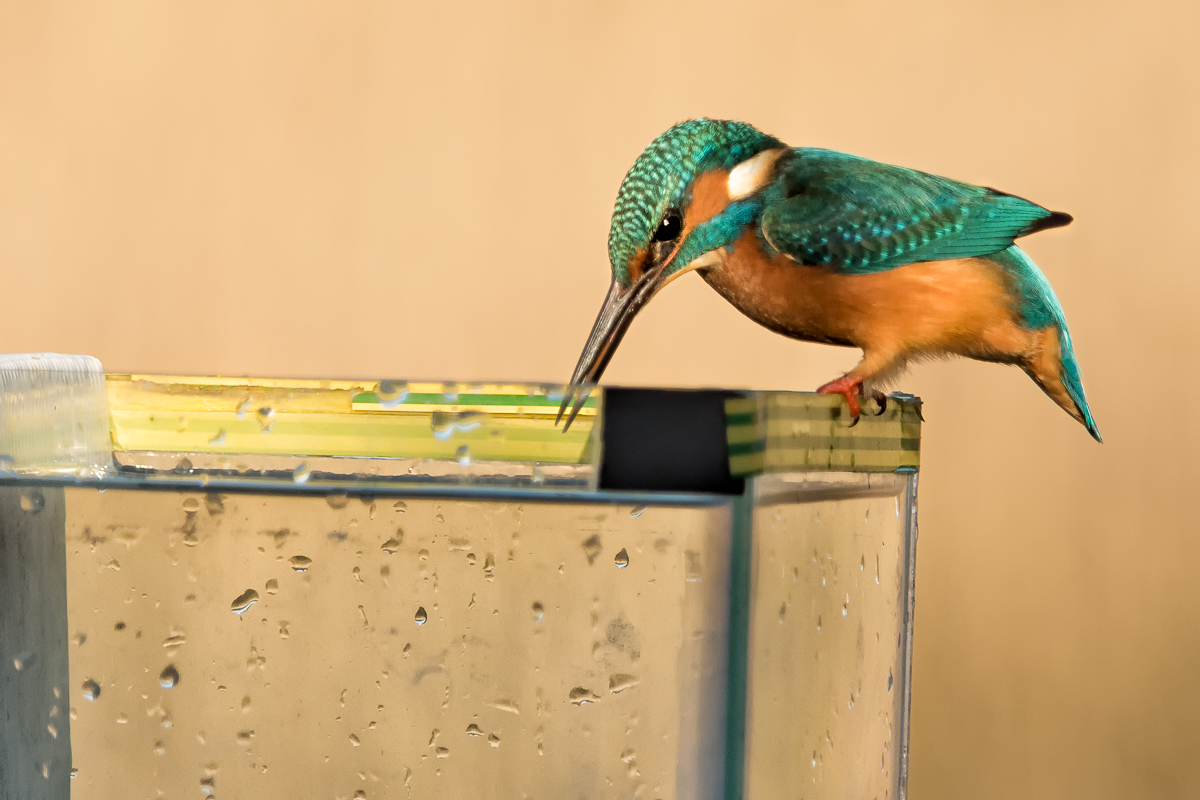
Eyeing up the Prey..
- The Kingfisher points his beak at the fish he wants several times
- Then there is an extra long stretch, and you see the bird go into the water
New Insights..
Having looked at my images very carefully, here is what happens next:
- The Kingfisher gives the extra long neck stretch then
- Flies upwards and backwards along the line of his beak keeping the fish in sight
- Then after gaining sufficient height, dives down and forwards again into the water to catch the fish
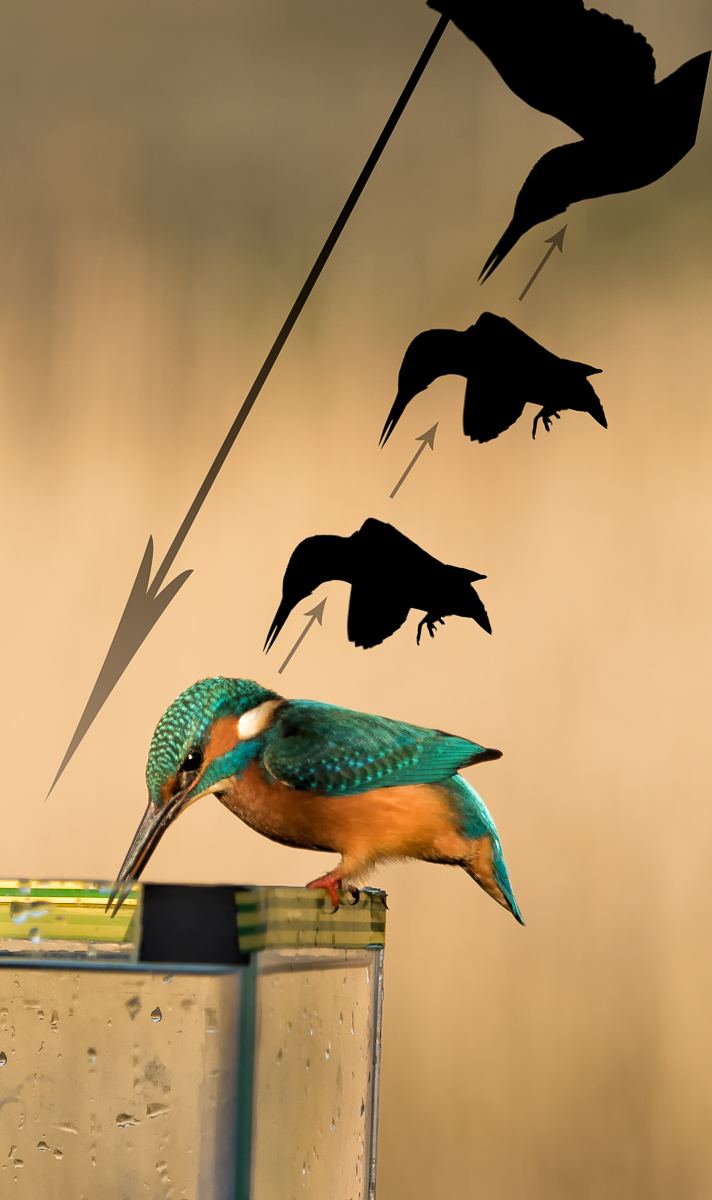
Flight Path for a Dive..
- This allows you to aim your camera along the flight-path much more accurately because you don’t have to overlap both sides of the tank just in case.
Some Action..
This is a little better than the Gif I published yesterday as it does show part of the backward flight prior to the dive. The shot 3 seconds before this sequence (not shown) has the Kingfisher looking at the fish, but before committing to dive. Fascinating stuff!!
Kingfisher Diving Sequence..
Until next time,
R.

Aug
03
Preserving Highlights whilst Shooting in the Midday Sun
Sandwich Terns and Gulls at Cemlyn Bay
I was recently out shooting at Cemlyn Bay and Lagoon on Isle of Anglesey. This area is famous for its Sandwich Terns and I’d popped along with a view to taking a few Tern and Gull images. The day we picked to go was bright and sunny, and we were there late morning, all of which was less than ideal. When I’m shooting wild birds in flight, I always spend a few moments working out the correct exposure, because I cannot stand reviewing my images to find blown-out highlights. Getting a good general exposure that encompasses preserving highlights, without unnecessarily under-exposing the rest of the shot (in other words shooting to the right) can be crucial to ensure a reasonable result when the birds are flying in and out of various lighting conditions.
The Aperture Priority versus Manual Exposure Shooting
Many, perhaps most, wildlife photographers shoot aperture priority and use exposure compensation. I have found that, although I have a fair idea what my D4 might think is a correct exposure, and therefore what exposure compensation I might need to dial in, in a range of circumstances, this method is completely impractical for judging exposure when photographing birds in flight. The reasons for this include:
- The relative size of the bird in the frame changes as you track it.
- The colour and brightness of the background may change.
- The lighting on the bird may change as it flies under cloud, landscape or building shadows.
- The position and brightness of the highlights on the bird may change.
All of these factors make preserving highlights particularly tricky as you need to make very complex judgements, at high speed, whilst also trying to keep the bird in the frame. You are effectively fighting the camera in this situation and there is just, for me anyway, too much to do at the same time.
Setting up for Manual Exposure Shooting
This is my process for preserving highlights. Firstly I find an area of mid-tone, usually a patch of grassy field, then with my camera set to manual exposure I zero the meter in the viewfinder and take a test shot. Clearly if the subject will be in the sunshine, your base exposure should be set using a grassy field that is also lit by sunshine. If there is no mid-tone available you could also just take test shots of your subject instead, but this will take you longer.
The chances are that, if shooting a white gull for instance, even having taken a good base reading, there will still be some blown highlights if the bird is in the bright sunshine. This being the case, I adjust my shutter speed (upwards) or ISO (downwards) until they are gone. Usually, with my bird photography, I will be using my 600mm at f4 and looking for at least 1000th, preferably 1600th-2000th, second to freeze the wing tips.
In and Out of Sunshine
In the situation where there is a major shadow in the overall scene, and the birds are moving in and out of that shadow, you can take additional test shots to establish the exposure for that too. Again, according to circumstances, you might use a decrease in shutter speed or, more likely, an increase in ISO. Once you have established the settings for the shaded area it is easier, using the in-viewfinder information, to alter the exposure by the exact amount needed during actual shooting. Equally, if you were shooting at f8 in the sunshine for example, you could open up the aperture instead using the same method, though this will change your depth of field.
Shooting in Overcast Weather
Preserving highlights in overcast weather may be more straightforward in the softer light. Nevertheless when shooting in overcast weather, it is still sometimes the case that you take a base exposure and still get a small amount of apparent highlight clipping. If you have been shooting raw files this is easily retrieved in post production. It is up to you whether you take this chance or not, but my advice would be that, in this situation, you don’t delete any shots because of the blinkies as they may well be salvageable. For myself, I would still try and find an exposure to preserve the highlights if possible.
Cemlyn Bay Shoot

May
26
Time Flies When You’re Having Fun
Time flies when you’re having fun (or very busy at work), and perhaps especially when you have a day out at Martin Mere Wetland Centre. It’s huge, but well laid out, with a number of handy, and very well specified, public hides from which to mix with twitchers and shoot long lens wetland birds. I can hardly believe that it was the 9th of April 2013 that I was last there, it’s now nearly 7 weeks and I haven’t published any of my images yet.
Routes Round the Martin Mere Wetland Centre
The handbook, or walkabout guide, contains a route map, several suggested routes and some very handy information on a variety of species. There is a nature trail map, some photographic plates and a Wildlife check-list to tick off your sightings. The Marsh harrier, Whooper swan, Bewick’s swan, Pink-footed goose and Tree sparrow are filled in at the head of the list to get you started. We did in fact see a Pair of Marsh Harrier’s last time out, but not this visit. I think that my favorite part of the handbook is the fold-out back cover that contains 121 colored drawings of ducks, geese and other birds to help you with identification. WWT Martin Mere is one of nine unique wetland visitor centres in the UK run by the Wildfowl & Wetlands Trust. All the paths have a tarmac surface so they are an easy walk and reasonably clean to lie on to get a good low angle for birds in ponds. Martin Mere Wetland Centre opens at 9.30 am and closes at 5.30 pm in the summer and 5.00 pm in the winter. The grounds are open for one hour after the building closes but visitors must then leave through the exit gates.
Images from the Hides and Ponds
Post Processing…
Some time is inevitably spent trying to work out what I have photographed, not always with any success. I get swept along by the photography, so tend not to remember to take a note of the species names where those are noted at the pools. So for this reason I am indebted to Belinda Barker, office manager at WWT Martin Mere Wetland Centre, for putting names to quite a few of the images you see above.
Otherwise, getting the correct exposure is most of the battle with images of water birds. The brightness of the water or the sky tends to lead to underexposure which can mean blocked up blacks. Post processing involved the usual passage through Photoshop Lightroom 4 for tonal range, contrast and vibrance, with a brief foray into Photoshop to further improve the mid-tone contrast and some very careful multi-pass sharpening.
Best wishes,
Robin.
Recent Comments