02
Rediscovering My Photography
Rediscovering My Photography
My Journey Back, This Year in Pictures..
Background
I’m sure that I am the same as every other working individual. Work-life, home-life and chores expand to fill all available time — that’s Robin’s Law, one of many! The balance of these three may change from time to time, but essentially, hobbies are squeezed into any free time that you are not too tired to use. Over the past 12 months I’ve been focused on my cycling, as this has been making me feel better emotionally, and physically, but whilst doing so I’ve had a nagging feeling that something else is missing. I’ve known that it is my photography well enough. I’ve been thinking that I may as well dispose of my cameras, and other studio equipment, because they represent a large investment and I’m not using them. Fortunately I have managed to resist the urge, and in an effort to re-balance things, have started making time to take a few images again.
Recession and the Cost of Living
In reality my retreat from picture taking has been multi-factorial. I have read a lot of recommendations along the following lines: “Take loads of pictures, it doesn’t cost you anything to experiment with digital photography”. In one way this is true, well almost, it doesn’t cost very much to press the shutter button. The only real costs, once you have purchased the machinery, are for electricity to charge the batteries. Beyond this though, if you want to keep your photos safely, you need storage space in the form of multiple hard drives (or DVD’s if you have the patience to record them), and these do cost money. If you want people to enjoy your work you may also choose to purchase a website with it’s own attendant charges etc. There may be other expenses too, after all, there are only so many photographs you can find in your garden or front room. There comes a time when you have to invest in some form of subject-seeking. This can take many forms from the full-octane photography holiday, through to purchasing multi-colored knickknacks from a stationers for your macro photography. For some of us, the true joy of photography lies in the execution of a fabulous print. These also cost money, especially the A3 and A2 ones, and if times are hard, and you can’t afford the ink and paper for your printer, some of the joy of photography is leached away. The improvement in the UK economy has therefore also been one factor in my rediscovering my photography again.
With all this in mind, I took a day out to replenish my soul with one of my favorite subjects, a variety of birds of prey on an organized shoot at a falconry center. Some out-doors in natural settings, and others in the studio. Easy-peasy..
Gauntlet Birds of Prey, Eagle and Vulture Park
If you would like to visit the Gauntlet birds of prey, eagle and vulture park I can strongly recommend it. The vulture collection is a particular treat. In addition to photography workshops they have flying displays at 12.30 pm and 3.00 pm, Vulture feeding at 12.00 pm and a meet and greet at 2.00 pm as well as other attractions.
A Photo-Walk Around Chester
Invigorated by shooting wildlife again, albeit in captivity, I next tackled a photo-walk around Chester. Not a brilliant day, in fact quite dull, so I had to keep my wits about me. Black and white to the rescue..
A Visit to Oxford
In our only city-break this year, we went down to Oxford to see Ceri, the daughter of some friends of ours, as she started her final exams. The weather was not kind to us, unfortunately, so we had plenty of time to look around the shops, and drink the occasional cup of tea and coffee.
A Visit Thurstaston
The next step in my rehabilitation occurred during a drive out to Thurstaston with my daughter. The plan was to find some coastline, and take a few pictures along the way. As good fortune was to have it, the North Wales Hang Gliding and Paragliding Club were flying, and we got a few shots of them, plus the visitor center had a photography exhibition and a public hide with views out onto some well stocked bird feeders. Heaven!
The Journey Continues
Sadly, these trips were still not quite enough, on their own, to get me taking pictures regularly again. Have you had the experience of wanting something all the more, when you knew you couldn’t have it? Well, my D300 broke! I hadn’t been abusing it, I’d just been updating the firmware to include compatibility with the 800mm f5.6 Nikkor extreme telephoto (it’s not like I will ever own one, but I like to be up to date), when to my astonishment, it just stopped working. In all honesty I hardly ever use the D300. It’s old technology now, but it is my backup camera and I do like to use it for macro shooting extreme close-ups with an old 300mm zoom and a 50mm reversed onto the end. And now, suddenly, I couldn’t. Should I buy a new camera? Probably not worth it if I’m not using my cameras much, but should I get the D300 repaired? Well probably, yes, was the conclusion I came to, if a camera that old can even be repaired? Well it turns out that it could. Nikon UK have a fabulous online system for repairs. You can say how much you would be prepared to pay without seeking permission to proceed, and even get the free postage label printed out from the website. They prepare an estimate and you say whether you want to go ahead or not and that is pretty much that.
Needless to say, once the D300 was returned to me in good working order, I couldn’t resist using it for some macro shots, and generally loving it and reminding myself of all its settings. Sad I know.. In fact, the challenge was as much to produce some good looking and clean shots with it as I could. I’d forgotten how noisy and textured D300 images could look. Sensor technology, and the supporting electronics behind them, are so much better now than even 5 years ago! Here’s how I got on:
Oulton Park Track Day
By this point I’m fully engaged with the drama and creativity, seeking new photographic experiences and subjects again. I’ve said before on this blog that, for me, it is more about the photography than the subject. Novelty and complexity are always the way for me. I’ve never shot cars or bikes on a track before, so this would be a great entrée. Is it difficult? Depends. If you want a straightforward shot, tack sharp, just set a monster shutter speed and shoot away. If you want a sharp bike and rider with spin-blur on the wheels done in camera, on a bend, yes that’s tricky first time out. Impossible? You be the judge!!
Hooked Again!!
The Inevitible Consequences..
And so it was, hooked again. Desperately fighting the urge to buy a new camera, but eventually succumbing to the temptation. A couple of years ago I blogged about wanting a Nikon D4 and a D800, but having to choose just one. That time it was the D4, this time the siren call of 36mp detail was too much for my battered psyche, and so to the D810..
More later,
Robin.
05
The Mach Loop in Wales
The Mach Loop is a set of valleys between Dolgellau in the north and Machynlleth in the south of Wales. The Mach coming from Machynlleth of course. The loop is used for low level flight training (as low as 76 metres from the nearest terrain) by the RAF. Geoff and I had heard that it was a simple matter to climb up a bit of bank and take some (nice) pictures of the Jets. Given that there had been heavy snowfalls, we wanted to scope out the terrain to see what might be involved in getting to a reasonable spot above the planes. So off we went to Bwlch to have a look.
The Weather was Against us!!
We checked out a few possible vantage points to visit from information on the internet, and off we went. We arrived at Bwlch at around 10:00am on the first of April 2013 (and it was no joke, even if we felt a little foolish). The temperature was just above zero, but felt about minus 30, due to the sharp wind. It was so cold that within no more than 3 minutes I couldn’t feel the ends of my fingertips. I scampered back to the car to re-group with a cup of coffee, before giving it another try.
After the second chilling, and a closer look at the steepness of the mountainside, I realized that I would need a helicopter winch to get me anywhere near the summit even if I was travelling without heavy camera gear. So we left to look down the road, but quickly gave up as the snow seemed deeper there. No stamina I suppose, perhaps after a year or two working out?
Decamp to Bala Lake
So a wholesale change of plan was required, and onward we forged to Bala Lake for a few photos. Hopefully it would be warmer lower down? Sadly, in the end, it was still pretty cold so I went with an HDR approach rather than breaking out my Lee Filter Holder and Neutral Density Grads. I did use my tripod though, for a change, rather than hand-holding a high speed burst.
I did think, afterwards, that I missed out an opportunity to try out my new Big Stopper. But hey-ho it was very cold, and I wanted to keep warm. I can hardly believe that a month has gone by since Bala and I’ve still to tell you about Ludlow and Martin Mere Wetland Centre!
26
I Just Cannot Believe It..
I must be getting old and Meldrew-like! I love the cold weather, and especially the snow, as an unparalleled opportunity to get outside with the camera. What I don’t like is the way that our weather forecasters seem incapable of even remotely predicting the time, place or extent of weather with any accuracy. Worse still, the very mention of the possibility (never mind the actuality) of snow throws the media into a frenzy with dire predictions of death and mayhem. These days my wife and I often have to travel, usually a long way and in different directions but that’s incidental, and an accurate weather forecast is pretty essential if snow is forecast. Can we get decent information? Certainly not.
And what about consistency of approach to travel information in the media and on the roads themselves. Forget it, no-one cares. On the M5/6 yesterday I saw plenty of signs for ‘Salt Spreading’, but never saw a grit spreader once. Neither, more worryingly, did I see any obvious grit on the road. Nor any warnings of snow on the road, or an advisory speed limit, despite several inches of snowy slush, harsh wind and appalling driving conditions!! I saw plenty of signs asking ‘is your vehicle prepared for winter?’ but for what purpose? So there we all were, driving in columns, much too fast, terrified to attempt to slow down or change lane in case a truck rear-ended you or the manoeuvre started a skid and a major pile-up. Astonishing. So I ask again was there an advisory speed limit? Were there warnings of snow? Of course not, no-one cares it seems. On the news this morning I hear that people were stuck in their cars overnight. I felt lucky to get home alive last night, this country beggars belief sometimes.
Less Moaning and More Photography
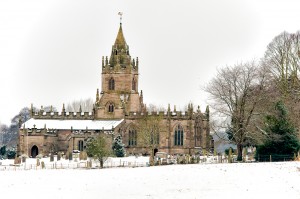 I did manage a couple of pictures however. I was quite attracted to the image of the Collegiate Church of St Bartholemew Tong pictured here. As you can see from the link it is a listed building with a very attractive facade. So who built Tong Church and when? It seems from their website that in 1409 Lady Isabel de Pembrugge obtained a Royal license from Henry IV to found Tong Church and build the present church so that masses could be said for Sir Fulke and her two other husbands, Thomas Peyteveyne and John Ludlow. Tong church is probably the third building on the site, and is a fine example of Perpendicular Gothic Architecture, with the exception of the Golden Chapel. It’s a real pity that it was so dull on the day I went past, this would look so much cleaner with a blue sky background. On well, you have to take what you can. If you would like to see it yourself it is off the Newport Road (A41) just off J3 of the M54.
Nighttime Snow HDR Stuff
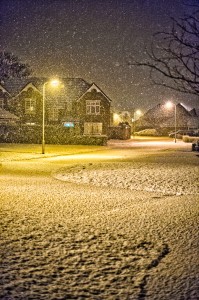 Many snow scenes are low contrast, and as such it is important to remember your positive exposure compensation to get clean bright whites, and to shoot to the right as far as possible. At night though, all that changes, particularly if you have things like streetlights in the scene. Here you may need HDR. One of the nice touches on the Nikon D4 is that you can select your bracket interval between 0.3 and 3.0 stops. Previously, on the D3 for example, you could only select 0.3-1.0 stops, so you would end up taking many more exposures just to get a good range. Now, many scenes can be captured automatically with a 3-image bracket of -2, 0, +2 stops. For this image, I pushed the boat out with a 5 image 2 stop bracket because of the deep blacks and the bright street lighting.
The shot was taken in full darkness using a 50mm f1.4 Nikor, hand-held at ISO bonkers (25,600), between 1/25 and 1/6400 of a second for the 5-image series. The shot was put together using lightroom 4 and CS6 Extended using the preset Scott 5 as a starting point in Merge to HDR Pro. It was then taken back to lightroom for further processing and then back to CS6 for extra tonal contrast thanks to Color Efex Pro 4. If you have never used Color Efex Pro 4 I can really recommend it to you, it is worth the asking price just for the tonal contrast feature, I use this on most of my images, even the wildlife pictures sometimes.
17
Work’s Been Hectic…
So not so much time for the photography this month. Nevertheless a fresh ordeal had been planned (more walking around the Sandstone Trail) and executed with somewhat less pain than previously. Small 20 minute walks several times a week seem to have helped my general levels of fitness, so there was definitely more energy to think about the pictures. Sadly, on Sunday 26th February 2012 the weather was not brilliant with featureless grey skies to accompany dull scenery. The sun did peak out once or twice, but this was not a tripod-wielding foray, and I had left out my gradient neutral density filters to save weight, so hand-held HDR seemed the order of the day.
Walk of the Week
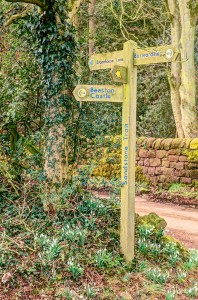
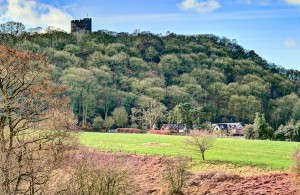
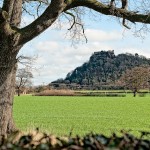
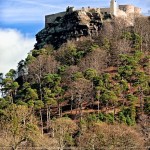
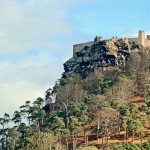
The walk this week was a circular trek around Beeston Castle which began in the car park opposite the castle entrance which walkers also use. You can find out more about the castle on the English Heritage site. You may remember the previous walk along the Sandstone Trail after Christmas.So off we set, Helen, Rebekah, Cyril, Suzie (complete with new hat) and myself.
The snowdrops looked lovely as they graciously carpeted several areas of the route, and contrary to initial expectations, the sun graced us with its presence on several occasions. This did not resolve the issue of high-contrast shooting conditions however, and the need for HDR (3-5 stop range) persisted through most of the day. Particularly for those shots of the castle where the foreground was in sunshine but the castle in shadow.
HDR shooting has become part of my routine these days, although I usually try to retain some subtlety in the final shots, but as with everything else this brings choices… There is necessarily a trade-off between speed and precision when it comes to HDR, attempted during a brisk walk with friends. Being generally slower than my fitter peers it would be bad-form to dally too long over multiple shots. Often in overcast situations with deep shadow areas it would be tricky to determine the exact range of exposure to capture everything anyway, so for these reasons quick and dirty frequently rules the day.
Dial in a 3-5 stop auto-bracket and then shoot and check the histograms to see whether that number caught the range or not. If not dial in another couple of shots and go again. Otherwise, if you are shooting in more relaxed company, use spot metering to check the difference in range between the highlights and shadows. It helps when auto-bracketing to use continuous high-speed shooting as this helps you to keep the camera still between shots and lets you know clearly when the bracketing sequence has finished – if you use single shots and lose track of your count, you’re sunk with your next photograph.
Dynamic Range Issues
My D3 has a dynamic range of 8.6 EV at ISO 200, though if I shoot at 14-bit in RAW (my default) then with ACR I have nearer 12 EV to work with. You need to shoot a range of exposures, in aperture priority, that will ensure that there is no clipping of the shadows in the longest exposure, or of the highlights in the shortest one.
Because of the way that the digital sensor works it is necessary to make sure there is a good margin between the end of the shadow peaks and the left-hand wall of the histogram to avoid posterization and excessive noise in the shadows in the final result. This is because digital sensors have a linear ratio of exposure to “negative” density. Clearly digital cameras don’t produce film negatives, but you know what I mean.
For the sake of example, let’s imagine that a photo sensor has a dynamic range of 6 stops. If you imagine these 6 stops as test tubes arranged in a row, then a 12-bit RAW image file contains 4,096 tonal levels. The first test tube is equivalent to the brightest stop of exposure. When it is filled to the top it will contain half of all the available levels i.e. 2,048. The next test tube along will represent the next stop of exposure which is half as bright and will therefore contain 1,024 levels, thus being only half full. Likewise the third stop will be half as bright again – 512 levels (a quarter full), the fourth 256, the fifth 128 and the darkest stop only 64 levels (just 1/32 of its capacity). The signal to noise ratio increases massively at these low light levels, making sure that the shadow detail is not only poorly represented by brightness levels but also very noisy. This theory has been incorporated into the notion of “shooting to the right”. This means adjusting the exposure value to keep the brightest values as close to the right-hand edge of the histogram as possible in order to maximize the number of levels in the shadow areas.
If you are interested in learning more about practical HDR, digital exposure issues and extreme lighting take a look at the references cited below.
White Balance
These days, when shooting my wildlife photographs outside, I generally use a White Balance preset of 5880K. This works well with landscape shots too, and keeps the white balance constant when shooting panoramas or HDR sequences. If you like technical accuracy there is no substitute for an ExpoDisc white balance filter.
HDR Software Choices
I use Photomatix Pro 4.1.4. Photoshop CS5 HDR Pro can also be useful, but seems to take more fiddling with to get a pleasing result. I generally aim for a very flat result, with well preserved highlights, as this gives more scope for the second and third pass processing in ACR and Photoshop. Everyone seems to prefer a different spin on HDR, from photo-realistic through to incredibly surreal. I’m not a fan of strong haloing, but other than that I don’t mind a strong visible HDR effect. I really like that hyper-saturated postcard look. See references below for more information on resources.
- A Sign of things to come…
- High Contrast Scene…
- See these Pine Cones Dad?
- Where’s my fill flash!!
- Castle from Under a Tree…
- Alternate Castle View…
- More Castle…
- Pleasant Spot for Lunch…
- The Right Path…
- Sweeping Left…
- Where’s the Castle?
So What was the Ordeal?
Nikon announced the D4 and then, shortly afterwards, the D800. I want both, they are very different animals and each is clearly useful for different purposes. Of course I can’t have both, so where should I spend my money? More on the issues, the dilemmas and the solution next time.
References
- Mastering Digital Exposure and HDR Imaging. Understanding the Next Generation of Digital Cameras. Chris Weston. RotoVision SA 2008.
- Practical HDR. A Complete Guide to Creating High Dynamic Range Images with your Digital SLR. David Nightingale. ILEX 2009.
- A Guide to Extreme Lighting Conditions in Digital Photography. Duncan Evans. AVA Publishing SA 2006.
- Extreme Exposure. Pushing the Limits of Aperture and Shutter Speed for High-Impact Photography. David Nightingale. ILEX Press Ltd 2010.
- The HDR Book. Rafael Concepcion. Peachpit Press 2011.
21
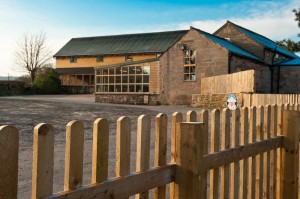 Christmas is Over…
So there we were. Christmas over, New Year too and everyone feeling bloated and slow. My better half decided that it was time to get healthy and that we should meet up with friends and go for a walk. Trouble is, I’m the more overweight and least energetic of our group, and the plan was to explore the Sandstone Trail in Cheshire. A 5-mile traipse over hill and dale. Oh well, at least an opportunity to get the D3 out and explore a fresh landscape. One problem though, I would need to take a selection of lenses and all of my current bags are shoulder bags. Not the best idea for a major 5-mile trek! Never mind, we were going into Chester for a hair cut so perhaps I could take a few moments to check out the Camera shops whilst Helen was having her hair coloured. I had planned to go into Jessops, but in the final event I happened across the London Camera Exchange in Bridge Street Chester. The staff were very helpful, and a couple buying Canon kit were keen to reassure that the Tamrac Expedition 6x Photo/Laptop Backpack would serve well enough. So the purchase was made.
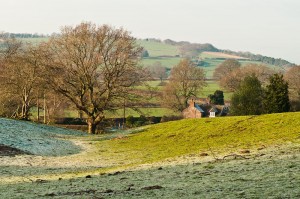 Starting Out…
So off we went, starting at the Candle Factory, Tattenhall, and made our way up hill on one of the circular walks. The Expedition 6 had everything I could possibly need, and was very comfortable in use, despite being quite heavy with everything in. The bag comfortably holds a Pro-DSLR with 3 Pro Lenses and there is still space for filters, a flash and sundry other accessories.
The Expedition 6x has a pocket for a laptop, and outside pockets for things like your mobile phone, spare batteries and cards with a nifty red card system to help you know which ones are spent and which ones are fresh. There is a third ‘pocket’ at the base of the sack which you can use to support your tripod legs if you have a tripod strapped to the back of the sack.
Finally there are the Strap Accessory System attachment slots in the sack chest straps, and the Modular Accessory System attachment slots on the sides of the sack. The modular accessories are purchased separately (for instance from Premier Ink and Photographic), and include things like a water-bottle with holder, various lens cases, flash cases, rain covers and belts. All in all the sack was comfortable in use, though as with anything like this, when fully loaded you have to be reasonably fit to avoid aches and pains the next day!! Helen says more walks for me, 10 miles next time – oh dear!!
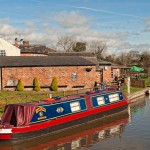
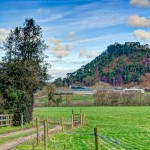
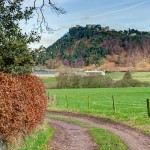
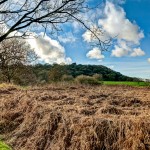
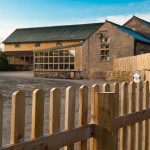
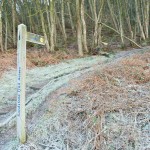
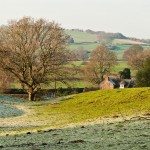
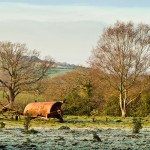
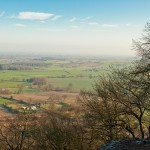
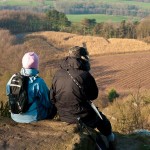
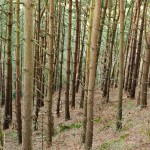
The circular route that we took presented a number of pleasing views, with various opportunities to include farm machinery, forest scenes and aerial views.



Recent Comments