
Aug
02
Kingfishers Fishing for Fish
Nature Photography Hides Diving Workshop
Nature Photography Hides recently hosted a diving workshop for a group of 4 intrepid souls (myself included) at their new Hide and Diving Pool setup. This is so new that it’s not publicised on the website yet, but nonetheless available, and worth the trip down to Bromsgrove in the West Midlands to see Kingfishers fishing first hand, and photograph the process in detail. The set is sited down on the river bank. In the distance is a large buff coloured fence which blurs out as a background nicely. In front of the tank is a sheltered mount for the cameras, secured by four Arca Swiss style tripod heads. The sloped roof keeps the rain off, and the height of the mounts leaves the cameras in position to shoot parallel to the water surface.

Diving Pool
The tank itself has a relatively shallow surface and a deeper centre portion in which the fish swim. This cuts down the area in to which the Kingfishers will dive (the rest is too shallow), which is important because of the limited depth of field. The cameras are fired by remote control from the hide itself which is in front of the setup visible here.
Just above the diving tank there is a perch holder, which is again positioned in order that the Kingfisher will dive into the tank facing backwards from the Hide. This way they turn in the tank and fly out either sideways along the length of the river, or towards the hide, for better looking shots. No one wants to see the Kingfisher’s backside as it flies away from the camera. In order to get sharp shots the cameras have to be set up in a very particular way, at their highest frame-rates. See ‘Camera Settings’ below for more information.
Camera Settings
To catch the Kingfishers fishing we need the birds to be in the correct place at the right time. You can’t alter the camera settings once you are in the hide, and you must try not to disturb the birds by going in and out of the hide too frequently. So we were using manual focus, having pre-focussed on the most likely diving spot.
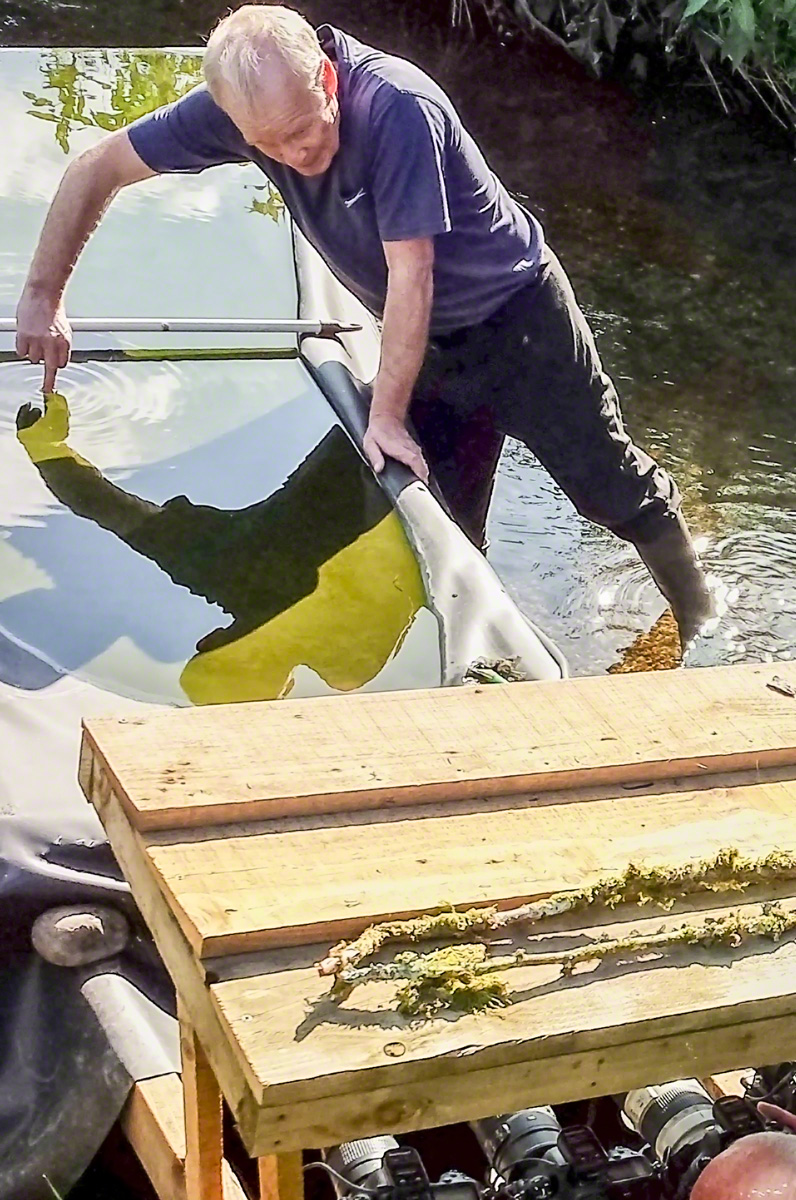
The Tricky Task of Focussing..
Our guide, Mick, was really helpful in making sure that we got everything right, and all came away with some excellent shots. Here Mick is holding a bar across the centre of the pool and using a handy finger knuckle placed mid tank for us to focus on (you can just see a head at a camera in the lower right hand corner). This is crucial because we were all using 70-200mm lenses at 200mm on full frame bodies. As you can see from the pictures, the Kingfishers were about 1.5m away, and this would mean a depth of field of about 2cm at f8 so there is no room for error and a certain amount of luck is still required.
F8 is about all you can afford in the dance between exposure value and ISO. To guarantee sharp shots you need a shutter speed of about 1/2500 of a second. We set auto ISO and aperture priority (i.e. to keep the camera set at f8) and a minimum shutter speed of 1/2500 s in the auto-ISO settings. We had great light and, with a 1 stop negative exposure compensation set to avoid blown highlights, the ISO ranged between a minimum of 720 and a maximum of 11,400 during the day. This said my keepers were evenly spread between ISO 800 and 7,200. No problem at all for the D4. You still need to take lots of shots however, because only some of them will be critically sharp and in frame. This depends partly on your timing, but mostly on where the Kingfisher dives and where he comes out again.
Participants were mostly shooting Nikon (1 D4s, 2x D4s and a Canon 5d MkIII). We were all using the Hahnel Giga T Pro II Wireless Timer Remote (by complete coincidence) and were able to set separate channels in order not to fire each other’s cameras. We were also able to help each other out because 3 of us hadn’t got much experience with the remote trigger, presumably purchasing them for this workshop! They worked flawlessly throughout the day though so they can be recommended as a reliable radio trigger.
Two Camera Setup
Having a perch, as well as a diving tank, gave the opportunity to shoot two cameras simultaneously (slightly tricky the first few times). This is made easier by the remote control, but you do have to watch that the handset doesn’t time out because it defaults to single shot when you first turn it on. This can be deceptive because you do get 3 shots if you hold the button down and, with other cameras firing at the same time, it’s easy to think that you are shooting continuously when you are not. So this is me in the hide with my D810 feeling very lucky indeed (though looking like I’ve just seen an alien)!

Selfie..
Not the best picture of myself I’ve ever taken, but I suppose given the conditions, my old Galaxy S4 did a decent enough job with it’s microscopic sensor, lens and 8 bit jpeg files. I’d probably just realised that my shutter speed was too high!
For the perch shots, given the very short distance to the perch, from the hide, it suited me to use my 300mm f2.8 with 2x teleconverter rather than my usual 600mm f4. I have been caught out once or twice recently by the 5m minimum focus distance on the 600. The 300mm Nikkor can focus down to 2.2m, which was crucial here. I must say that even with the 2x teleconverter the results are still very sharp, but you do lose 1 stop of light (f5.6) compared to f4 with the 600. This isn’t really a problem provided you keep your brain engaged!
One of the worries, with a shoot like this, is that you will miss a crucial setting on the camera. Prior to arriving at the hotel the night before, I had set both camera bodies up for the diving shots (i.e. auto-ISO and a minimum shutter speed of 1/2,500). You don’t need that kind of speed on the perch shots, unless you want to capture an in-flight arrival or departure from the perch. It’s not that there is really a problem with auto-ISO per se, but you do need to remember to tone down the minimum shutter speed, or better still (for me anyway) move to aperture priority with a fixed ISO. I prefer to use VR on the D810 with a shutter speed close to 1/500th second for the Perch Shots. This is plenty stopping power for subject movement and camera shake, providing me the sharpest results on the high-res sensor. On the D4 my VR threshold on the 600mm is 1/160th second (I prefer 1/250th second if I’m shooting with the 1.4 teleconverter) but this doesn’t give a tack sharp result on the D810 so I like to go higher. Obviously above 1/500th second you can introduce shake with the VR so you need a shutter speed to match the reciprocal focal length (1/600th s or above in this case).
The End Result
The setup above may appear Heath-Robinson, but it is just perfect for the task. Take a look!
Until next time..
Cheers,
R.
Feb
22
Kingfisher Diving Supplement
How do Kingfishers Dive for Fish?
This Kingfisher diving supplement adds to my post from yesterday A Few Days Out. I’ve examined my images from the Dumfries and Galloway shoot very carefully and I have realized something else important that I wish to share.
To recap:
- The Kingfisher eyes up the fish from the side of the tank
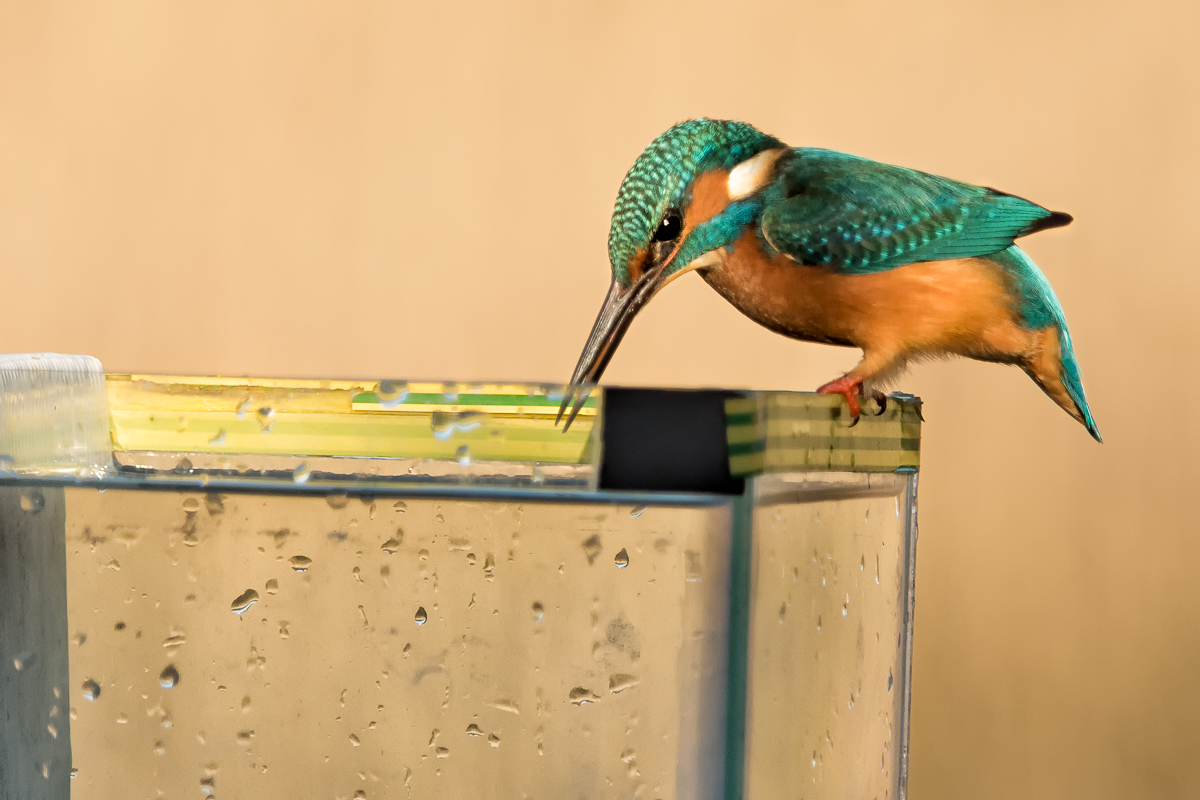
Eyeing up the Prey..
- The Kingfisher points his beak at the fish he wants several times
- Then there is an extra long stretch, and you see the bird go into the water
New Insights..
Having looked at my images very carefully, here is what happens next:
- The Kingfisher gives the extra long neck stretch then
- Flies upwards and backwards along the line of his beak keeping the fish in sight
- Then after gaining sufficient height, dives down and forwards again into the water to catch the fish
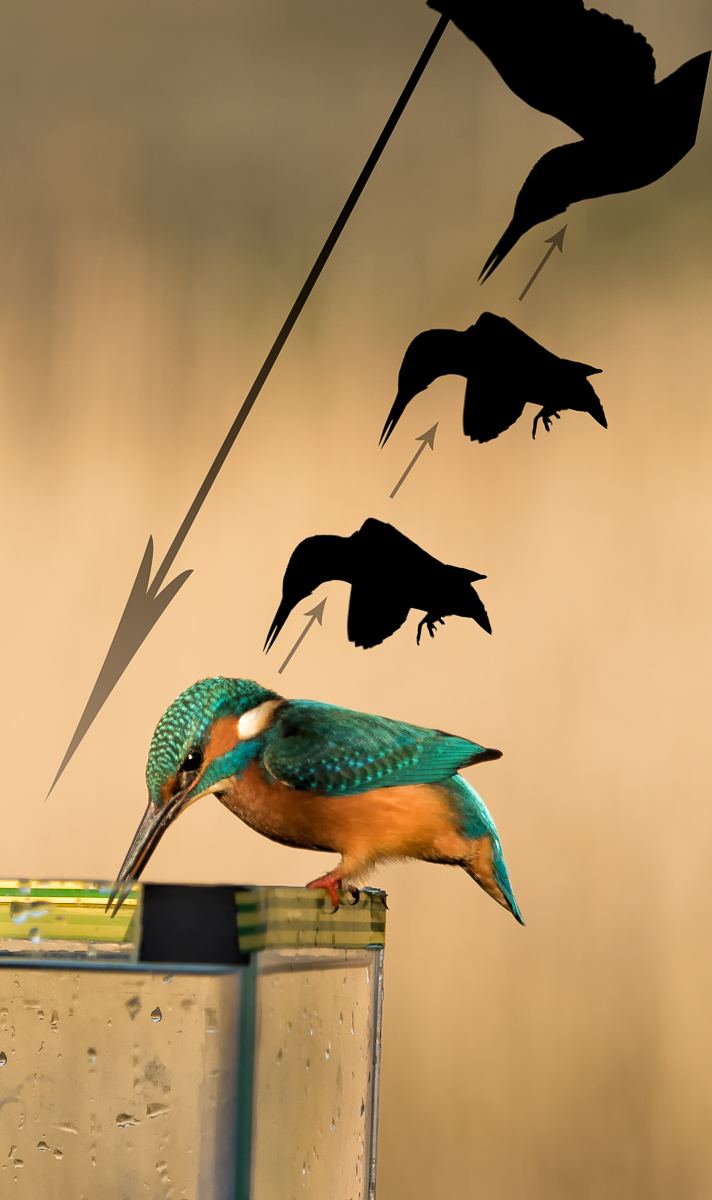
Flight Path for a Dive..
- This allows you to aim your camera along the flight-path much more accurately because you don’t have to overlap both sides of the tank just in case.
Some Action..
This is a little better than the Gif I published yesterday as it does show part of the backward flight prior to the dive. The shot 3 seconds before this sequence (not shown) has the Kingfisher looking at the fish, but before committing to dive. Fascinating stuff!!
Kingfisher Diving Sequence..
Until next time,
R.

Feb
21
A Few Days Out
Birds of Prey / Field Craft / Garden Birds / Nature / Nikon D4 / Nikon D810 Posted by Robin
/
1 comments
A Few Days Out
Setting the Scene
It’s been quite a while since I could afford the time, and the cost, of having a few days out of my local area, just for the purposes of shooting wildlife! This trip had been planned for a few months and you often have to book very early just to get places. My pal Geoff and I have often gone with Natures Images (Mark Sisson and Danny Green) in the past, and their workshops are universally fantastic! This time we booked with Nature Photography Hides (Mark Hancock) for the hides in South West Scotland. We had used Mark’s hides in Worcester to shoot Kingfisher previously (on a Nature’s Images workshop), so knew they would be of good quality. The plan was to work with the Sparrowhawk hide, the Red Squirrel reflection pool and the Buzzard Hide. Unfortunately the reflection pool was frozen so our host, Alan McFadyen, swapped us to one of his personal hides to shoot Kingfisher in order to avoid disappointment. As it happened, that was to work out very well indeed! Alan was a great host, and very personable, and the hotel we stayed in (the Selkirk Arms Hotel in Kirkcudbright) were fantastic. Great food, and they pulled out all the stops to provide early breakfast and packed lunches for our demanding schedule.
Day One
We met with Alan in the small village of Ringford at 7.15am and moved on to the hides from there. We negotiated the Buzzard hide for the first day, and made our way up a short climb, through the snow, to a hide looking out into an initially very foggy scene.
And my was it cold!! The mist cleared to reveal a really beautiful view of the valley and yes the Buzzard did arrive and sit on an awesome perch. He was there for 20 minutes and we never took a shot!! There is a serious learning point here, which is this: Having taken due note of all necessary advice, sometimes you just have to go for it! We knew that he tended to be very twitchy before eating, and would usually fly off if he detected any lens movement from the hides. We were advised to wait until he had flown to the rocks to eat the rabbit or mice on the rocks. Unfortunately he had obviously eaten before arriving and had no interest in the free meal on the rocks. He was very twitchy on the perch and we might have only got one shot before he flew off. We will never know. The main thing is that we did no harm!
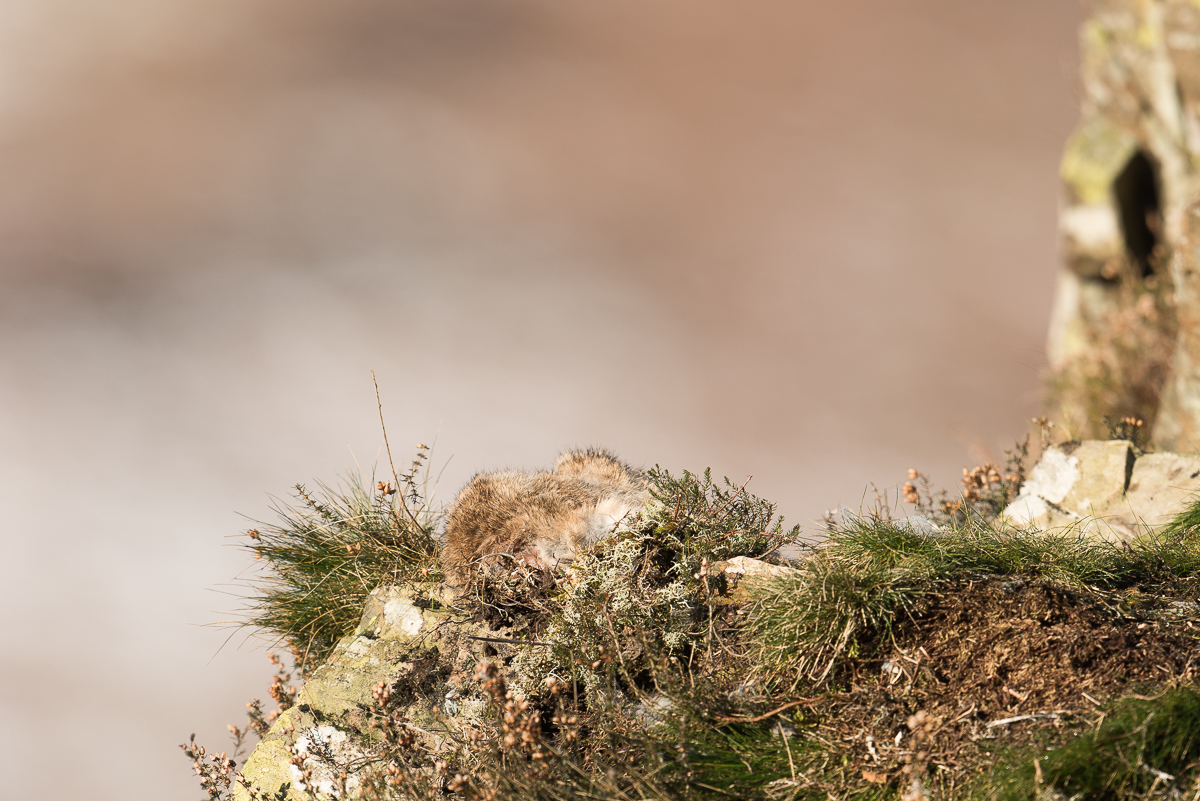
Feed on the Rocks
The Buzzard retreated to the distant tree line and seemed happy as Larry, preening and sunbathing. Just too far away for anthing other than a context shot. I would have struggled even for that were it not for the mega-resolution of the remarkable D810.
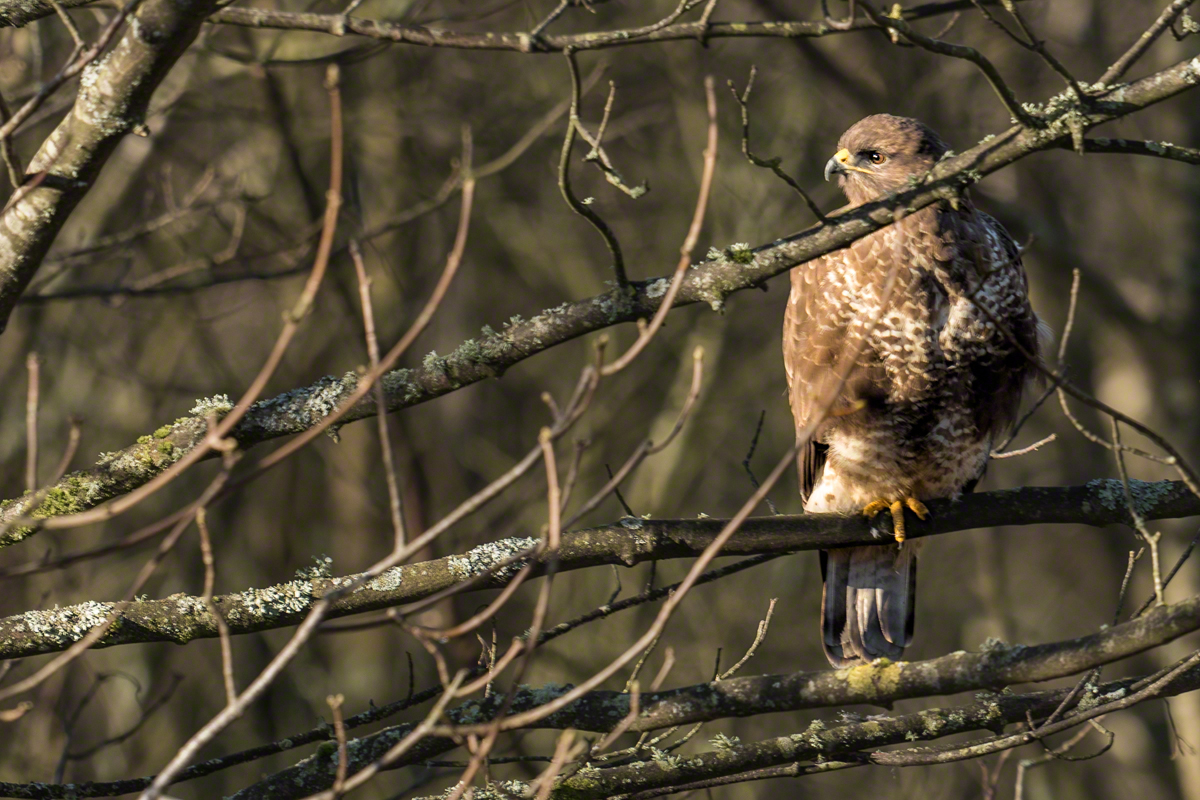
Buzzard in the Trees
Day Two
This was the bonus day of our plan for a few days out. Kingfisher diving shots. Wow! Alan has a couple of hides down in a secret location by the river estuary. One hide is actually in the river at high tide! Fortunately for us, we were in the dry hide as there is quite a large tidal surge during the day. Yet again the weather was perfect, sunshine but frosty and cold.
An Early Fright
We met Alan at the hotel and he asked what lens I’d be using. 600mm I said. He looked horrified. Haven’t you got anything smaller? 200mm is all you will need!! Fortunately I had my 70-200mm f2.8 VR2 with me, plus teleconvertors, and Geoff was using his 200-400mm f4. Drama over. I was concerned about the quality though, and whether I’d get enough background blur with this kit. As you can see by the final shots below, I needn’t have worried. Most of my shots were taken with my 1.7 teleconvertor, and if I hadn’t been shooting full frame then I wouldn’t have needed one at all. A zoom definitely helped too because I could swap from wider to narrower view depending on whether the Kingfisher was on the perch or diving into the tank.
So How does it Work?
It would take a remarkable amount of patience, luck and time to catch Kingfishers fishing in their completely natural habitat, so photographers increase their chances with a staged set that includes perches and fish tank. Et viola, now you have a place, and a 2 hour window of time, in which you can see a Kingfisher fishing. The utilitarian looking setup shown below is perfect for the job.
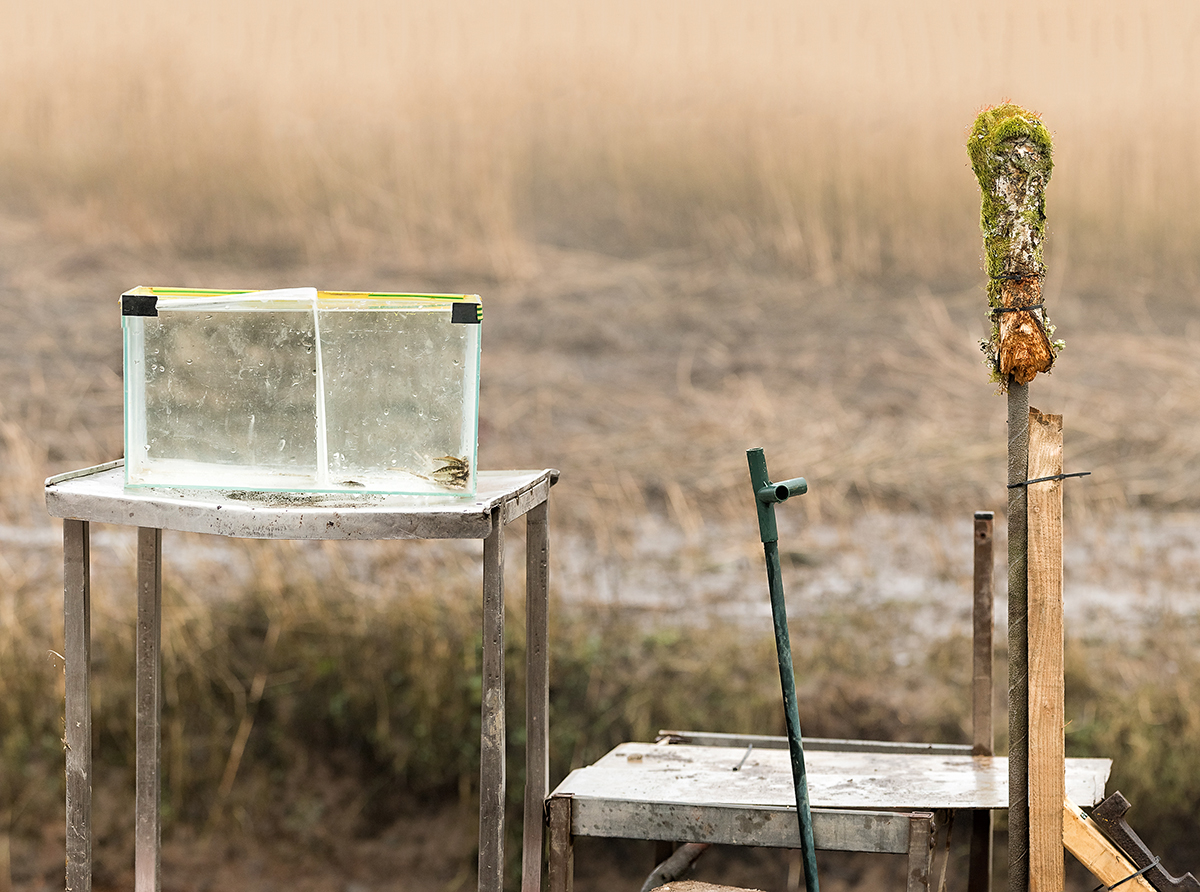
Riverbank Set for Kingfisher Fishing
As you can see, the river bank sits below and in front of the tank and perch. Beyond the tank you can see the reeds which are sufficiently far away to provide a very blurred out background when you are focused on the fish tank or perch. You can see the fish bait in the bottom corner of the tank.
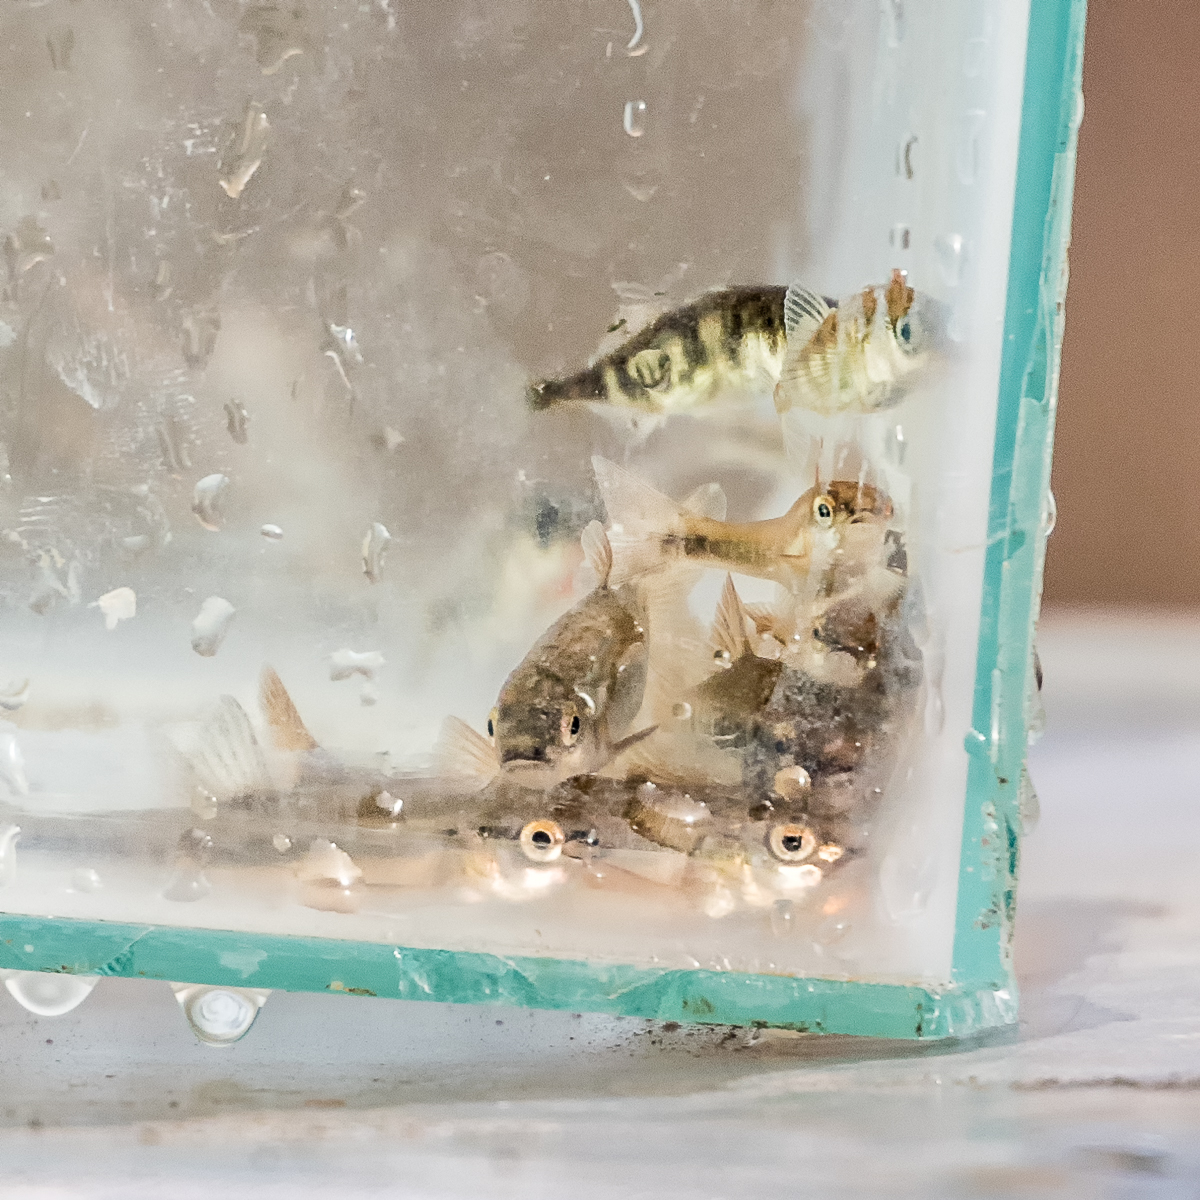
Kingfisher Bait
Taking a Shot
It took me all day to realize what I am about to tell you now. So if you want to know how to take diving Kingfisher shots, listen up!!
The Kingfishers know the deal. There are fish in that tank, and like an expensive fish restaurant, they can choose which one they want. Every two hours or so they need to feed, so along they come, as regular as clockwork. They land on the side of the tank and take a good look, they peer in, and look round, apparently sizing things up then — whoosh — with a splash they are in the tank and emerging with a fish. At least that’s what it looks like. But actually, that’s not what just happened, not even close!
To take an effective image of a diving or hovering Kingfisher you need a few things in place:
- An exposure of 1/2000 second or faster to freeze the motion
- To test the exposure in advance to ensure that you don’t get any blown highlights, or blown colors, on the Kingfisher itself
- Pre-focus on the mid point of the tank
- Your fastest frames per second set in camera
- A wide-enough field of view to capture the action
1/2000 Second Exposure
This can be a bit of an ask at the beginning and end of the day. Depending on your maximum aperture, your ISO might have to go way up. Let’s consider some scenarios. I was shooting a full frame Nikon D810 with my 70-200mm f2.8 zoom Nikkor. I ended up using my 1.7x teleconvertor which gave me sufficient reach for a reasonable crop on the perch shots, and a wide enough crop on the tank. This gave me an aperture of f4.8 which at the start of the day meant an ISO of 2500, 1/2500 second and a reach of 340mm. Had I been shooting cropped sensor then I would have had an effective reach of 300mm at f2.8 and an ISO of 1000 with 1/2500 shutter speed would suffice. Either scenario means minimal depth of field so precise focusing is essential.
I had my D4 available, and, despite the phenomenal dynamic range of the D810 sensor at low ISO, the D4 beats it from ISO 400 upwards. Did this matter? Actually, no it didn’t. What you need to remember is that at dawn, and dusk, the light becomes flatter and much less contrasty so dynamic range is less of an issue than noise is. Interestingly, despite the poor reputation of the D810 for noise at high ISO, it is still 2 years newer than the D4 and the difference is less than I might have expected (for noise).
Check Exposure
This is also crucial. The Kingfisher has very bright and iridescent colors that are very easy to blow out. This is one of those circumstances where you really need to use your 4-channel histogram display (RGB, R, G and B) to check than none of the channels are blown. You have a couple of choices here. Take a few shots to ascertain the best exposure value and then switch to manual mode. The down-side of this is that you will have to check the light levels during the day and adjust accordingly. This can be especially problematic if the sun is in and out behind clouds. Alternatively you can shoot aperture priority with negative exposure compensation. This is what I did in fact, using -0.7 ev exposure compensation. Again there is a caveat, which is that if the light becomes very contrasty (eg. in bright sunshine) you might need to increase the exposure compensation. If the light is very flat though you may have to reduce it, or even use positive exposure compensation . There’s no substitute for experience here unfortunately.
Pre-focus and Its Implications
You know where the edges of the tank are, and you know that the Kingfisher will fly in between them. Manual focusing is arguably the best, and Alan had a suitable target for us to pre-focus on. With manual focus you help optimise your frames per second because the camera doesn’t have to waste time focusing.
Focusing Target
I didn’t use manual focus though. This was because the perch and the tank were at different distances from my shooting position in the hide. With this in mind, I used my back focus button and set my shutter to release priority. This gives you the best of both worlds. You can pre-focus on the mid-point of the tank (it just so happened that there were some glue drops on the outside of the tank in the middle of the side face which worked perfectly), and fire at will when the Kingfisher dives. Or you can auto-focus on the bird on the perch if it lands there when it emerges from the tank.
Fastest FPS and Gotcha’s
I really wanted to use my D810 which gives 5 fps at full frame 36mp. Partly because it still feels very new, and I’m getting to know what it is capable of and also because I hoped for a few images that could be printed full detail at A2. I suspected that I would use the D4 first when the light was low, and the D810 when the light was better and the contrast higher, to optimize both noise performance and dynamic range. But actually, a new priority presented itself that meant I was willing to use the D810 from the start (see below). I only used the D4 at the end of the day when the light was really terrible and I needed to get my frame rate up (or so I thought).
I have a battery pack on my D810, and at Dx crop (15mp) it can shoot 7 fps. At full frame I was only getting 3 fps at the start of the day and, what I didn’t realize until I got home was that, I had my camera set to backup the main SD card to the secondary CF card (as opposed to overflow which I normally use). There’s no doubt in my mind that this slowed down the frame rate at full size, but was less of an issue at 1.2 crop (24mp) which then gave me 6 fps which was much more satisfactory.
A Wide Enough Field of View
I mentioned above that the Kingfisher appears to go off the side of the tank directly into the water, but that this is not what actually happens. In reality, faster than the human eye can register it, the Kingfisher flies up into the air and then dives down into the water to get the fish. The problem is that you just can’t see it so you don’t realize where you need to point your camera to get the best shots. Here’s an example of the sort of issue that occurs. First frame the Kingfisher is barely in shot, next frame he’s half into the water, so at 6 fps you are nowhere close to a satisfactory shot. It’s just happening too fast.
This took 1.5 seconds, start to finish
Here I’m burst shooting for 10 consecutive frames at 6 fps. You would need to be precise to a level of approximately 1/100 of a second in your timing to get the bird central in your frame every time. So what’s the trick? Well it boils down to this. To have a fighting chance you need your camera set to its fastest frame rate, and a wide-enough angle of view to improve your chance of getting an image in frame within any particular 1/10 second.
How do you do this? My advice is shoot portrait orientation with the base of your frame about twice the width of the tank to start with. Move wider if you still are not getting anything and shorter as you get better with your timing. The more pixels you have the better, but there is a tension between your number of pixels and your frame rate, and the size of the bird in the frame and your success rate. Simple as that!
Finally, how do you know when the Kingfisher will dive? Actually this is very straightforward, but can be easy to miss. The Kingfisher points his beak towards the fish a few times first and then gives a single longer neck stretch towards the fish and flies. As soon as you see that longer neck stretch start shooting and keep going until the Kingfisher has left the scene.
Putting it all Together
In the final analysis it just takes practice, once you have your settings. In reality you only need one good shot for a day’s shooting, so try to be patient. There’s a lot of waiting around between the bursts of action, but that’s wildlife for you! Don’t forget that Kingfisher are protected and don’t try any of this without the proper supervision. Definitely never approach a Kingfisher nest in the UK with your camera!
D4 or D810?
I think that you can use either camera successfully. There is clearly a difference between 6 fps and 10 fps in terms of the number of successful frames you can catch, but you can shoot a wider area on the D810, at 24mp, thereby increasing your success rate, so in the end there is not as much difference as you might think between the two. I was forced to switch to my D4 at the very end of the day in order to minimize noise, but I would still have come away with sharp shots even if I hadn’t switched.
Final Day
And what of the challenges on the final day? We were blessed with lovely weather yet again. A backdrop including some snow and woodland, fearsome cold (of course) and the expectation of a Sparrowhawk called Mad Max. Unfortunately Max didn’t show, but lots of other cool birds did. The Woodpeckers were spectacular. Did I have any problems, well yes in the sense that I needed to use my beanbag rather than my tripod, which works well enough, but I’m less used to it. The balance point on my Nikkor 600mm is on the focus ring, a terrible design flaw in my view, meaning that when you turn the camera to portrait orientation, the focus changes if the lens isn’t lifted completely off the bean bag (easier for body builders, less so for me), so you have to refocus. The 600mm Nikkor is a full 5kg in weight, even without its camouflage kit. Also, I had not brought my extension rings.
Extension rings I hear you ask. Are you crazy? You shouldn’t be shooting macro with a 600 you fool!! No, quite so. Here’s the thing. Some of the perches were set up for shooting with a 70-200mm or 70-300mm lens and they were just too close for the 600 Nikkor which has a minimum focus distance of 5m (autofocus), 4.8m (manual focus). You can bring this forwards (at the possible expense of infinity focus) by using an extension ring! Old-school, but useful..
And for the portrait shots..
Don’t forget that you can follow me on twitter or G+, but for now, until next time..
R.

Nov
02
Rediscovering My Photography
B&W / Birds of Prey / Cameras / Landscapes / Macro / Motorcycling / Nature / Nikon Cameras / Nikon D3 / Nikon D300 / Nikon D4 / Nikon D810 / Photography Posted by Robin
/
0 comments
Rediscovering My Photography
My Journey Back, This Year in Pictures..
Background
I’m sure that I am the same as every other working individual. Work-life, home-life and chores expand to fill all available time — that’s Robin’s Law, one of many! The balance of these three may change from time to time, but essentially, hobbies are squeezed into any free time that you are not too tired to use. Over the past 12 months I’ve been focused on my cycling, as this has been making me feel better emotionally, and physically, but whilst doing so I’ve had a nagging feeling that something else is missing. I’ve known that it is my photography well enough. I’ve been thinking that I may as well dispose of my cameras, and other studio equipment, because they represent a large investment and I’m not using them. Fortunately I have managed to resist the urge, and in an effort to re-balance things, have started making time to take a few images again.
Recession and the Cost of Living
In reality my retreat from picture taking has been multi-factorial. I have read a lot of recommendations along the following lines: “Take loads of pictures, it doesn’t cost you anything to experiment with digital photography”. In one way this is true, well almost, it doesn’t cost very much to press the shutter button. The only real costs, once you have purchased the machinery, are for electricity to charge the batteries. Beyond this though, if you want to keep your photos safely, you need storage space in the form of multiple hard drives (or DVD’s if you have the patience to record them), and these do cost money. If you want people to enjoy your work you may also choose to purchase a website with it’s own attendant charges etc. There may be other expenses too, after all, there are only so many photographs you can find in your garden or front room. There comes a time when you have to invest in some form of subject-seeking. This can take many forms from the full-octane photography holiday, through to purchasing multi-colored knickknacks from a stationers for your macro photography. For some of us, the true joy of photography lies in the execution of a fabulous print. These also cost money, especially the A3 and A2 ones, and if times are hard, and you can’t afford the ink and paper for your printer, some of the joy of photography is leached away. The improvement in the UK economy has therefore also been one factor in my rediscovering my photography again.
With all this in mind, I took a day out to replenish my soul with one of my favorite subjects, a variety of birds of prey on an organized shoot at a falconry center. Some out-doors in natural settings, and others in the studio. Easy-peasy..
Gauntlet Birds of Prey, Eagle and Vulture Park
If you would like to visit the Gauntlet birds of prey, eagle and vulture park I can strongly recommend it. The vulture collection is a particular treat. In addition to photography workshops they have flying displays at 12.30 pm and 3.00 pm, Vulture feeding at 12.00 pm and a meet and greet at 2.00 pm as well as other attractions.
A Photo-Walk Around Chester
Invigorated by shooting wildlife again, albeit in captivity, I next tackled a photo-walk around Chester. Not a brilliant day, in fact quite dull, so I had to keep my wits about me. Black and white to the rescue..
A Visit to Oxford
In our only city-break this year, we went down to Oxford to see Ceri, the daughter of some friends of ours, as she started her final exams. The weather was not kind to us, unfortunately, so we had plenty of time to look around the shops, and drink the occasional cup of tea and coffee.
A Visit Thurstaston
The next step in my rehabilitation occurred during a drive out to Thurstaston with my daughter. The plan was to find some coastline, and take a few pictures along the way. As good fortune was to have it, the North Wales Hang Gliding and Paragliding Club were flying, and we got a few shots of them, plus the visitor center had a photography exhibition and a public hide with views out onto some well stocked bird feeders. Heaven!
The Journey Continues
Sadly, these trips were still not quite enough, on their own, to get me taking pictures regularly again. Have you had the experience of wanting something all the more, when you knew you couldn’t have it? Well, my D300 broke! I hadn’t been abusing it, I’d just been updating the firmware to include compatibility with the 800mm f5.6 Nikkor extreme telephoto (it’s not like I will ever own one, but I like to be up to date), when to my astonishment, it just stopped working. In all honesty I hardly ever use the D300. It’s old technology now, but it is my backup camera and I do like to use it for macro shooting extreme close-ups with an old 300mm zoom and a 50mm reversed onto the end. And now, suddenly, I couldn’t. Should I buy a new camera? Probably not worth it if I’m not using my cameras much, but should I get the D300 repaired? Well probably, yes, was the conclusion I came to, if a camera that old can even be repaired? Well it turns out that it could. Nikon UK have a fabulous online system for repairs. You can say how much you would be prepared to pay without seeking permission to proceed, and even get the free postage label printed out from the website. They prepare an estimate and you say whether you want to go ahead or not and that is pretty much that.
Needless to say, once the D300 was returned to me in good working order, I couldn’t resist using it for some macro shots, and generally loving it and reminding myself of all its settings. Sad I know.. In fact, the challenge was as much to produce some good looking and clean shots with it as I could. I’d forgotten how noisy and textured D300 images could look. Sensor technology, and the supporting electronics behind them, are so much better now than even 5 years ago! Here’s how I got on:
Oulton Park Track Day
By this point I’m fully engaged with the drama and creativity, seeking new photographic experiences and subjects again. I’ve said before on this blog that, for me, it is more about the photography than the subject. Novelty and complexity are always the way for me. I’ve never shot cars or bikes on a track before, so this would be a great entrée. Is it difficult? Depends. If you want a straightforward shot, tack sharp, just set a monster shutter speed and shoot away. If you want a sharp bike and rider with spin-blur on the wheels done in camera, on a bend, yes that’s tricky first time out. Impossible? You be the judge!!
Hooked Again!!
The Inevitible Consequences..
And so it was, hooked again. Desperately fighting the urge to buy a new camera, but eventually succumbing to the temptation. A couple of years ago I blogged about wanting a Nikon D4 and a D800, but having to choose just one. That time it was the D4, this time the siren call of 36mp detail was too much for my battered psyche, and so to the D810..
More later,
Robin.
Dec
27
Another Image of the Week for TDI
At Printer’s Inc
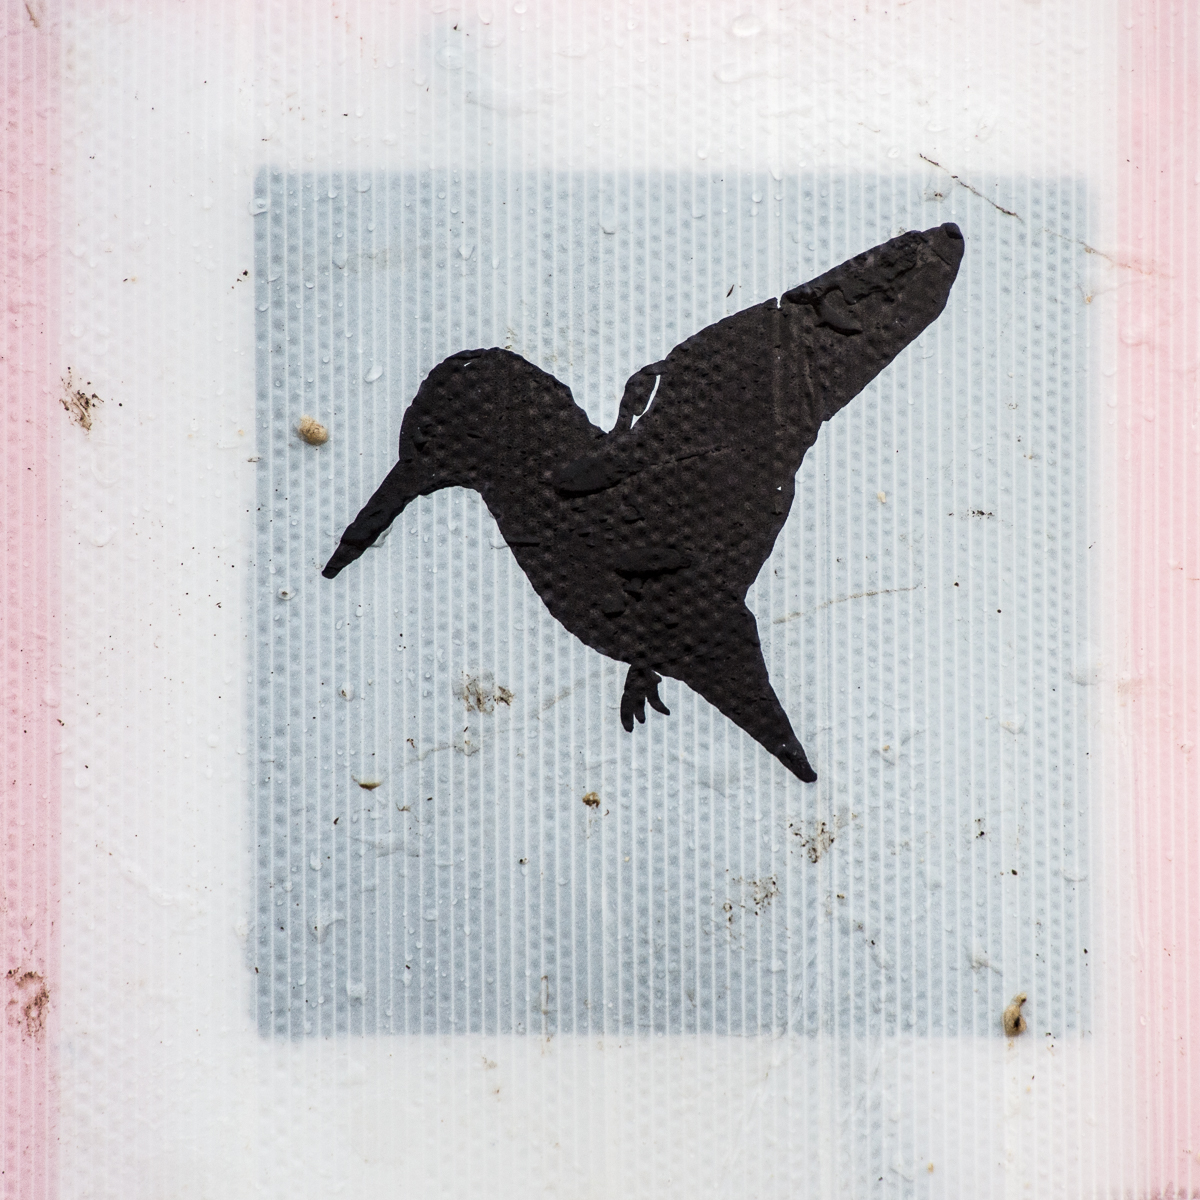
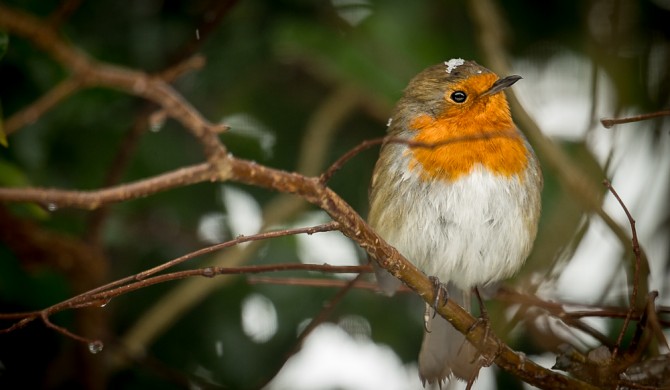
“Robin in the Snow” (above) has been featured as the Image of the Week at The Printers Inc over the Christmas week 2013. The Doctor’s Images is particularly pleased to have this slot over the festive period, not least because of the very christmassy nature of this particular photograph. This is not the first time that TDI has achieved the coveted Image of the Week slot at The Printers Inc, as an image of a Eurasian Eagle Owl was featured earlier in 2013. I didn’t have to travel too far for this one as “Robin in the Snow” was taken in my back garden. See Photographing Garden Birds in the Snow (published on 26th March) 2013 for further details of the shoot.
Robin in the Snow and the Eurasian Eagle Owl in Flight are both available to purchase from TDI and The Printer’s Inc.
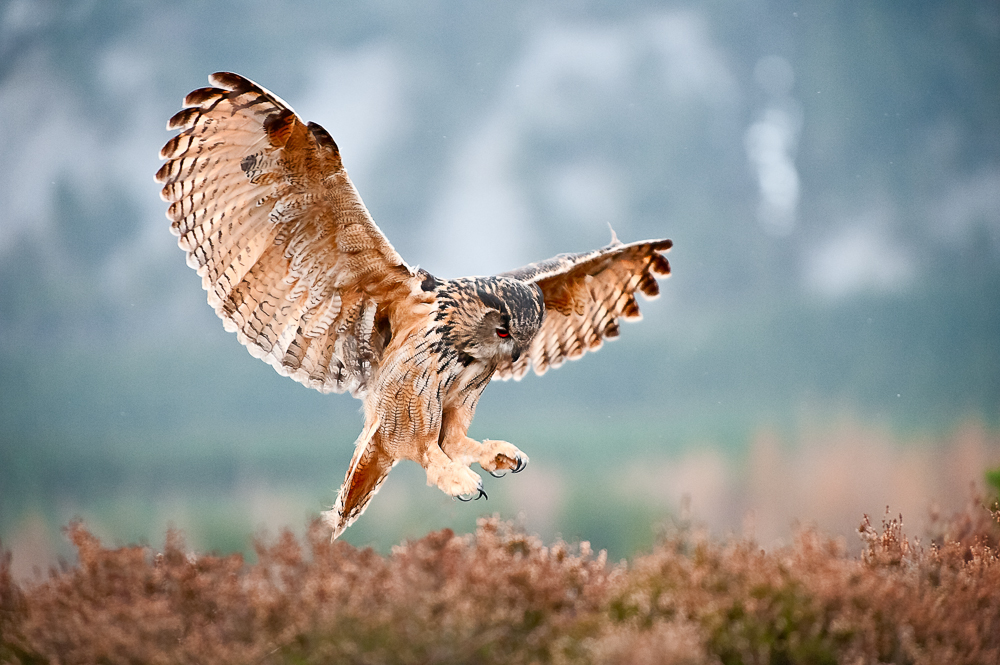
Eurasian Eagle Owl in Flight
Best wishes,
Robin.

Dec
14
Free Postage in UK until February 2014
Birds of Prey / Christmas Bargains / Nature / Photography / Sales / TDI News Posted by Robin
/
0 comments
Free Postage on UK Deliveries
TDI are pleased to announce that there will be free postage on images delivered within the UK until February 2014.
Here at TDI we have also recently reviewed our pricing policy and reduced out tariffs across the board. Check out our wide selection of wildlife and macro images, and see if there is anything you would like to hang on your own wall, or give as a gift, this Christmas. We have a range of stretched canvas, semi-gloss and premium matte prints available in sizes from A5 through to size A0 on selected images.
Prices range from £5 for an A5 Premium Matte print, through to £166 for a 40×60 inch Stretched Canvas. Canvas prints can be purchased for as little as £20, with A3 Premium Matte prints available for as little as £10.
Our prints are professionally produced by The Printers Inc.
Coming Soon…
A selection of garden bird images, including birds in snowy settings, will shortly be available to order from TDI.
Best wishes,
Robin.

Aug
03
Preserving Highlights whilst Shooting in the Midday Sun
Sandwich Terns and Gulls at Cemlyn Bay
I was recently out shooting at Cemlyn Bay and Lagoon on Isle of Anglesey. This area is famous for its Sandwich Terns and I’d popped along with a view to taking a few Tern and Gull images. The day we picked to go was bright and sunny, and we were there late morning, all of which was less than ideal. When I’m shooting wild birds in flight, I always spend a few moments working out the correct exposure, because I cannot stand reviewing my images to find blown-out highlights. Getting a good general exposure that encompasses preserving highlights, without unnecessarily under-exposing the rest of the shot (in other words shooting to the right) can be crucial to ensure a reasonable result when the birds are flying in and out of various lighting conditions.
The Aperture Priority versus Manual Exposure Shooting
Many, perhaps most, wildlife photographers shoot aperture priority and use exposure compensation. I have found that, although I have a fair idea what my D4 might think is a correct exposure, and therefore what exposure compensation I might need to dial in, in a range of circumstances, this method is completely impractical for judging exposure when photographing birds in flight. The reasons for this include:
- The relative size of the bird in the frame changes as you track it.
- The colour and brightness of the background may change.
- The lighting on the bird may change as it flies under cloud, landscape or building shadows.
- The position and brightness of the highlights on the bird may change.
All of these factors make preserving highlights particularly tricky as you need to make very complex judgements, at high speed, whilst also trying to keep the bird in the frame. You are effectively fighting the camera in this situation and there is just, for me anyway, too much to do at the same time.
Setting up for Manual Exposure Shooting
This is my process for preserving highlights. Firstly I find an area of mid-tone, usually a patch of grassy field, then with my camera set to manual exposure I zero the meter in the viewfinder and take a test shot. Clearly if the subject will be in the sunshine, your base exposure should be set using a grassy field that is also lit by sunshine. If there is no mid-tone available you could also just take test shots of your subject instead, but this will take you longer.
The chances are that, if shooting a white gull for instance, even having taken a good base reading, there will still be some blown highlights if the bird is in the bright sunshine. This being the case, I adjust my shutter speed (upwards) or ISO (downwards) until they are gone. Usually, with my bird photography, I will be using my 600mm at f4 and looking for at least 1000th, preferably 1600th-2000th, second to freeze the wing tips.
In and Out of Sunshine
In the situation where there is a major shadow in the overall scene, and the birds are moving in and out of that shadow, you can take additional test shots to establish the exposure for that too. Again, according to circumstances, you might use a decrease in shutter speed or, more likely, an increase in ISO. Once you have established the settings for the shaded area it is easier, using the in-viewfinder information, to alter the exposure by the exact amount needed during actual shooting. Equally, if you were shooting at f8 in the sunshine for example, you could open up the aperture instead using the same method, though this will change your depth of field.
Shooting in Overcast Weather
Preserving highlights in overcast weather may be more straightforward in the softer light. Nevertheless when shooting in overcast weather, it is still sometimes the case that you take a base exposure and still get a small amount of apparent highlight clipping. If you have been shooting raw files this is easily retrieved in post production. It is up to you whether you take this chance or not, but my advice would be that, in this situation, you don’t delete any shots because of the blinkies as they may well be salvageable. For myself, I would still try and find an exposure to preserve the highlights if possible.
Cemlyn Bay Shoot

Apr
08
Photographing Roses
Focus Stacking / Macro / Nature / Photography / Photoshop / Studio Flash Posted by Robin
/
0 comments
A Rose by Any Other Name
I hadn’t started out to do a studio flash session photographing roses, but on thinking about what background colour would suit a white and pink rose, I realized that it had to be bright white and not grey, so the available window light session that I had planned quickly turned into something else entirely.
Photographing Roses Against a White Background
 Photographing roses against a white background requires the same technique as for photographing a portrait, or anything else, against a white background. The background has to blown-out, but only just blown out, in order to avoid too much flare and contrast reduction from the resultant backlight. People sometimes talk about getting the background about 2-stops hotter than the foreground, which is another way to go, but I treat the background (which, by the way, needn’t itself be white!) like I would treat a snow scene. I will take a couple of shots with just the background lit, and increase the exposure, from metered, up a couple of stops or so, until it is just blown out. I will then turn the back-lights off and use the main light to get an exposure for the subject. For this shoot, I used 3 x SB900 strobes. 2 for the background, either side at 45 degrees, and one in a Lastolite Joe McNally Ezybox Hotshoe for the main light. I prefer to shoot manual as much as possible these days, so the Camera was set to 1/200 second at f11, ISO 200. The lens was a 105 mm Micro Nikkor on a D3, and I used 2 layers of diffusion in the softbox. All 3 flashes were set on manual, and the amount adjusted for correct exposure. I like this setup because nothing changes (except perhaps the ambient light), so all your shots are perfectly exposed and provided your strobes aren’t maxed out (1/1) you can take a small burst of shots if you need to, for instance with a moving subject.
Focus Stacking
 Photographing roses with a macro lens, close up, can lead you into problems with depth of field. This is often livable with, particularly if your shot includes quite a bit of stem and you are further back, but close-in you will have to make a decision about where to focus. I had just been reminded of the possibility of using focus-stacking in an article in Am Phog (Saturday 6th April 2013, Martin Evening’s Retouchers’ Guide), so thought I would give it a go here. By the way, Martin Evening’s books, ‘Adobe Photoshop for Photographers’, ‘The Ultimate Workshop’ and ‘Photoshop Lightroom’ are all very useful tomes if you get a chance to read them.
Focus stacking is often used in macro photography, especially for extreme close-ups of things like small insects. It is often not straightforward, however, and there are several gotcha’s to be aware of. It is best to use an uncluttered plain background because as the lens elements move, the relationship of the subject to the background can change, making the blend between layers harder to do manually (or trick the software and end up with a small areas of blur that really stand out). Having a lens that focusses internally helps (but doesn’t avoid the problem completely), and sometimes you get a better result by using something like a Manfrotto 454 Micro Positioning Plate. What this does is allows you to slide the camera and lens combination backwards and forwards by very small amounts using a thumb-screw. This can be much easier for small focus adjustments when you are very close in and the depth-of-field is only a millimeter or so, where the lens’s own focus ring gives too course an adjustment.

 For good focus stacking it is said to be best to use an aperture that represents the sharpest focus of the lens, which on my 105 is f8 or f11), in order to avoid diffraction effects. There are several good focus stacking software programs available, but I use Photoshop because I don’t do this very often and a bespoke software solution has not seemed warranted. The process is quite straightforward. Take a series of photographs (in this case of your roses) starting at the foremost focus point, working through to the rearmost focus point. Select the files in Bridge or Lightroom, then using the tools menu choose Photoshop –> Load Files into Photoshop Layers, or in Lightroom, right-click on the selected files and go to Edit In –> Open in Layers in Photoshop… Once the files are in a single Photoshop document. Select the layers and go to the Edit menu and choose ‘Auto Align Layers…’ using the Auto Projection method.
 The next step is to merge the layered images together. Go to the Edit menu and select ‘Auto-Blend layers’ making sure that the Stack Images button is set and the Seamless Tones and Colours also checked. From then on it’s just a matter of clicking Ok and waiting a while. As I have mentioned, you may not get perfect results and, for this reason, you may want to manually select appropriate images, stack them, and blend them manually yourself. This is not for the feint-hearted, but does give you a great-deal of control over the final result and this is what I did here. I suspect, but have not checked out myself, that it makes a difference to Photoshop that the images are in depth-of-focus stacking order, rather than in a random order. Sometimes you get a really excellent result, other times less so. At the point of capture it is not always clear which bits of an image are at which depth, so you can end up going backwards and forwards a bit.
Until next time,
R.

Mar
26
Photographing Garden Birds in the Snow
This weekend was a busy weekend with several major commitments. I have to edit our local Parish News magazine and my daughter has a choir performance. Then there is the snow! What a fantastic opportunity to get some interesting new shots of the garden birds in a snowy setting. But here’s the rub, I’ve got so little time and the weather will probably be gone in time for my return to work. Photographing garden birds in the snow is tough but here is a tip. Shooting from the house can pay dividends and may impact on quality less than you think. It certainly allows you to keep dry and warm.
Does Shooting Through Double Glazing Have to Ruin your Images?
Shooting through your double glazed domestic window does present certain problems. It helps if they are reasonably clean, and you will have to accept a small loss of contrast and sharpness as a result of adding an extra barrier between yourself and your subject, but these effects may be less than you think if you take steps to make sure that contrast is not further reduced by shooting through reflections in the window before you. I have also found that, I suppose intuitively this would be true, that the sharper the lens I am using the better the result through the window.
Reducing Reflections

Room Setup
The traditional approach, for instance at a zoo, is to get your lens as close to the window as possible, to eliminate any light hitting the surface in front of the lens. This is pretty much your only recourse if you are shooting from outside in, but shooting from inside out increases your options. Clearly, you don’t want to have your lens touching the window when shooting garden birds for a couple of reasons. Firstly you will be presenting a man like image close to your subject that will frighten them and secondly you won’t be able to adjust position when your subject moves.

The Garden Outside
For my shots I discovered that I couldn’t focus on the nearest perch (my beloved antlers – thank you Jo!!) as it was too close (there is a way round this, see later) to the window anyway, so I needed to retreat into the room, way back from the window. I still had a good view, but there was more glass in front of me to reflect objects in the room. This had the added advantage of reducing my presence in the window. In fact, hiding behind my camera and the piano at the window (see production shot above) meant that I had frequent visitors to the perches. There were some reflections from objects in the room (my daughter’s playroom), but these were quite easily countered by turning off the lights in the room.
Our house has glass doors to capitalize on borrowed light, so I was getting an annoying reflection from the front door which also has glass panelling. Drawing the curtains over the front door removed these completely. In a way, you want your windows to be reflecting black, so another tip is cover up any highlights in the room you are shooting in with black sheets, either of paper, or perhaps a black panel reflector or two if you have them lying around. The ideal scenario would be a black painted room with no contents, though this is unlikely to find favour with the spouse or partner.
Finally it is best if the window that you are shooting through doesn’t have direct sunlight shining onto it as this reduces your chances of getting the light levels in your room down to a reasonable level, and causes reflections and flare on the window itself. It’s not so easy to fit a lens hood to a window frame!!
The Setup
For photographing garden birds in the snow I used the following setup. I had my D4 on a Gitzo Carbon Fibre Tripod (though any would have done), with a Wimberley Gimbal head Mk II, and a 600mm f4 Nikkor lens, though I could have used something like a 70-200mm f2.8 with a 2x teleconvertor. This would have had the advantage of a close focus point so I wouldn’t have had to be so far back in the room. On the question of how to make the 600mm nearest focus point closer to the front of the lens, the solution is simply to add an extension ring between the lens and the camera body. You will lose a small amount of light, and you may lose infinity focus, but this doesn’t really matter in a situation like this where nothing is too far away.
Gallery
Cheers,
R.
Mar
09
Shooting Garden Birds
Field Craft / Garden Birds / Nature / Photography / Photoshop / Slideshow Posted by Robin
/
0 comments
Frosty Mornings are so Cold

The Hide and Feeders
On a frosty Sunday morning in March (the 3rd 2013 to be precise) I had the urge to pop up my hide and go shooting garden birds. We do have feeders in our garden, to which we have a steady stream of Goldfinch visiting along with a variety of Tits (Blue, Great and this month Long-Tailed), but I had shot these before and was keen to try a different position in the garden. Our garden is L-shaped so there are a few different angles from which to shoot, and I have not yet tried them all. So the day before I visited one of our local garden centres and purchased some fresh feeders on sticks and placed them round the corner so as not to disturb the current visitors to our existing feeders. This turned out to be a very helpful strategy for reasons I did not yet fully appreciate. I did not particularly want to shoot Goldfinch, but rather a selection of other garden birds, but I expected them to make an appearance (ie the Goldfinch) round the corner if I put out more Niger seeds. You can probably see the three feeders on the right hand side, beyond the hide in the picture above. The feeders are stocked with, from left to right, high energy bird feed, peanuts and Niger seeds. You may also be able to see, by zooming in, that there are 3 perches attached to the poles underneath the feeders. Obviously the plan is to have the birds land on the organic looking perches for some of the shots. I can’t stand birds on feeder shots actually – but nevertheless everyone takes a few whilst your waiting for better shots on the perches – unless you are exceptionally disciplined.

A Gnarly Perch
Here is a close-up of one of the gnarly sticks used as a perch for shooting garden birds. Usually you need about 10m or so beyond the focus point in order to blur the background. For this reason, I positioned the perches so that, by shooting from the hide level, I would be taking in a background beyond the fence (mostly). It was a dull and overcast day, so the background was either distant tree foliage or dull sky. As it happened, towards midday the sun came out and I was treated to lovely blue skies as well. The day was bitter cold, so I set up with plenty of layers and my trusty flask of coffee in the hide and waited, and waited some more. The joy of shooting overcomes the feeling cold, but I was shivering for hours afterwards. Make sure you eat regularly to keep the cold out.
Happily there started to arrive a series to blue and great tits, mostly to the high energy feeder and the peanuts. Sadly, not one alighted on my special perches. Actually there is a bit to know about perch diameter. It is essential that the perches are not too wide as this hurts the bird’s foot musculature and they don’t stay on them very long. Moose Peterson says that being uncomfortable in this way also affects the bird’s eyes in an unhelpful way. So titrate the diameter of your perch to the size of your intended bird’s feet!! I wasn’t sure what to do. Was it just a matter of waiting (a very long time, as opposed to just a long one) or was there something that I could do to improve my odds?
Field Craft for Shooting Garden Birds
So here’s what I did. I took down the peanut feeder. It was getting a lot of traffic, but not so much the Niger seeds, and actually the peanut feeder had the least visually appealing perch. I also put an assortment of peanuts, meal worm and high energy feed on the top of the fence in the distance to see if I could encourage some birds onto that. Et Viola, a Great Tit landed on my gnarly perch. Boom he was gone. It was so unexpected I wasn’t ready and missed the shot. And then, something even more unexpected. Siskin. And at least 3 males. All loving the Niger seeds, greedily feeding on the built-in perches for minutes on end. Bright yellow and gorgeous. Visiting only from mid-March to mid-May, and completely unnoticed in the garden so far. Still no gnarly stick action though. But in-between plenty of birds on the fence in the distance, and still within reach of the 840mm combination of Nikkor 600mm plus 1.4x teleconvertor. These interventions did make a difference to my hit-rate on the organic perches, but even so these shots were few and far between. I could have put suet on the back of the thicker sticks, but I am loath to do this in case it shows up in the photograph.

Close-up of the Hide
So, what about the Hide? The hide is an F1 Fold Out Hide from Wildlife Watching Supplies. This is a cube shaped hunting style Hide with a built-in metal frame. It folds down to a small case that has two straps for easy carrying by hand, or on your shoulder, or back. It comes with pegs and guy ropes (although you usually don’t need to use the guy ropes). For shooting garden birds it really is very easy to put up, but if you are on your own it is necessary to peg the base out in order to pull up the roof frame. The hide is very well made and has viewing “windows” at the front and at the sides in addition to the rear. Each window has a cover attached by toggles (like an old duffel coat) and velcro’d on scrim netting. The inside is matt black coloured so provided you are wearing dull coloured clothes the animals don’t know that you are there. Clearly from this photograph you can see that the Hide cannot be said to be inconspicuous in my back garden, yet I am constantly amazed at how close birds, squirrels etc will approach. Sometimes too close for the 600mm to focus on!! I purchased my Hide with a handy portable chair (the C25 Fold-Out Chair). It has a handy shoulder strap, and a fabric pocket beneath the seat. The only down side is that there is no ground sheet, though I haven’t really found that one is essential.
The Photography
There was quite a range of lighting between the various places that the birds were landing so, at least until the sun came out, I was forced to select a pretty high ISO to keep the shutter speeds up to a reasonable level. I find that I can reliably shoot at a 160th with the 840mm set up on a tripod with gimbal head, and can get away with a 125th of a second on a good day. This meant sometimes rising to ISO 2500. When shooting garden birds that are fast-moving, I find it difficult to change the ISO at a moment’s notice, so this is something I tend to do in-between shots. I live in hope that practise will eventually make perfect for this issue. It’s certainly easier to change ISO with your eye to the viewfinder on the professional bodies like the D4. It’s strange, but I can adjust aperture and exposure compensation whilst juggling back focus and firing but really struggle with the left hand adjustment of ISO, which means I slightly lose control of the camera bracing and positioning is critical for rapid shooting within frame. But setting a high ISO in advance does let me increase depth of field for the brighter perches by stopping down, which I can do very quickly. Once the sun came out I was able to get down to ISO 200 for some of the shots again. Usually I shoot wide open at f4 or f5.6 with the 1.4x teleconvertor, but I have found it beneficial to stop down to f8 or f11 respectively to get slightly more feather and beak in focus, particularly when the bird is face-on.
The Photoshop
There isn’t a great deal to say about this. The images were prepared in Lightroom 4 and finished in CS6. All that was required was some mid-tone contrast adjustment via the ever amazing Color Efex Pro 4, and some sharpening using my usual sharpening actions in a 3-pass routine with additional local creative sharpening where required and sharpening for screen to finish. I must discuss sharpening as an issue in-depth some time.
Glad to be back in the warm,
Until next time,
Robin.
Recent Comments