26
Context
I’ve seen a lot of fantastic drop collision photographs recently, both on the net and in magazines. It seems clear that there are at least two levels of water drop photography, the random ‘hit and hope’ style of droplet photography (without the collisions) and the more engineered droplet collision photographs made with the assistance of some complicated electronic hydraulic systems. Markus Reugals is perhaps the grand father of the more technical approach, and another fine water drop artist is Corrie White.
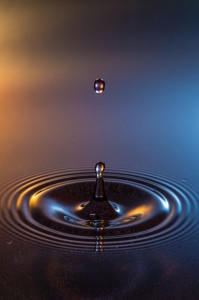
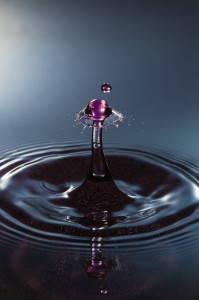
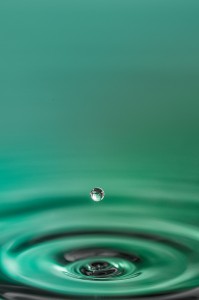
Having read a little about water drop photography, I decided to have a go at the hit and hope style which is much less technically demanding but more reliant on good timing and good luck. A little research indicated that I didn’t need too much equipment and if I was prepared to be patient I could still get some good results. All I needed was a plastic bag, some water, a drip tray, a small strobe, camera and tripod and I would be good to go. If I could throw in a coloured background in addition then the world was my oyster. The set-up would prove to be a little Heath-Robinson, but nonetheless effective for that. I knew that those nicknacks would come in helpful at some point, and if I was to consider purchasing some mechanical drop making machinary, I at least needed to know what other technical issues might arise.
Practicalities
Here’s how I went about it.
- Firstly I set up a turkey basting tray on the surface in the kitchen.
- Next I filled this with water and suspended a resealable sandwich bag filled with tap water about 35cm above.
- I placed a pin hole in one of the sandwich bag corners, and let it drip into the basting tray at a steady rate.
- Next I set up my flash heads. You need these to be very close to the water-drops to get good exposure because you want to use the lowest possible manual flash setting that your guns will provide. I used 3 Nikon SB900s on a Joe McNally Lastolite TriFlash, set to 1/128 power, though I could have got good results with just one flash head, albeit at a higher ISO. This gives me approximately 1/38500 of a second.
- Then I set an A2 sheet of coloured cardboard against the wall behind the tray and aimed the flashes towards it. In this way the droplets were both side and backlit both by direct flash and a coloured wash of light from behind. Ideally you would shoot through an opaque perspex to both soften and spread the light. Coloured gels can then be used to create interesting colour wash in the background and on the water surface.
- Finally I set up my D4 on a tripod with a 105mm Micro NikKor and focussed on the drops as they hit the water. To get better accuracy I placed a sharp knife blade in the exact position of the falling water droplets and focussed on that. You need to attach a remote release, and depending on the camera body and system you are using you may use the built-in light control or perhaps radio triggers. In this instance I used Flex tt5 radio triggers as the D4 does not have a built-in commander flash. Alternatively I could have used a separate flash gun to provide the remote control.
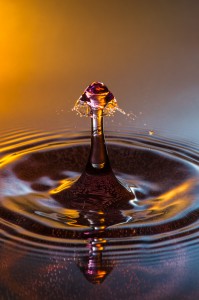
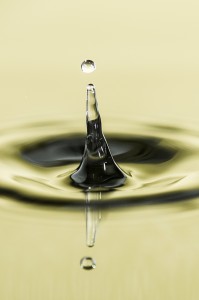
Then all you have to do to start your water drop photography is watch the drips fall, and fire a few test shots to get the correct exposure. Obviously you need to obliterate the ambient light with the combination of shutter and aperture (I was using 1/250th second and f11) in order to avoid any ghosting. Watch out for your highlights. There is a tension between too much specular highlight and detail in the drops and the general brightness of the pool. After an initial trial I found that I was having to shoot downwards at too steep an angle. To counter this I needed to shoot from further back so I hooked up my 2x teleconvertor to the 105mm and this gave an effective focal length of 210mm and a greater distance from the droplet.There is a further issue with the positioning of the water droplets. I found it more convenient to have drops fall towards the front of the drip tray in order to have the frame filled to the top by the pool in the background. Otherwise the edge of the tray might be visible. I wasn’t brave enough to shoot into a pool with a meniscus!! Secondly there is considerable variation in the exact landing spot of the drops wich can easily vary by 5mm or more front to back, making critical focus a bit of a lottery. The higher the water in the tray, the flatter you are able to keep your lens. There needs to be some angle to ensure that the background does not include the edge of the tray (unless you have a 6 foot drip tray that is). Nevertheless the variation in focus drop to drop is countered by taking a lot of shots. Once you get your eye in, you can improve your success rate substantially. I did end up taking 765 shots in all, but there was quite a lot of experimentation to get my final set up.
Photoshop Embellishments…
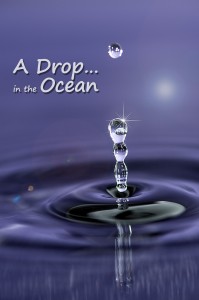
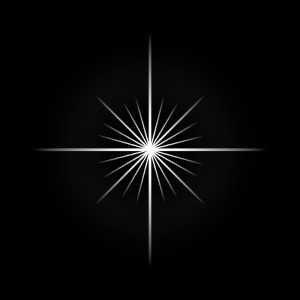
As lovely as this image was fresh out of the camera, it was crying out for that something extra to really make it pop. Looking carefully at the top of the splash column I could see that there was a specular flare highlight at the top. If I had used f16 or f22 this might have been substantial enough on its own, but in this instance it required a helping hand.I have used a few techniques here. First of all I created a starburst in Photoshop (white on a black background), and then I sized and placed it into position on a separate layer. Change the blend mode to screen to drop the blacks out and Robert is very definitely your mother’s brother!! Photoshop has a lens flare feature (Filter | Render | Lens flare) but how do you get this into your image? Again the trick is to create a new layer. Fill it with black. Create your lens flare on the black layer (I used the flare for a 105mm prime). Change the blend mode to screen, reposition and set the opacity to taste to finish.
Sharpening is another interesting issue. If your droplet shot lacks that critical crispness, and quite a few will do, one way to counter this is to use octave sharpening. I first learned about this technique in a book by Lee Varis called Skin. The edition of the book that I have was published by Sybex in 2006. The book claims to be the complete guide to digitally lighting, photographing and retouching faces and bodies, and it really does do a good job at this. There are a few useful sharpening techniques that I would recommend you check for yourselves but the octave sharpening routine has general applicability above and beyond portraiture. The point of the technique is that you use multiple sharpening layers (4 in this case) to minimize the visibility of wide halos. Unsharp mask values are set, in order, at radius 0.5px, 1.0px, 2.0px and 4.0px all at an amount of 500%. Each layer has a luminosity blend mode, and the opacity is set at 100%, 50%, 25% and 13% respectively.
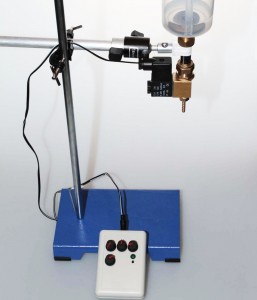
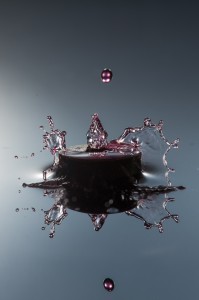
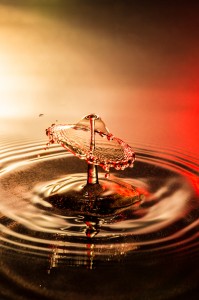
There are plenty of online tutorials on how to make a starburst. The basic technique is to start with a white line on a black background. Apply motion blur to the line to get a lovely fade effect on the ends, then copy, rotate and resize the line to get the final effect. If you save your creation you can use it again at any point where a convincing starburst is required. If you create a large starburst, you can reduce the size without loss of quality.Over the last few days I have been experimenting with an electro-mechanical dropper and can confirm that there will be a part 2 to this article. Wow!! Here’s a taster, until next time…
And For Next Time…
Cheers for now,
Robin.
07
My Love of Photography
Have you ever thought much about why you like photography? Or indeed why you take the pictures you do? No? Well nor me, until earlier this week. A few events have made me reflect on what it is to take differing types of pictures, in different ways and at different times. I’m still thinking so bear with me, this is difficult.
Like many men, I suspect, I get a thrill from handling my camera and using it to photograph, but recently I’ve become aware that this is by no means a constant in my picture-taking. More on this aspect later. For me there are three main image making scenarios. Firstly, I’m setting out to take pictures, and I’ve got something specific in mind. Perhaps I’ve planned a trip or perhaps I’ve been thinking about a particular picture I can take at home, either way there is planning involved and the end point is to produce some images that I am pleased with. The better they can be, fresh out of the camera, the more satisfied I am. Secondly, I’m in a social situation, but I have taken my camera along to record the event. Here there is no planning involved and actually, depending on the precise circumstances, I may or may not take any photographs. I think that this depends on how sociable the act of engaging in the process of photography is likely to be for the people I’m with, because human contact, not image making, is the primary purpose. Mind you if it is a large gathering and I feel anxious, I do sometimes hide behind the camera to give a purpose to my social interactions. Thirdly there are situations where planning to go somewhere socially with others, where photographs may be expected to be taken, happen and these are somewhere in between the first two scenarios given above. So where is this preamble leading?
I like to Snap!!
It seems to me that there is a lot of pretentious nonsense spoken about photography. Some image makers espouse a notion that every image has to be carefully considered, of high technical quality whilst also having a competent and pleasing aesthetic. Photographs must tell a complicated story, requiring the viewer to have superior imagination and narrative understanding. Photographs must involve an ordeal to achieve, either through the hoops that must be got through just to be there, perhaps at sunrise or after dark, or perhaps involving a hike up a mountain or travel in dangerous settings, in order to have enduring value as an image. I hear things said like “If you snooze you lose” and “You don’t take a picture, you make a picture”. And yet, on the flip-side, many people are much more concerned with gathering mementos of their everyday lives, often using a mobile phone camera these days, to share with their friends of Facebook or other social networking sites. Many of these pictures have little aesthetic merit but huge sentimental value and there is nothing wrong with that. Well, what is best? Who is correct?
An old friend of mine, now pardon my rudeness, once said “Eat shit.., 10,000 flies can’t be wrong”. We were adolescent at the time, and I think the comment was more for its intrinsic shock value than about making an important point, but this phrase has stayed with me because there are many trends, fads and innovations out there that lead to huge numbers of people doing something a little unusual that is initially disparaged. The advent of colour television, mobile phones and Betamax video all spring to mind as technologies that initially led to criticism for the early adopters. For flies, eating excrement is a natural and purposeful enterprise. They are able to extract nutrients that sustain them, from the copious waste that humans cannot use. Not an obvious pastime, but not at all crazy once you are in possession of the full facts. I’m not seeking to draw a parallel with the many photographs that get taken on mobile phones, for these images do also sustain, at least the spirit if not the physical health and can be a vehicle to greater technical proficiency. Put another way, 10,000 people taking poor quality i_snaps can’t be wrong. And they are not, they are purposeful, and the images meaningful to them. Of course there is a severe limit to how much you can learn from photography with a camera phone, as they have few controls and little precision, though I expect that to change in years to come as manual controls sneak in to camera phones, or phones sneak in to better cameras. After all, the very best camera is the one that you have with you and several successful books have been published on the back of this (for instance the excellent “The Best Camera is the One That’s with You: iPhone Photography” by Chase Jarvis).
So what is a Snap to Me?
In my old Collins Gem English Dictionary from 1998, in a very different time, a snapshot is an informal photograph, whereas a photograph is a picture made by the chemical action of light on a film (my how that has changed!) and an image is something altogether more general and complex. It’s a mental picture of someone or something, an impression that people have of a person or organization, a representation of a person or thing in a work of art, an optical reproduction or even a metaphor. We can see right away that the pretentious crowd are using the correct word for their impression of the way photographs should be made, but what about the happy snappers? Looks like they are correct too, with an emphasis on informal. And this, at its crux, is why I like snapping. It’s the informality of it all. To be in situations where others are comfortable with your taking pictures. To not have to worry too much about the quality or purpose of a picture. To make it just because you can. To create and keep memories of events and people for when you are old (or gone). To be accepted for what and who you are, to be at peace with yourself, enjoying the moment. This is the time I take pleasure in my camera. This is what I enjoy. It is not that I don’t enjoy my more technical photography, it’s just that it is different. That is a much more professional endeavour. It is do-or-die. The stakes are immense. You have to get things right. The camera is a tool to be wielded with skill and accuracy. Like computer programming, there are no half measures, no in-between. It works or it doesn’t. You have a moment, if you are lucky a few moments, but you have to be on time and on task. The rewards are high but so are the costs, in that the perfectionists are correct at least.
Is it really this Black and White?
As with many things in life, however, there are situations in-between the extremes. Grey areas exist, betwixt these poles, in which people have options. A third way if you will. A more personal way or style if you like. Once you have the technical skills to take successful photographs, you don’t lose them, or fail to implement them, just because you are in an informal social situation. These skills do contribute to the less formal pictures you take, making them better timed, technically proficient, better framed, more interesting with better background narrative. The informality of the situation helps you concentrate on your technique and encourages you to play more. Try things you might otherwise not have done in a more formal setting, where failure is not an option. Your missed opportunities will be fewer if you have good technique, your personal memories will better reflect how you felt at the time (remember the camera looks both ways) and there is a chance that your pictures will hold the attention of others for more than a microsecond.
Conclusions
Realize that picture-making settings vary considerably, and be comfortable with that. Learn what you can, through rigorous image making opportunities, but use these skills to take personal pictures that have meaning for you. Be snap-happy, and proud.
Cheers, till next time,
R.
06
Another Year Older..
Both the Doctor’s Images, and the Doctor himself, are another year older. It has bugged me for some time that my current photo has me with such long hair. Did I ever tell you that story? I really dislike having my hair cut. Just always have done. I only go to have it cut with my family, to places I’m used to. Once happy with a hairdresser I would always go there, even on my own. My spouse, on the other hand, is very fussy. Hairstyle is a business issue as well as a personal one. Picky doesn’t come into it. And she changes hairdresser quite often, which leaves me high and dry. Can’t go back. Too embarrassing to explain why my wife has changed. Nightmare. Several months will go by, and then another few, whilst the new stylist proves themselves and then I can join in. Meanwhile I turn into 60’s man. Work colleagues recognize this pattern. Anyway, we are back where we need to be with Sam again, and my hair is a reasonable length. So time for another picture.
Choosing a Setting
Actually, I quite like the relaxing at home in the library look (although, as you will see, the reality is somewhat different), so I will go with a repeat of that. I thought briefly about a plain black or grey or white background, but then thought something less clinical would be better. I thought about a 2 strobe setup, and whether to employ the same methodology as previously described in The Making of a Self Portrait, but decided against it. Instead, as can be seen from the production shot below, I used a softbox and a grid-spot this time.
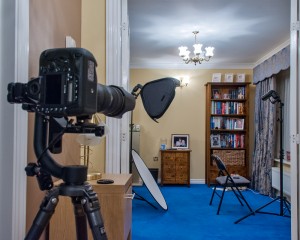 This was no ordinary softbox, but a Lastolite Ezybox 30 inch from their Jo McNally range. As you can see I’m using part of my lounge with a single bookcase, which through careful positioning, and by using a 70-200mm f2.8 zoom, has been made to look like a whole library. As you can also see from the production shot I am using my famous home-made grid spot, the ones made of black straws and cardboard, for the hair light rather than using window light.
Finding the Focus
This was not as easy as it might have been because I was doing this as a self-portrait. Our weekends are very busy and no helper was available. I had a remote release in play and used manual focus via trial and error to find my focus point. I started out using f2.8 to blur the bookcase as much as possible, but this just made critical focus impossible to find on my own, so I moved out to f5.6 which gave sufficient depth of field. My radio flash triggers worked well but I was having a problem with my remote release. If not pressed firmly and precisely downwards, the button caused only one flash to fire, and at first this seemed to weird to be true. This gave an interesting and very dramatic effect (because it was the grid spot) but this was not to be too arty. Common sense would indicate that it must be a flash trigger problem, though this didn’t seem to be the case and after a while I was able to choose one or both flash to fire at will based on how I pressed the button on my remote trigger. So what about the outcome? Well I have chosen 2 shots below as possible to use, and by the time you read this one will be posted in my About page.
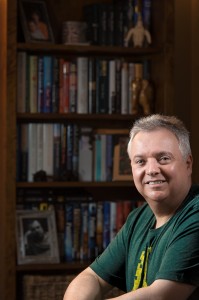
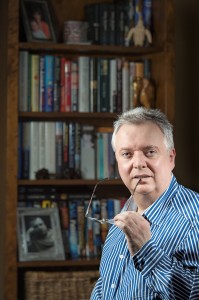 The images were relatively straight forward to edit, but I did use the opportunity to play with onOne Software’s Perfect Portrait 2 which is now much faster and easier to use than previously. There are many things to like, particularly the way in which it uses Bezier curves to select the mouth and eyes. This is so much faster than the previous method which used a mask. Skin smoothing is a real doddle and it is possible to get a really nice skin tone and texture even if the original is quite red for instance. Perfect Portrait 2 comes as part of Perfect Photo Suite 7 which again is worth a look. Comparing these images with last year’s picture, the background blur is much less at f5.6 than that achieved with my 85mm at f1.4, but this is to be expected given that I was much closer in on the previous image. Background blur varies with both the camera to subject distance (a shorter distance gives more background blur) and subject to background distance (a longer distance gives more background blur). So in essence self-portraits, with a lot of background blur, are better taken by someone else!! Well at least focussed by someone else. I have decided to use the more casual looking photo for my about page, and to blur the background a little more in Photoshop using CS6 field blur from the blur gallery.
Blurring the Background in Photoshop
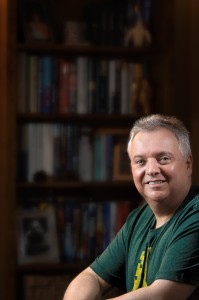 This is trickier than most people think by the way. If you blur the image substantially, for instance to remove most of the texture from the books, you will end up creating a large halo around the figure on the background layer. So when it comes to mask out the blur over the person, so that they remain sharp, what happens is there is still the halo blur of the figure in the blurred background. You can’t get rid of it, so what do you do? The trick is this:
Copy the layer that you are going to blur, prior to applying the blur, twice. Now, turn off the upper layer and apply the blur to the background layer beneath it, leaving the bottom most layer unblurred and untouched, until it appears satisfactory (in fact go a bit further than you think you need to, you can always fade it back later on). On the background layer (the middle of the 3), use the clone stamp tool to carefully clone appropriate background detail into the halo around the figure, effectively losing the outer rim of the blurred figure. Clone-in until the entire halo has been removed. Now turn off this layer and turn on the top layer. Mask out the figure using whatever technique you normally use. These days I use the quick selection brush to create the selection and then finesse in refine edge to create the mask. This creates a sharp-edged cut out that can then sit in the blurred background. Turn on both the blurred and the untouched background layers and select the blurred layer. Dial down the opacity to taste and you’re done.
In the interests of full disclosure, I have also darkened the background a little too.
Cheers,
R.


Recent Comments