Jun
03
Super-Resolution Imaging using a Fujifilm XT-20
Cameras / Computing / Fujifilm XT-20 / Photography / Super-Resolution Photography Posted by Robin
/
0 comments
Super-Resolution
Overview of Super-Resolution Techniques, What are we Discussing Here?
Super-resolution is a term with many modern meanings, but basically involves those techniques which add detail to poor resolution and grainy images. Fractal techniques for enlarging images have existed for many years, but are really just retaining existing detail, during enlargement, in a plausible way. More modern, single image, techniques however, can actually add extra detail that wasn’t there to begin with. Some techniques work by creating a dictionary of low resolution parts (for example in facial recognition) in which similar details are found (for instance an eye or a mouth) and patched together to form a complete picture. These new, but similar, parts are then substituted for higher resolution examples of the same details to create a higher resolution image overall. Whilst ingenious, this is a step removed from using the information within the image itself directly and not the subject of this discussion.
Another technique is known as resolution-stitching. In this technique a series of close-up images from a wider scene are taken and stitched together to make a higher-resolution whole. Taking the example of a landscape image, perhaps taken with a 24mm lens. The scene would be re-shot with a longer lens, say 100mm, in such a way that you have overlapping patches which can be stitched together using appropriate software. The longer the lens, the more detailed the final image will be. This is essentially the same as panorama photography and is also not the topic of this discussion. For the sake of completeness, when considering resolution stitching, there is a related technique attributed to the Wedding Photographer Ryan Brenizer called the Brenizer technique or sometimes the Bokeramah technique. This uses a telephoto lens, opened up to give a narrow depth of field, to take overlapping images to include the background such that the subject is very sharp but the background is blurred out, yet remains relatively wide angle. See Ryan in action via this B&H interview and video.
Finally, there are also artificial intelligence (AI) systems using a variety of neural networks and so-called deep learning which are also able to fill in missing detail in a range of images. One recent, well-known, example is Google’s RAISR (Rapid and Accurate Image Super Resolution) system as seen in this 2-minute papers video. For the interested reader there are a range of videos on neural networks in the YouTube Computerphile channel.
So what am I talking about? I’m talking about the super-resolution technique for photography popularised by Ian Norman from the photon collective in 2015. Take a look at Enhance! Superresolution Tutorial in Adobe Photoshop on YouTube and Ian’s excellent Peta Pixel piece A Practical Guide to Creating Superresolution Photos with Photoshop for more information on the technique and how it is applied.
Experiments with Super-Resolution
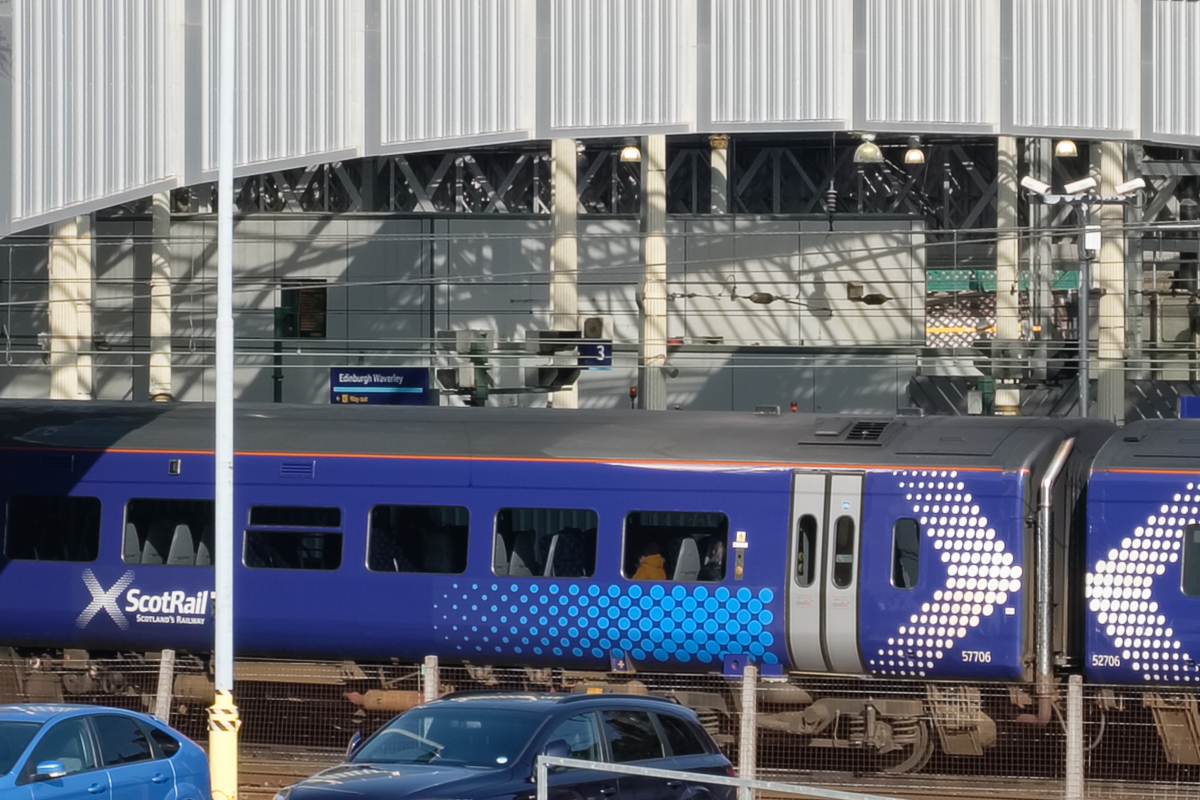
There’s little sense in me re-creating Ian’s work here, so I’ll move straight into my immediate reflections on reading his articles on super-resolution myself. I was away in Edinburgh for a long weekend and my immediate reaction was “I’ve got to try that!!” and “I wonder whether it will work with an X-Trans sensor camera” as I had my XT-20 with me. Only one way to find out, so I took a few random image bursts by way of experimentation.
Why the Worry About X-Trans?
I’ve read a great deal about the X-Trans sensor and am not sure what to make of the very partisan portrayals sometimes seen. From my own practical experience, I don’t find that the x-trans files are as easy to process when the shooting conditions have been difficult, and sharpening is often an issue unless you remember the tricks.
- Use Iridient X-Transformer to demosaic or..
- Turn off sharpening in Lightroom altogether, convert to a .tiff, then sharpen back in Lightroom or in Photoshop or..
- If sharpening in Lightroom has to be done, use the detail slider not the amount slider or..
- Use a different raw processor such as Capture One or On1 Photo Raw.
But actually, my concern was more about the green blocks of 4 pixels in the matrix. Would this effect the pixel averaging that takes place in the super-resolution process resulting in lower resolution than with a Bayer sensor? Would there be as much sub-pixel information available? This is the sort of situation where a little knowledge might be dangerous.
An Insight Into Sub-Pixel Imaging
I find it quite difficult to imagine how information can be gathered at a sub-pixel level when it is only captured at a pixel level. Looking into the research on image processing however, there are lots of different ways of extracting this information, even from a single image.
This paper by John Gavin and Christopher Jennison from 1997 called ‘A Subpixel Image Restoration Algorithm‘ gives a useful insight to the theory and practise. Indeed there are many applications in common usage including processing images of landscapes, remote sensing of active volcanos, locating and measuring blood vessel boundaries and diameters etc.
But will Ian’s process really reveal more detail, or simply smooth out the imperfections (noise) whilst placing the image on a larger canvas? Time for an experiment to find out whether super-resolution is a viable technique on X-Trans sensor cameras.
Technique
I used my Fujifilm XT-20 in manual shooting mode. The exposure was 1/250 second at an aperture of f8.0 for maximum sharpness. I used the highly respected ‘kit’ lens 18-55mm f2.8-4.0 set at 32.9mm. Several bursts of 25 images were taken, hand-held. For post processing I used Ian’s technique via specially constructed actions for 200% and 400% super-resolution. The original raw files were processed in Lightroom Clasic v7.3.1 using Auto settings, Camera ASTIA/Soft profile and the as shot auto white balance setting. Iridient X-Trans conversions were performed from within Lightroom. Final sharpening of the images was done via smart-sharpen with a setting of 300% at a radius of 2 pixels and no noise reduction. Detail shots were resized from the super-resolution images to 1200 by 800 pixels and saved via Lightroom’s export function as jpeg’s at 100% quality.
Image Results
Given the potential for artifacting in Lightroom, I generally demosaic special images in Iridient X-Transformer which, except for a single comparison just to see if there would be any difference, was the case here. So the Fuji raw files were demosaiced using X-Transformer prior to enlarging, aligning and then averaging using a smart object stack mode of mean. 5, 10, 15 and a full 25 images were enlarged to either 200 or 400%. Post enlargement, mild sharpening was applied using Smart Sharpen set at Amount 300, Radius 2 px and Noise Reduction 0%. Illustrative details from the scene are compared below. Representative details of the overall scene were selected and down-sampled to 1200 x 800 pixels for this section. This might not be the best way to demonstrate the improvements achieved by the super-resolution blending, but it does allow us to compare like with like.
Comparison results are set out as follows:
- Differences between Lightroom and Iridient X-Trans Demosaicing for the single image result.
- Differences between the 25 Image Blend at 200% size (96 mega-pixel equivalent) for Lightroom and Iridient X-Trans Demosaicing.
- 25 Image Blend at 400% (384 mega-pixel equivalent, Iridient X-Trans Demosaicing only).
- 200% and 400% with a 15 Image Blend.
- 200% and 400% with a 10 Image Blend.
- 200% and 400% with a 5 Image Blend.
- Please note that all blended shots are uncropped.
Single Image Results
Lightroom Demosaicing
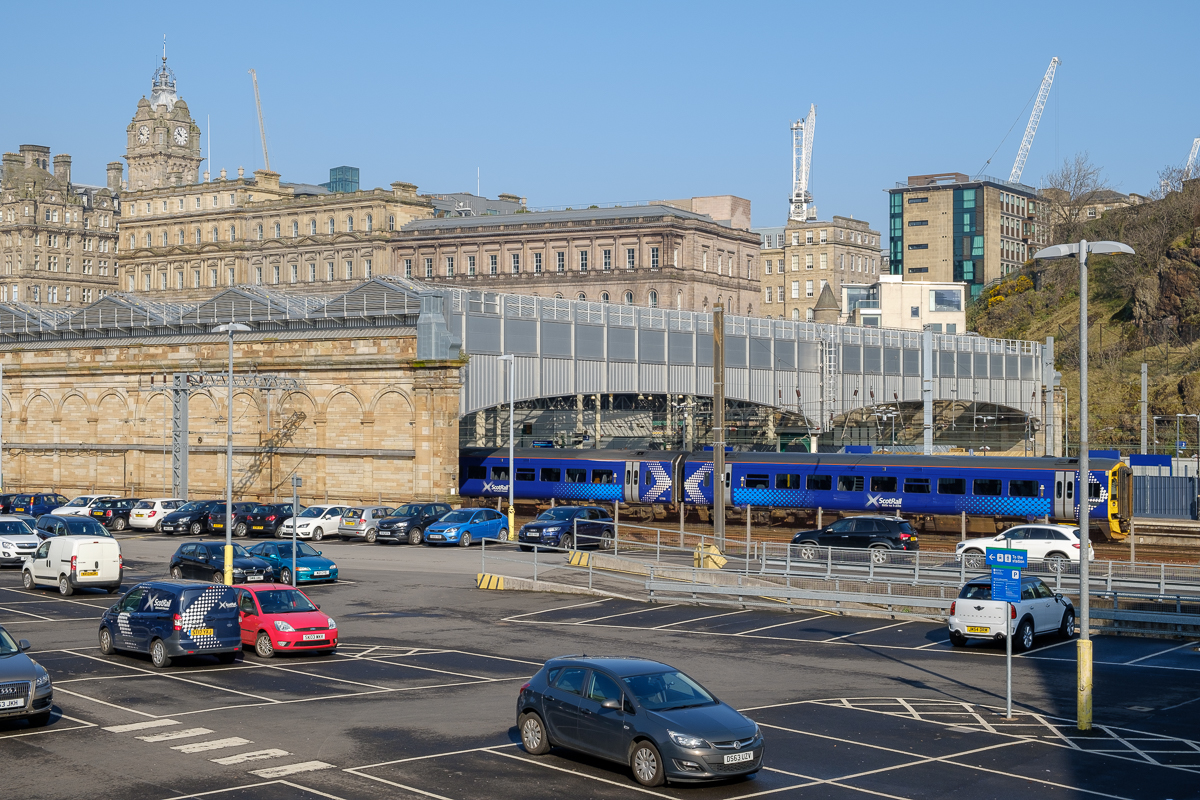
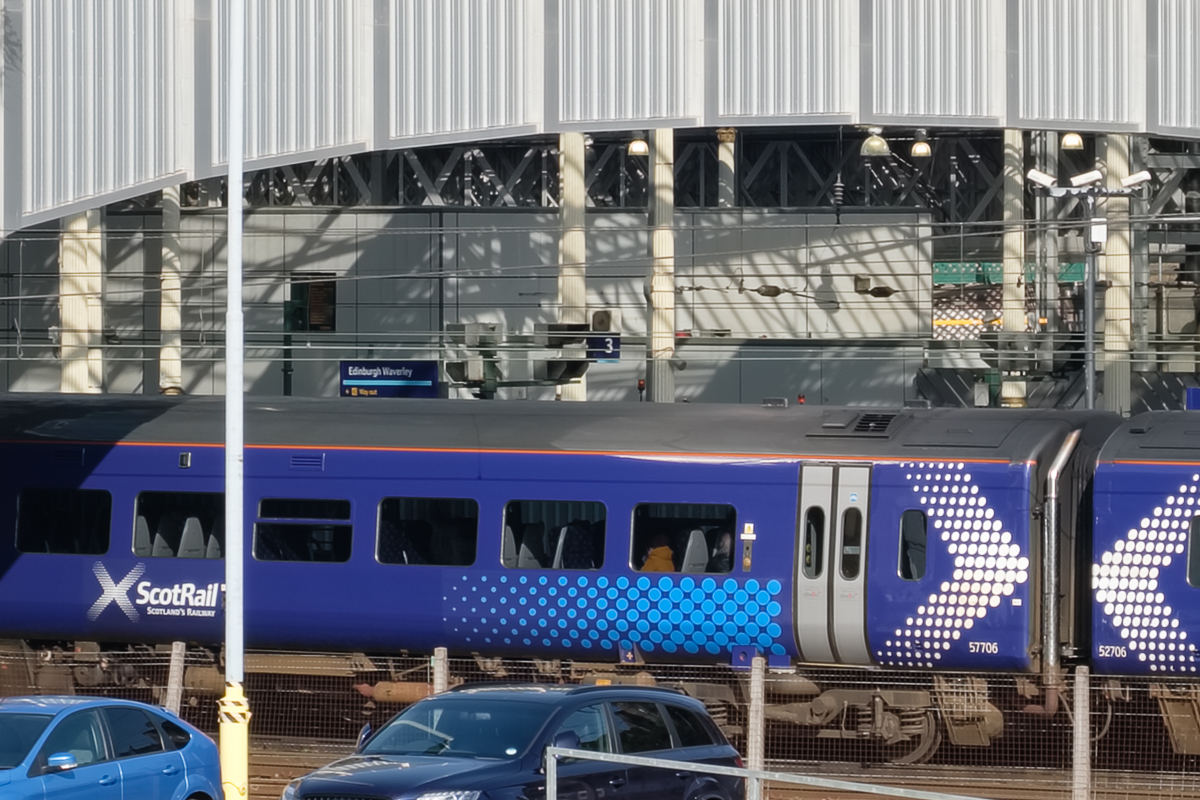
Waverley Station, Single Image..

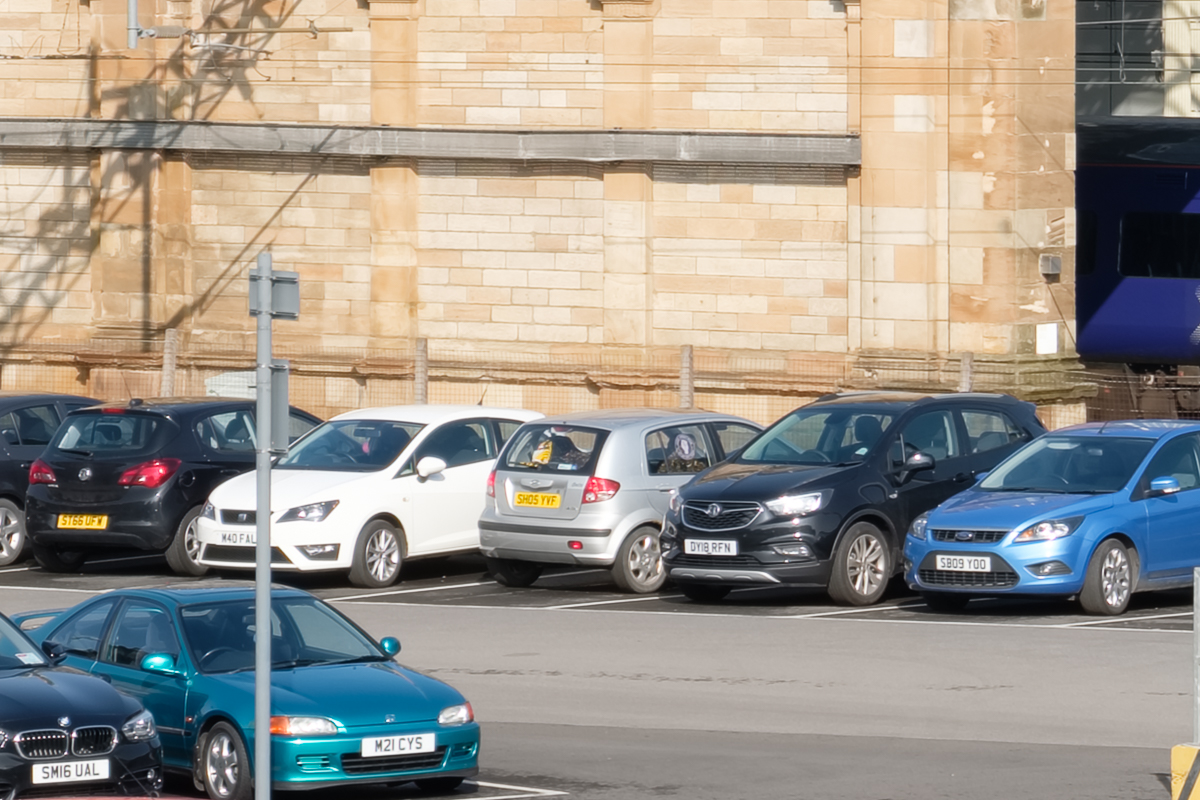
Car Detail..
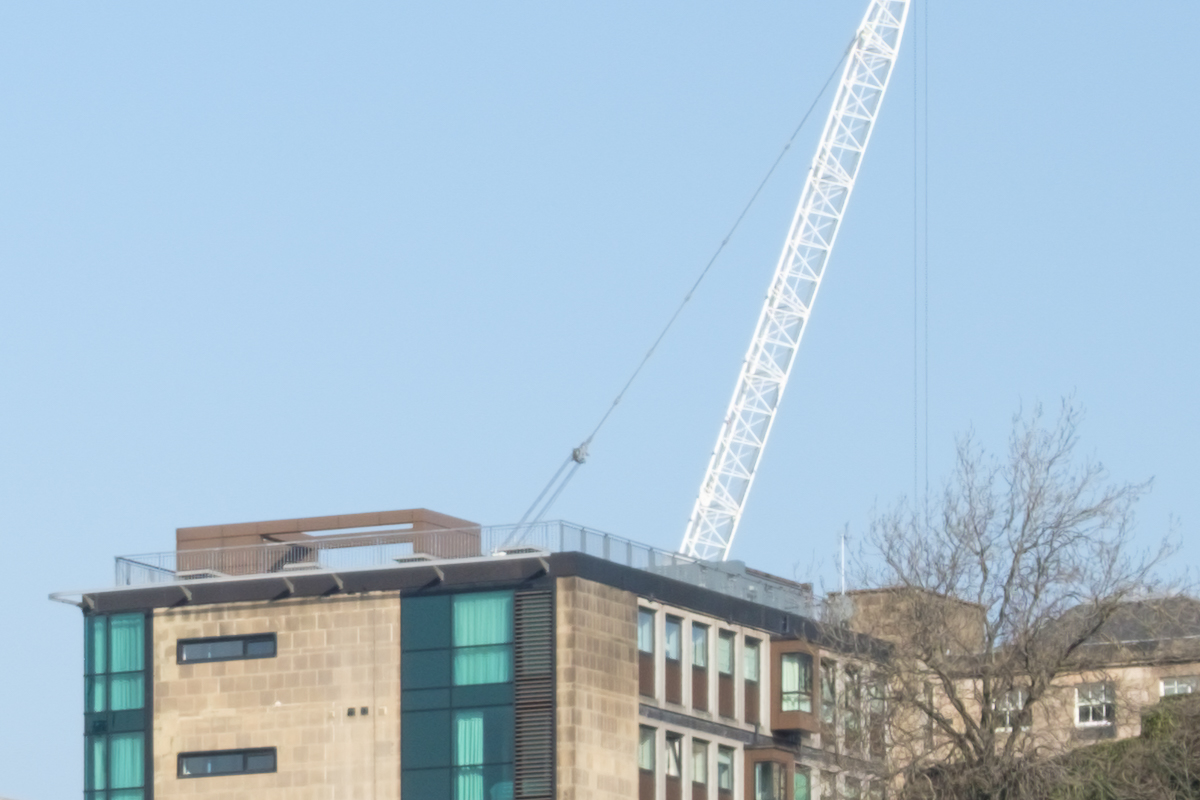
Crane Detail..

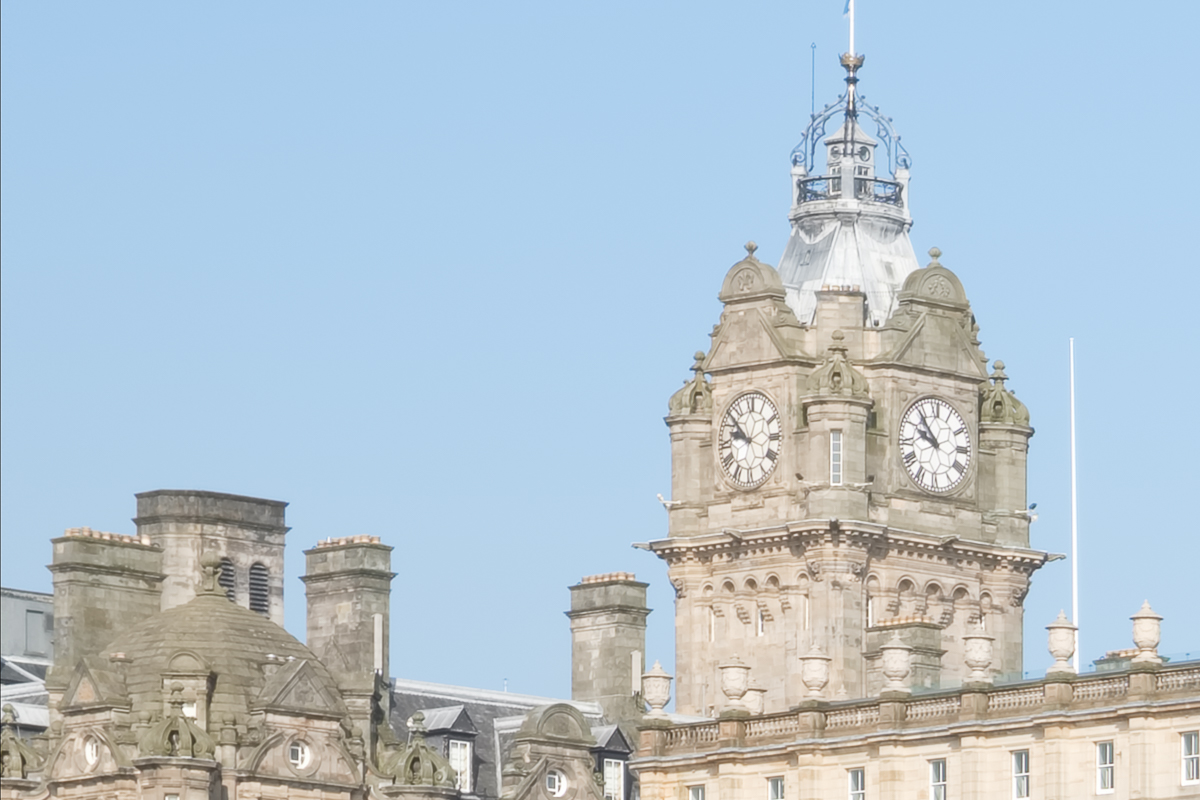
Clock Tower Detail..
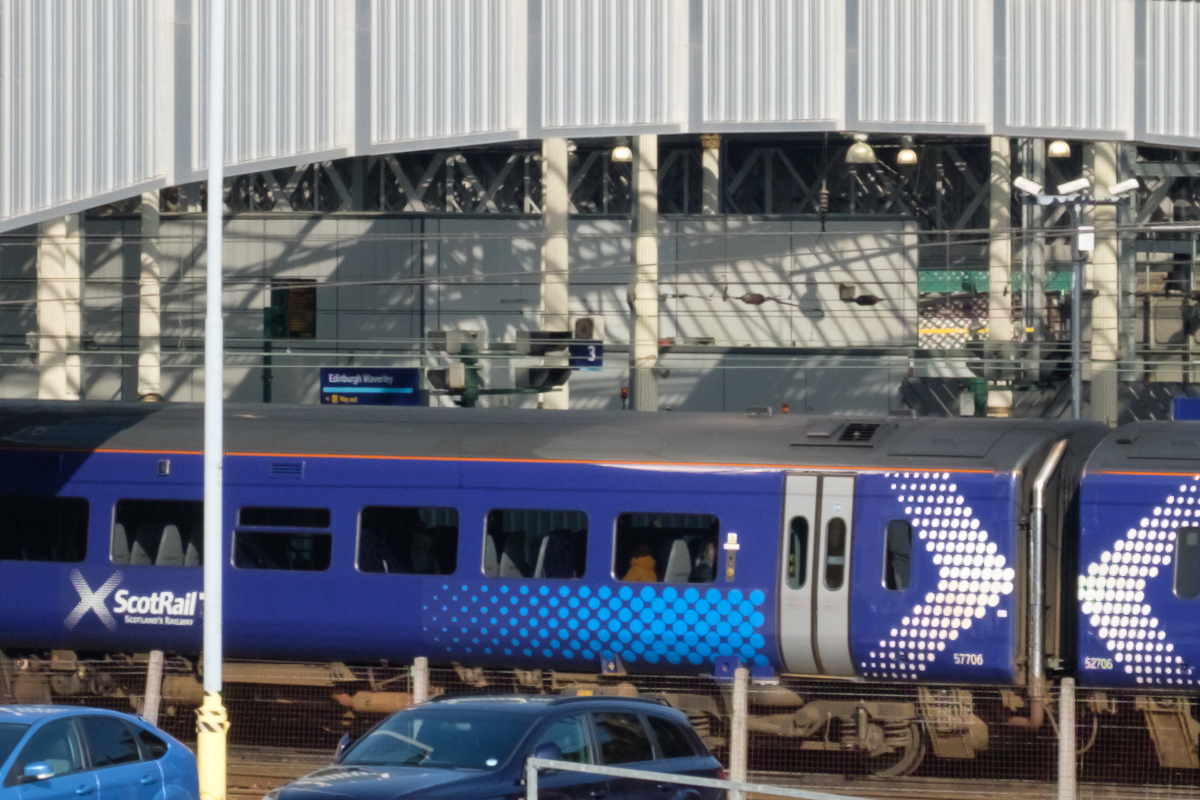
Train Detail..
Iridient X-Trans Demosaicing
Waverley Station, Single Image..
Car Detail..
Crane Detail..
Clock Tower Detail..
Train Detail..
25 Image Blend Results
200% Lightroom Demosaicing
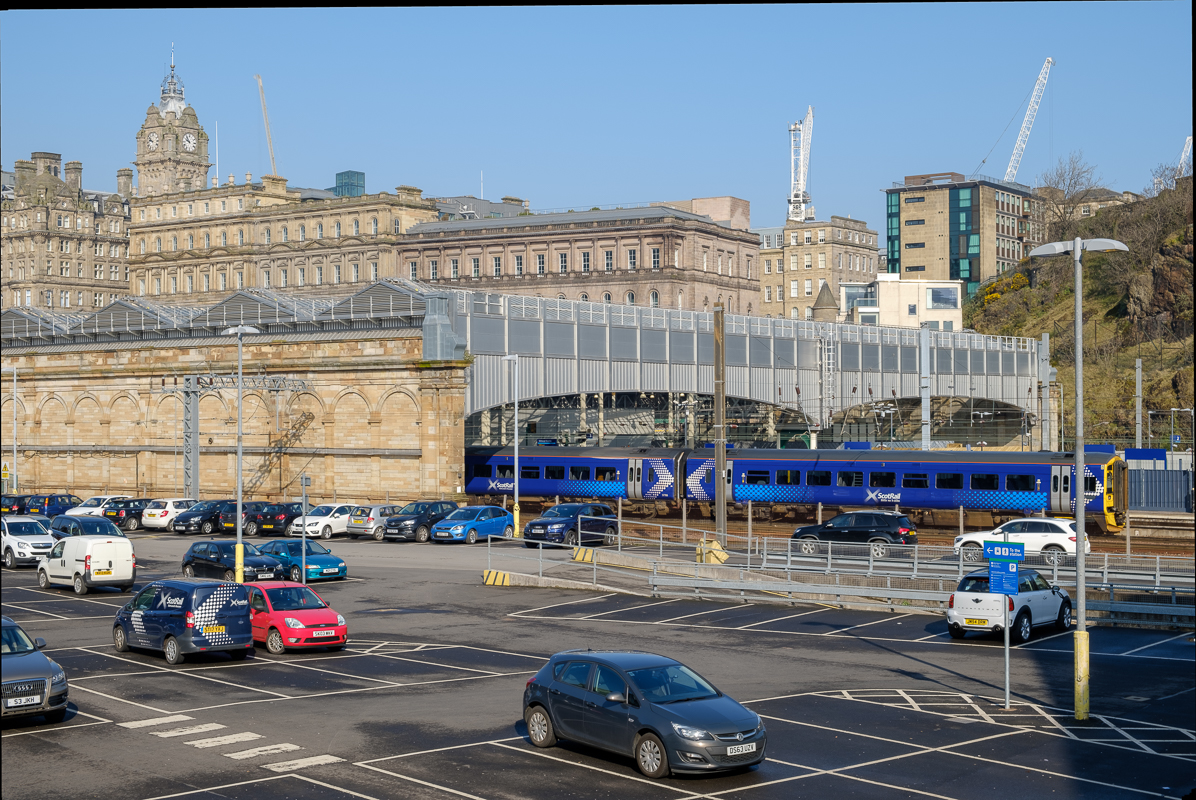
Waverley Station, Single Image..
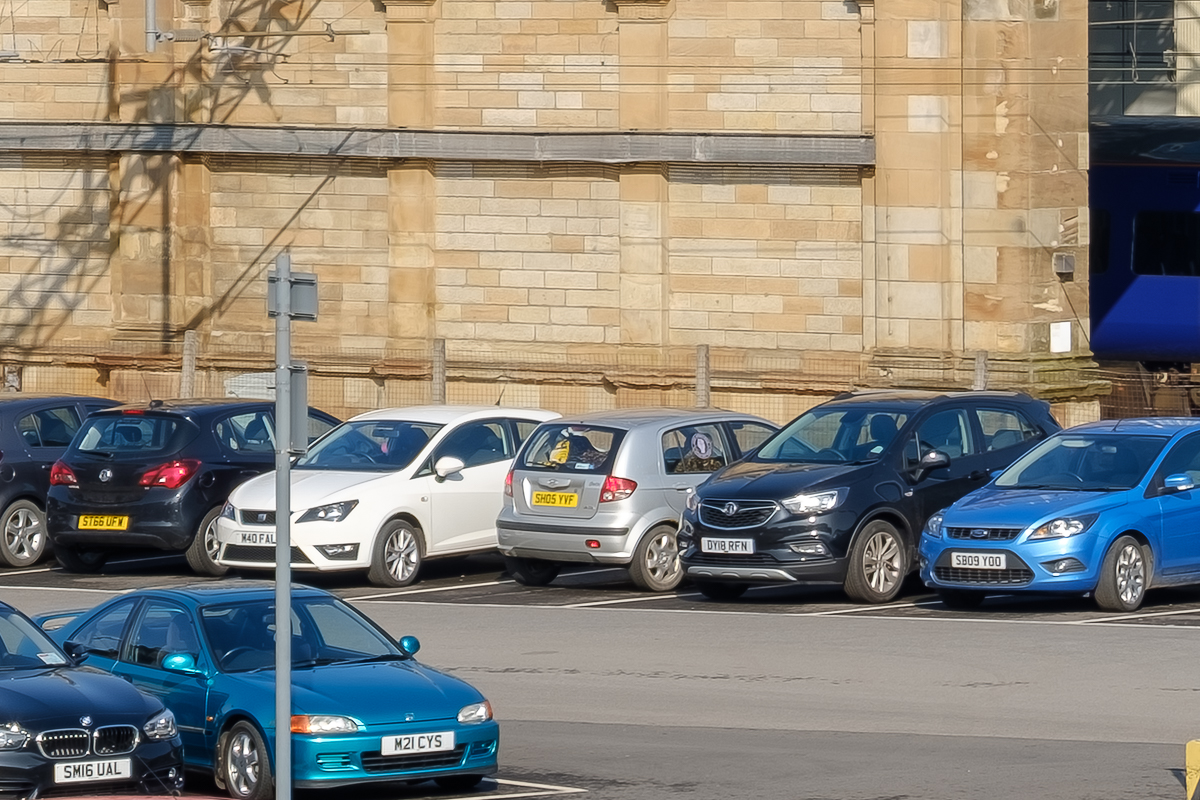
Car Detail..

Crane Detail..

Clock Tower Detail..
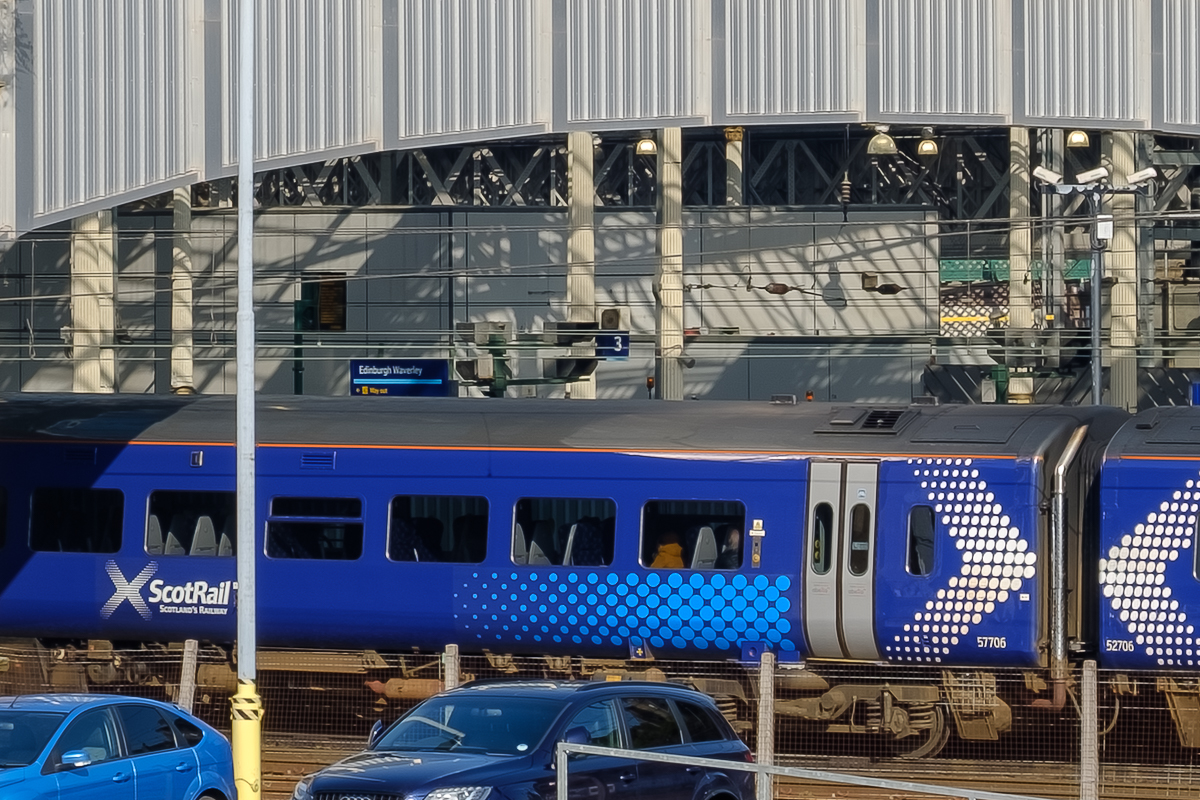
Train Detail..
200% Iridient X-Trans Demosaicing
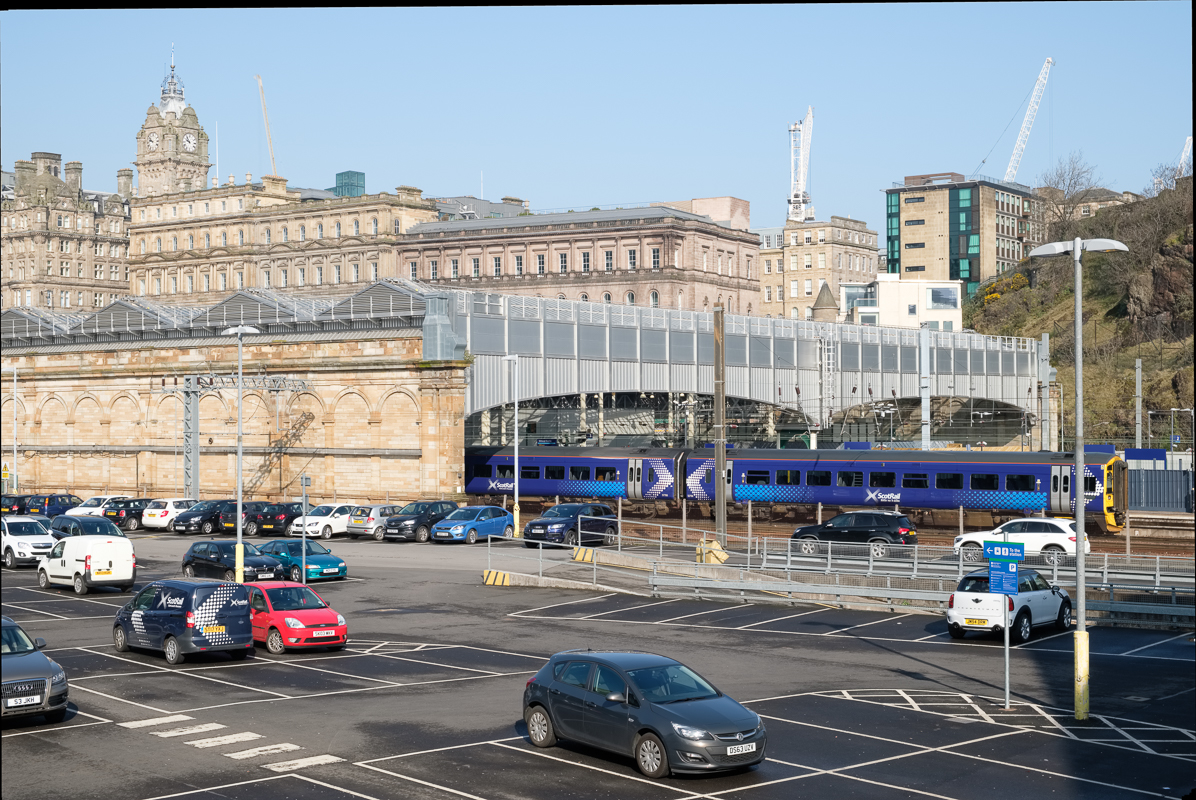
Waverley Station, Single Image..
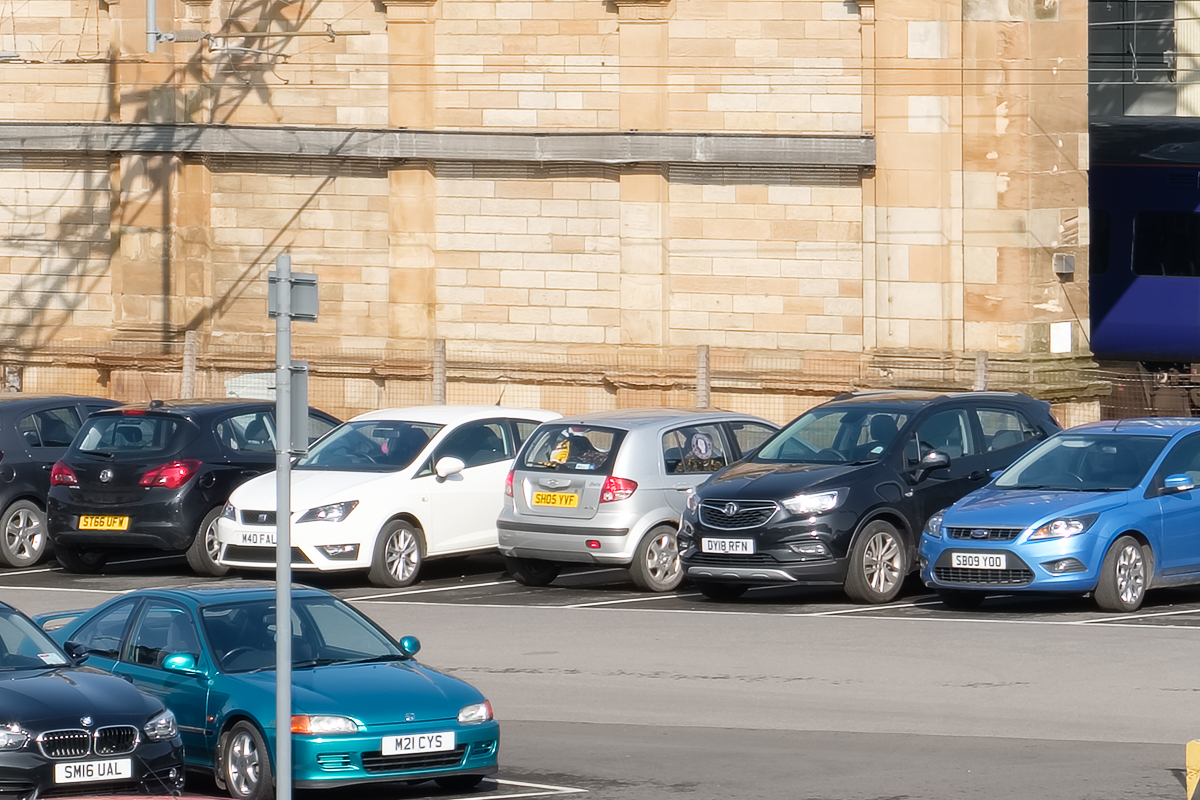
Car Detail..

Crane Detail..

Clock Tower Detail..

Train Detail..
400% Iridient X-Trans Demosaicing

Waverley Station, Single Image..

Car Detail..

Crane Detail..
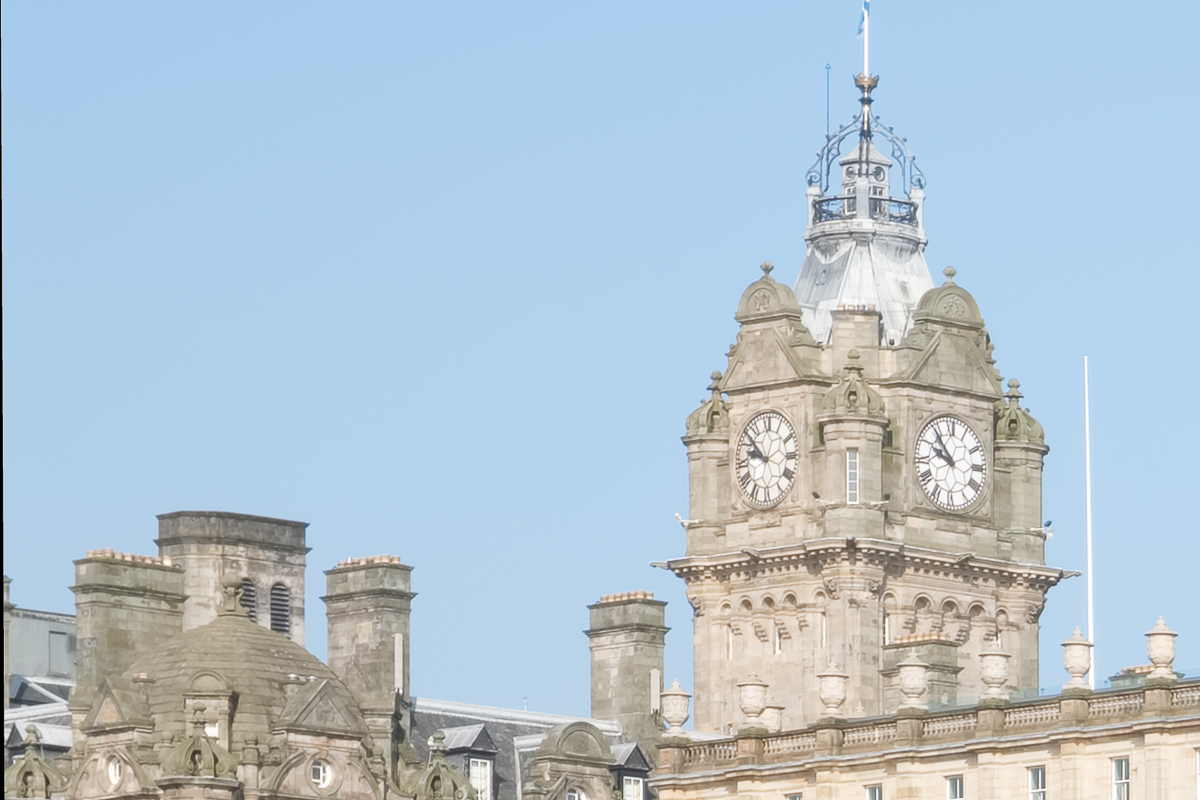
Clock Tower Detail..
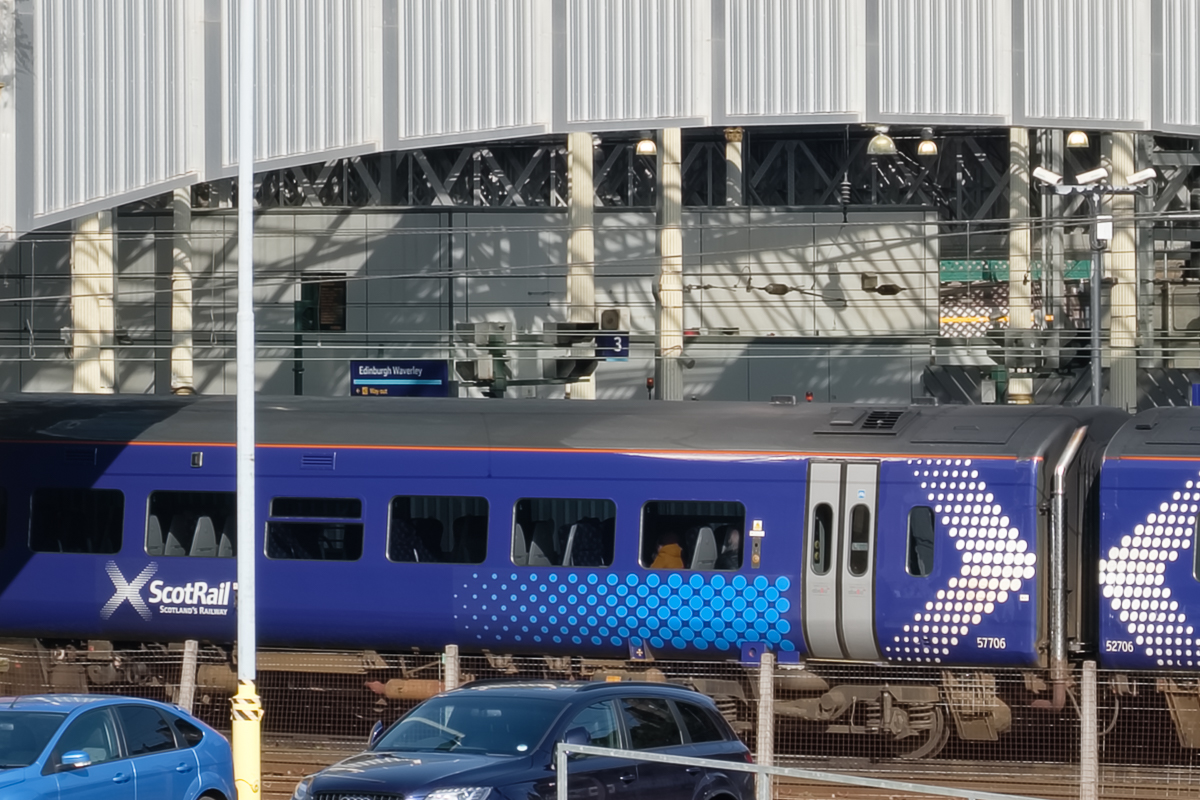
Train Detail..
15 Image Blend Results
200% Iridient X-Trans Demosaicing

Waverley Station, Single Image..

Car Detail..
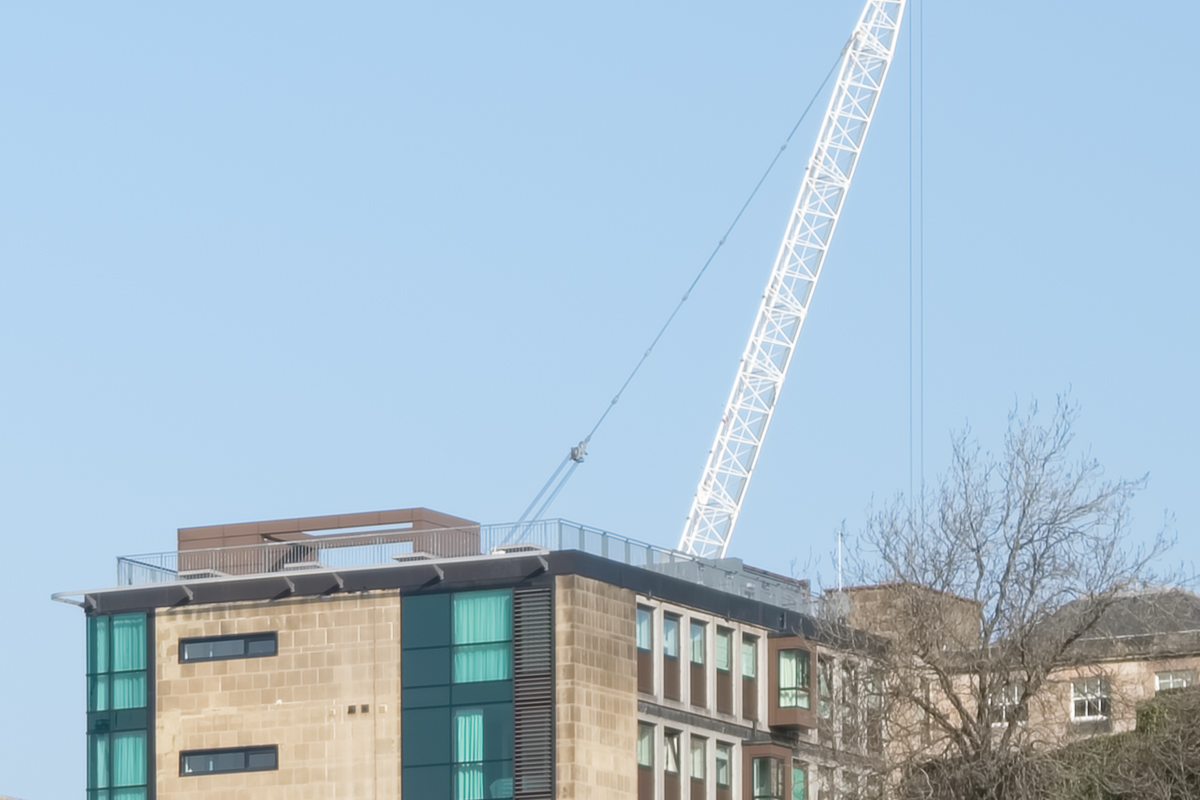
Crane Detail..

Clock Tower Detail..

Train Detail..
400% Iridient X-Trans Demosaicing

Waverley Station, Single Image..

Car Detail..
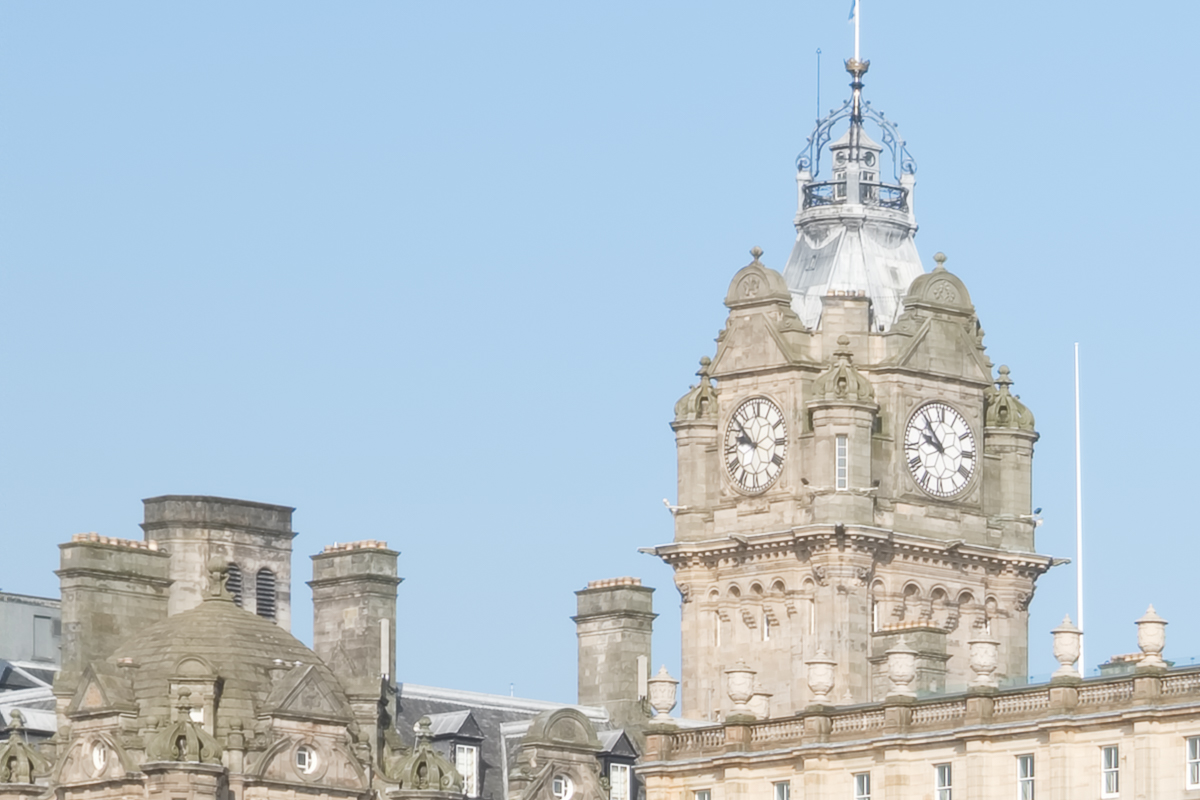
Clock Tower Detail..

Train Detail..
10 Image Blend Results
200% Iridient X-Trans Demosaicing

Waverley Station, Single Image..

Car Detail..

Crane Detail..

Clock Tower Detail..
Train Detail..
400% Iridient X-Trans Demosiacing

Waverley Station, Single Image..
Car Detail..

Crane Detail..
Clock Tower Detail..

Train Detail..
5 Image Blend Results
200% Iridient X-Trans Demosaicing

Waverley Station, Single Image..

Car Detail..

Crane Detail..
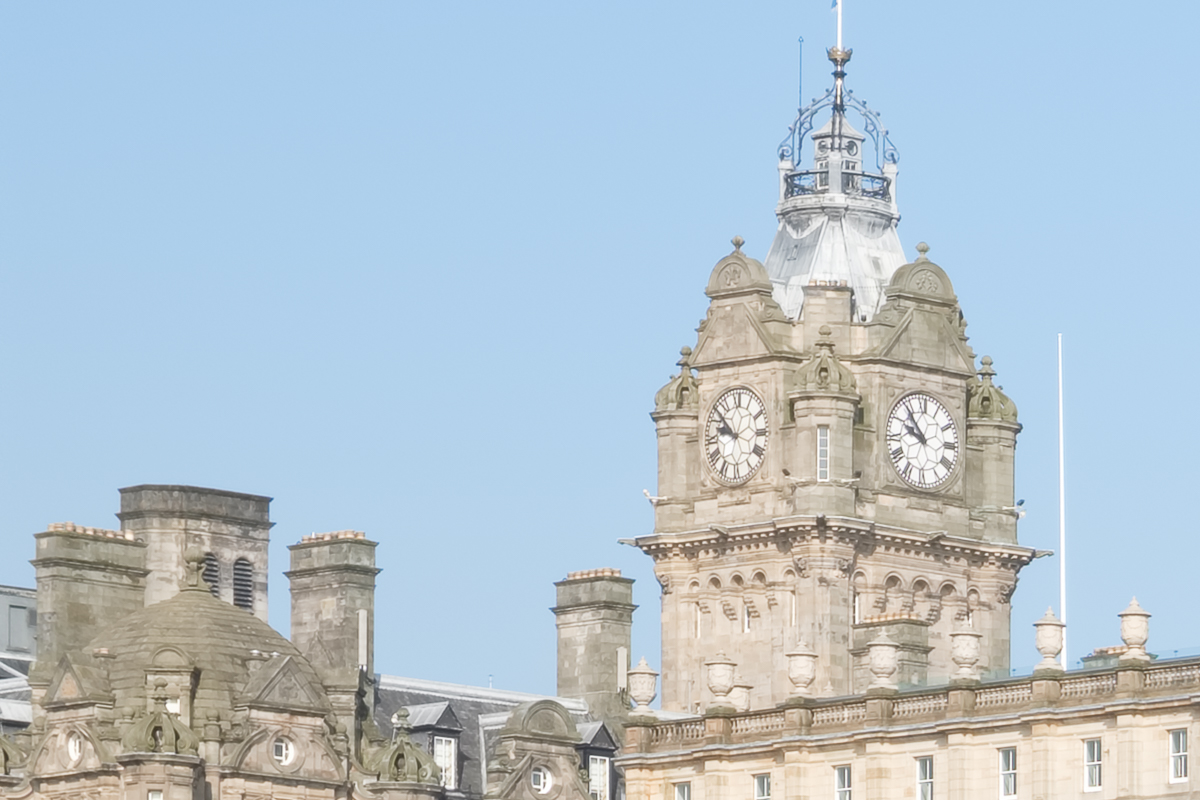
Clock Tower Detail..

Train Detail..
400% Iridient X-Trans Demosaicing

Waverley Station, Single Image..

Car Detail..

Crane Detail..

Clock Tower Detail..
Train Detail..
Summary of Image Findings
Lightroom versus Iridient X-Trans Demosaicing in the Single Image Test
In this test, the first observation is that the Lightroom processing gave a darker result than the Iridient X-Trans did. Looking carefully at the individual images, the detail in the Iridient rendering is very slightly better with less aliasing and more pleasing colour in the overall image. Moving on to the single image detail shots, it is very clear that the Iridient Demosaicing is superior. There is a noticeable level of extra detail with the images looking sharper with an oveall sheen and sparkle missing from the lightroom images which look muddy in comparison.
25 Image Blends at 200%
In the overall Waverley image there was again a difference in colour between the lightroom and Iridient X-Trans renderings with the Iridient looking more pleasing with better contrast and slightly less harsh aliasing. There was less false colour though the detail was fairly similar to my eye.
Comparing the Lightroom single image to the Lightroom 25 image blend there is a very noticeable increase in the clarity of the image. The car detail images have a sparkle to them that was missing in the individual rendering and the extra details in the car number plates and the chain link fence behind the cars is remarkable. There was little noise in the original Fujifilm XT-20 raw files which were taken at an ISO of 200, but the 25x image blends are totally noise free.
Comparing the Lightroom blend to the Iridient blend, there are further gains in image resolution and quality, to me most noticeable in the appearance of the chain fence where it overlaps the train wheels in the train detail image. The similarity of the colour of the rusty chain link to the false colour shadows under the train in the Lightroom image makes the link much more difficult to see in the Lightroom image.
25 Image Blends at 400%
I think that the key question here is whether there is any extra detail at all in a 400% size image compared to the 200% images. Here we are comparing simply between Iridient X-Trans demosaiced image blends only as I did not perform the 400% blends using a Lightroom render for reasons of time (more on the time aspect later).
To my eye, the 400% results were softer with less contrast, but noticeably less aliased and artefacts were fewer around small details like the number plates in the car detail image. It looked as though the 400% images might respond really well to a mid-tone contrast boost which may reveal this extra detail more clearly. The 400% 25 image blend took six and a half hours to render (after many failures to complete and certain tweaks being necessary to my computer hardware). As such the small gains may not be worthwhile as a routine workflow.
Reducing the Number of Blended Images
Reducing the number of images from the 20s to the teens may improve the speed of processing considerably, but is the lost quality acceptable. How many images do you really need. Ian Norman likes to use about 20 images which clearly works well, so I have started from 15 images working down in 5s.
Looking particularly at the Car Detail shots at 200%, there is an improvement in detail above that of a single shot even with 5 images. The improvements in detail and contrast improve incrementally the more images you add. 15 images is quite acceptable, though 25 gives a surprising amount of extra contrast and detail.
Going through the same exercise with the 400% images there is much less difference in contrast and detail as you increase the number of blended images. At 400% even 5 blended images gives a substantial increase in detail over the single image, so given the time in processing there may be little advantage in going to much larger frame numbers.
Practical Difficulties with Super-Resolution
With a 24 mega-pixel camera sensor, at 200%, you are essentially creating a 96 mega-pixel image (12,000 x 8,000 pixels). With a 400% super-resolution image you are creating a 384 mega-pixel image (24,000 x 16,000 pixels). Each 24 megapixel layer in your super-resolution stack will be 137 megabytes in size at 100%, so for a 25 image stack that’s 25*137 megabytes. Increase to 200% size and this becomes 25*549 megabytes file size or at 400% size a massive 25*2.15 gigabytes.
Needless to say that these file sizes are problematic for Photoshop to work with. It can do it, but it needs a massive amount of memory to do so. Way more memory than an average domestic PC will have.
Out of Memory?
I have a decent specification PC even though it is now a few years old (see link). But I was unable to process 400% super-resolution images with 25 layers because I kept getting out of memory messages half way through. It took a while to work out precisely which memory was running out, but it turned out to be both the Photoshop scratch disk and the Windows page file.
Of Scratch Disks and Page Files..
My PC uses a 500 GB M.2 SSD for the operating system and programs and, by default, Windows uses the operating system drive for its virtual memory management. Photoshop also uses the operating system drive for its scratch disc. Basically, my C: drive was filling up with virtual memory files and grinding to a halt. As good fortune would have it, I have a second, empty, high speed M.2 drive in my system so I was able to relocate both the Windows page file and my Photoshop scratch disc to that 500 GB drive. Sadly that still wasn’t enough space for these gigantic files and I had to add slower hard-drive capacity to the Photoshop scratch disc list after which all was well. Nevertheless, having had to wait six and a half hours for photoshop to finish, I only ran one 400%, 25 layer, file through the process. This is definitely a major limiting factor.
Is Super-Resolution Worth Doing?
My analysis is that it is worthwhile for some types of imagery:
- When you are in a push, especially in situations requiring high ISO to reduce noise as well as improve detail.
- For architecture and some indoor shots.
- For landscape photography in calm weather.
- In situations where you might want to make a very large print.
- When you don’t have a high resolution camera available, or where resolution stitching is not viable because you don’t have a long lens handy.
- In situations where extreme upscaling is necessary (400%) the availability of 5 images or more for this process gives a significant lift to the detail of the image.
Nevertheless there are situations in which you couldn’t use the technique, for instance where there was a lot of movement in the scene, or where every image is substantially different. Notwithstanding this some authors have used long-exposures for blurring water with this technique, so in some circumstances movement per se may not be an absolute barrier. It may also be used where small changes in perspective mean that the images can still be aligned (although there will be more waste within the image).
Final Thoughts
Iridient X-Transformer does not respect the Lightroom processing settings, but does use the in-camera film simulation. I would have been better off not making any development changes in Lightroom to ensure that judgements of the differences in resolution and contrast were not colored by them.

Nov
02
Rediscovering My Photography
B&W / Birds of Prey / Cameras / Landscapes / Macro / Motorcycling / Nature / Nikon Cameras / Nikon D3 / Nikon D300 / Nikon D4 / Nikon D810 / Photography Posted by Robin
/
0 comments
Rediscovering My Photography
My Journey Back, This Year in Pictures..
Background
I’m sure that I am the same as every other working individual. Work-life, home-life and chores expand to fill all available time — that’s Robin’s Law, one of many! The balance of these three may change from time to time, but essentially, hobbies are squeezed into any free time that you are not too tired to use. Over the past 12 months I’ve been focused on my cycling, as this has been making me feel better emotionally, and physically, but whilst doing so I’ve had a nagging feeling that something else is missing. I’ve known that it is my photography well enough. I’ve been thinking that I may as well dispose of my cameras, and other studio equipment, because they represent a large investment and I’m not using them. Fortunately I have managed to resist the urge, and in an effort to re-balance things, have started making time to take a few images again.
Recession and the Cost of Living
In reality my retreat from picture taking has been multi-factorial. I have read a lot of recommendations along the following lines: “Take loads of pictures, it doesn’t cost you anything to experiment with digital photography”. In one way this is true, well almost, it doesn’t cost very much to press the shutter button. The only real costs, once you have purchased the machinery, are for electricity to charge the batteries. Beyond this though, if you want to keep your photos safely, you need storage space in the form of multiple hard drives (or DVD’s if you have the patience to record them), and these do cost money. If you want people to enjoy your work you may also choose to purchase a website with it’s own attendant charges etc. There may be other expenses too, after all, there are only so many photographs you can find in your garden or front room. There comes a time when you have to invest in some form of subject-seeking. This can take many forms from the full-octane photography holiday, through to purchasing multi-colored knickknacks from a stationers for your macro photography. For some of us, the true joy of photography lies in the execution of a fabulous print. These also cost money, especially the A3 and A2 ones, and if times are hard, and you can’t afford the ink and paper for your printer, some of the joy of photography is leached away. The improvement in the UK economy has therefore also been one factor in my rediscovering my photography again.
With all this in mind, I took a day out to replenish my soul with one of my favorite subjects, a variety of birds of prey on an organized shoot at a falconry center. Some out-doors in natural settings, and others in the studio. Easy-peasy..
Gauntlet Birds of Prey, Eagle and Vulture Park
If you would like to visit the Gauntlet birds of prey, eagle and vulture park I can strongly recommend it. The vulture collection is a particular treat. In addition to photography workshops they have flying displays at 12.30 pm and 3.00 pm, Vulture feeding at 12.00 pm and a meet and greet at 2.00 pm as well as other attractions.
A Photo-Walk Around Chester
Invigorated by shooting wildlife again, albeit in captivity, I next tackled a photo-walk around Chester. Not a brilliant day, in fact quite dull, so I had to keep my wits about me. Black and white to the rescue..
A Visit to Oxford
In our only city-break this year, we went down to Oxford to see Ceri, the daughter of some friends of ours, as she started her final exams. The weather was not kind to us, unfortunately, so we had plenty of time to look around the shops, and drink the occasional cup of tea and coffee.
A Visit Thurstaston
The next step in my rehabilitation occurred during a drive out to Thurstaston with my daughter. The plan was to find some coastline, and take a few pictures along the way. As good fortune was to have it, the North Wales Hang Gliding and Paragliding Club were flying, and we got a few shots of them, plus the visitor center had a photography exhibition and a public hide with views out onto some well stocked bird feeders. Heaven!
The Journey Continues
Sadly, these trips were still not quite enough, on their own, to get me taking pictures regularly again. Have you had the experience of wanting something all the more, when you knew you couldn’t have it? Well, my D300 broke! I hadn’t been abusing it, I’d just been updating the firmware to include compatibility with the 800mm f5.6 Nikkor extreme telephoto (it’s not like I will ever own one, but I like to be up to date), when to my astonishment, it just stopped working. In all honesty I hardly ever use the D300. It’s old technology now, but it is my backup camera and I do like to use it for macro shooting extreme close-ups with an old 300mm zoom and a 50mm reversed onto the end. And now, suddenly, I couldn’t. Should I buy a new camera? Probably not worth it if I’m not using my cameras much, but should I get the D300 repaired? Well probably, yes, was the conclusion I came to, if a camera that old can even be repaired? Well it turns out that it could. Nikon UK have a fabulous online system for repairs. You can say how much you would be prepared to pay without seeking permission to proceed, and even get the free postage label printed out from the website. They prepare an estimate and you say whether you want to go ahead or not and that is pretty much that.
Needless to say, once the D300 was returned to me in good working order, I couldn’t resist using it for some macro shots, and generally loving it and reminding myself of all its settings. Sad I know.. In fact, the challenge was as much to produce some good looking and clean shots with it as I could. I’d forgotten how noisy and textured D300 images could look. Sensor technology, and the supporting electronics behind them, are so much better now than even 5 years ago! Here’s how I got on:
Oulton Park Track Day
By this point I’m fully engaged with the drama and creativity, seeking new photographic experiences and subjects again. I’ve said before on this blog that, for me, it is more about the photography than the subject. Novelty and complexity are always the way for me. I’ve never shot cars or bikes on a track before, so this would be a great entrée. Is it difficult? Depends. If you want a straightforward shot, tack sharp, just set a monster shutter speed and shoot away. If you want a sharp bike and rider with spin-blur on the wheels done in camera, on a bend, yes that’s tricky first time out. Impossible? You be the judge!!
Hooked Again!!
The Inevitible Consequences..
And so it was, hooked again. Desperately fighting the urge to buy a new camera, but eventually succumbing to the temptation. A couple of years ago I blogged about wanting a Nikon D4 and a D800, but having to choose just one. That time it was the D4, this time the siren call of 36mp detail was too much for my battered psyche, and so to the D810..
More later,
Robin.
Recent Comments