
Jan
26
Alas No Cycling, But a Few Hours to Play…
Photoshop and the Art of Self Destruction
Last weekend I had a great ride on Saturday, 2,000 feet of climbing (and calorie burning), over 25 miles, including the famous Horseshoe Pass. The weather was cold and wet, with some wind, but a lovely lunch at Fouzi’s in Llangollen made up for the strain. I had been having some difficulty with my freewheel for several months, and there had been a few events where its slipping had caused problems starting off, especially at temperatures near zero. Last Sunday, I set off for another ride, but the freewheel failed completely. No forward motion, so alas no cycling. My friends walked back with me to the car, and we talked about what next. I had been hoping that I could manage through the winter and get a new bike in the summer months, but this plan has had to be trashed. Spares for the Marin have been hard to get, and a freewheel seems impossible to source at this juncture. So I have ordered a new bike from Halfords, and I’m waiting for it to arrive. I’m going for a Boardman Team CX this time. It should see me through the rest of the winter, once the frame size I require is shipped down from the Leeds store. But that is another story.
The weather has been awful today, so I guess it has been no hardship to stay at home, but I needed a diversion to make up for not having a regular hit of exercise on the Marin. So what was it to be today? I didn’t fancy a trip out to photograph landscapes or wildlife (the weather again), and my inside macro-brain was similarly uninspired. I caught sight of an old book on the shelf in my study, ‘How to Cheat in Photoshop CS3, The Art of Creating Photorealistic Montages’ by Steve Caplin. That’s it I thought, I’ll just play this morning, with Photoshop, just see what I can create. I didn’t have a plan, or any pre-conceptions, it was a spur of the moment thing. I thought about it for a while, and decided that I would edit a photograph of myself, and see what might be possible. That way, nobody would be offended.
Gold Finger…
First off, how about some fun with Curves?

First convert the image to black and white using your preferred method, then, to get a metal effect, you need a curve with wiggles. From here it is simple enough to color the image with a second curve that does 3 things. Lift the red and green mid-tones and then darken the overall image.
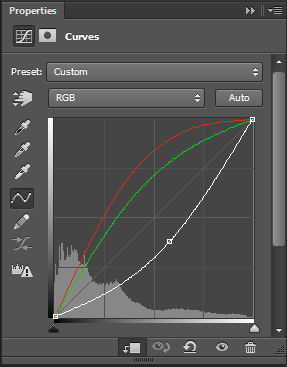
Layer mask your image to taste and away you go. For this image, I made a cut-out of myself, and jumped it up onto its own layer, in order to simplify the masking. There was already quite a lot of contrast in the image, so I was able to do this fairly straightforwardly using the Quick Selection tool, rather than resorting to a channel mask.

Goldfinger, He’s the Man!
The Next Level
That was fun. It only took a few minutes, but was not intrinsically satisfying. I would definitely like my own weight in gold, but would want to earn it by doing something that was a real test. So what next? Play some more, it’s the only way!!
Having thought of myself as a golden statue, what about being a robot? Perhaps with something removed? What about some missing face? What about an explosion of some sort? Hmm. An idea was taking shape. Smoke and flame, that’s the stuff. Now, I can definitely step you through what I did next, but for this blog it might be sufficient just to show you the finished piece. I’m not claiming that this is perfect, I didn’t spend too long working on it, I way just experimenting after all. I’m certainly not sure that an exploding head merits such an inane smile. But hey, it’s a start.

Until next time,
R.

Jan
05
New Year, New Profile Photo for LinkedIn
Photography / Photoshop / Portfolio / Portrait / Studio Flash / TDI News Posted by Robin
/
0 comments
The Making of a New Profile Photo for LinkedIn
The Reason Why…
I have been working on my social media profile for a few weeks now. I have a Google+ account, with a page for TDI, an Instagram account and most recently a LinkedIn account and now Twitter. I am in the process of getting to know the strengths and weaknesses of these, how they work, and how best to engage with them and will be linking. My LinkedIn account is really to support my other career as a psychiatrist but I have previously used the same (branding) image as for TDI and my other accounts. Thinking that I probably need something a little more formal, my wife agreed to help me take a fresh portrait for LinkedIn.
A New Fridge-Freezer, A New Problem
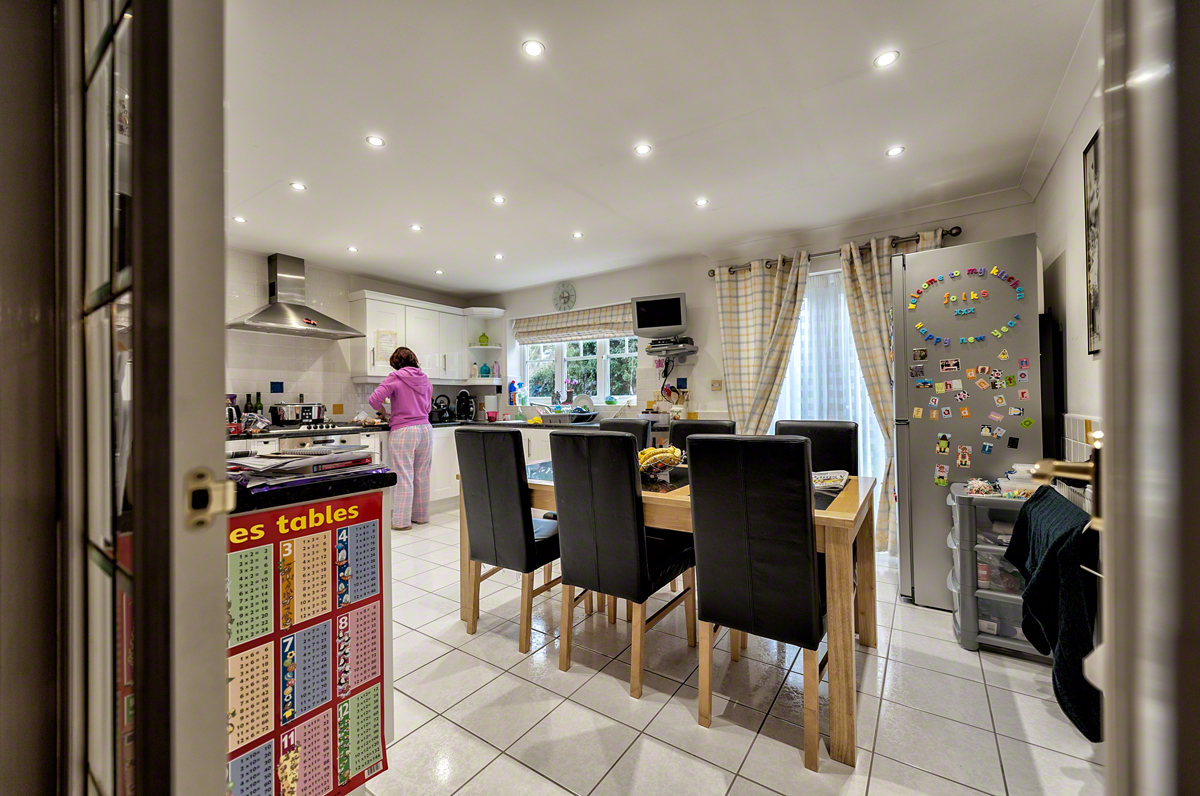
Towards the end of last year our built in Fridge-Freezer decided that it would start freezing everything in the fridge, as well as the freezer, and to make so much ice that the drawers in the freezer wouldn’t open at all. Fearing a fire, and not having enough time to source a reasonably priced built in unit, or re-fit it in the appropriate cupboard, we elected to have a free-standing unit instead. In fairness this has been a great success, my daughter has decorated it with magnets, and uses it as a noticeboard for maths puzzles for her poor old dad to write down and solve. But here’s the rub. I can’t easily move the kitchen table out to the side like I used to, because a third of that space is now Fridge-Freezer!! So using the kitchen as a studio to capture a new profile photo is a world more grief than it used to be. Still, I needed some exercise because the weather had trashed our planned cycle ride today (too much ice this morning, too much rain and gale force winds this afternoon). Plus my bike’s not well at the moment either. So moving a heavy table and running up and down stairs a lot seemed just the ticket.
The Area to Clear, Ho Hum..
So here’s the thing, that kitchen table had to go out in the hallway. Would it go out through the doors? Could we lift it? If it was out in the hallway, could we get back in the kitchen? Was I going to be able to carry my equipment from upstairs past the obstruction? Who knew, we had to give it a try. After, that is, Helen had cleaned the floor!!
Phew, That Looks Better!!
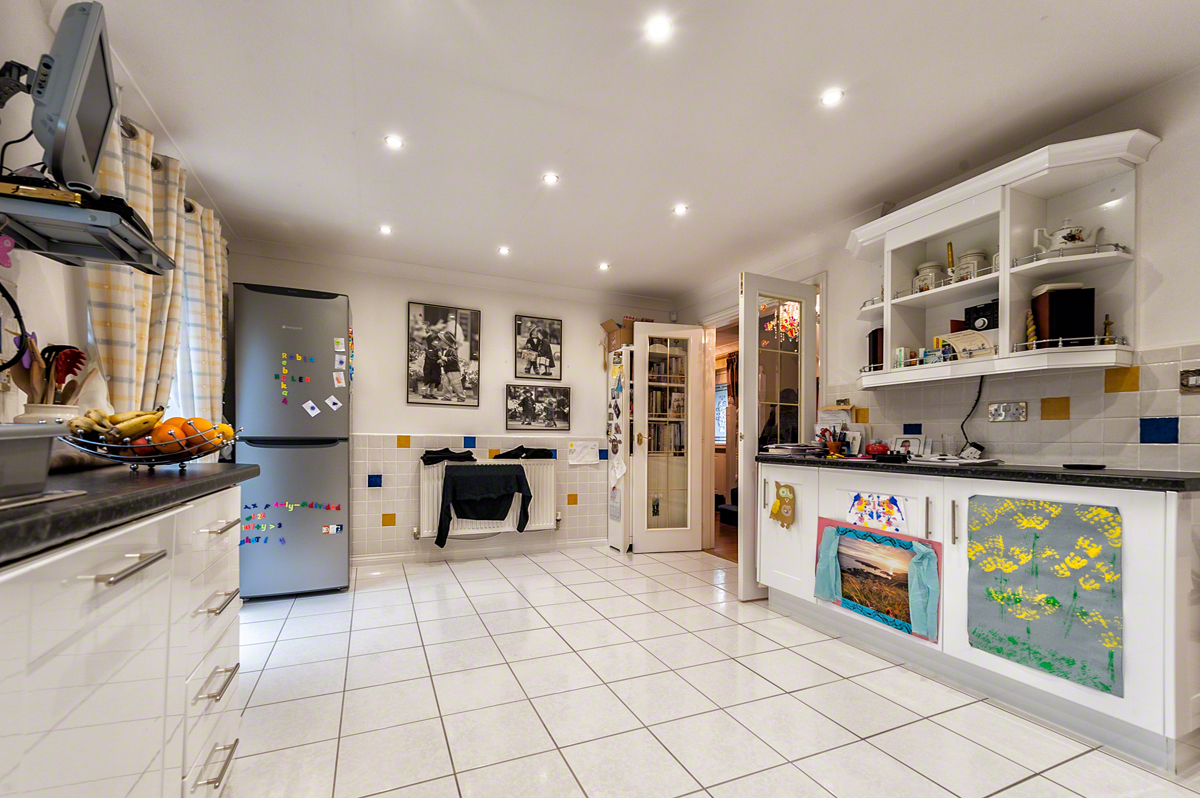
After much shoving and scraping, and even more hoovering and washing, a space was made available in the now pristine cooking and dining area. So, whilst Helen moved on to pastures new, for further housework opportunities, I set about bringing the necessary equipment downstairs, and stockpiling it into the hallway. Hmm.. That’s a bit of a mess you’ve got there thought I. I wonder how long Helen is going to stay patient with you?

Hallway Carnage…
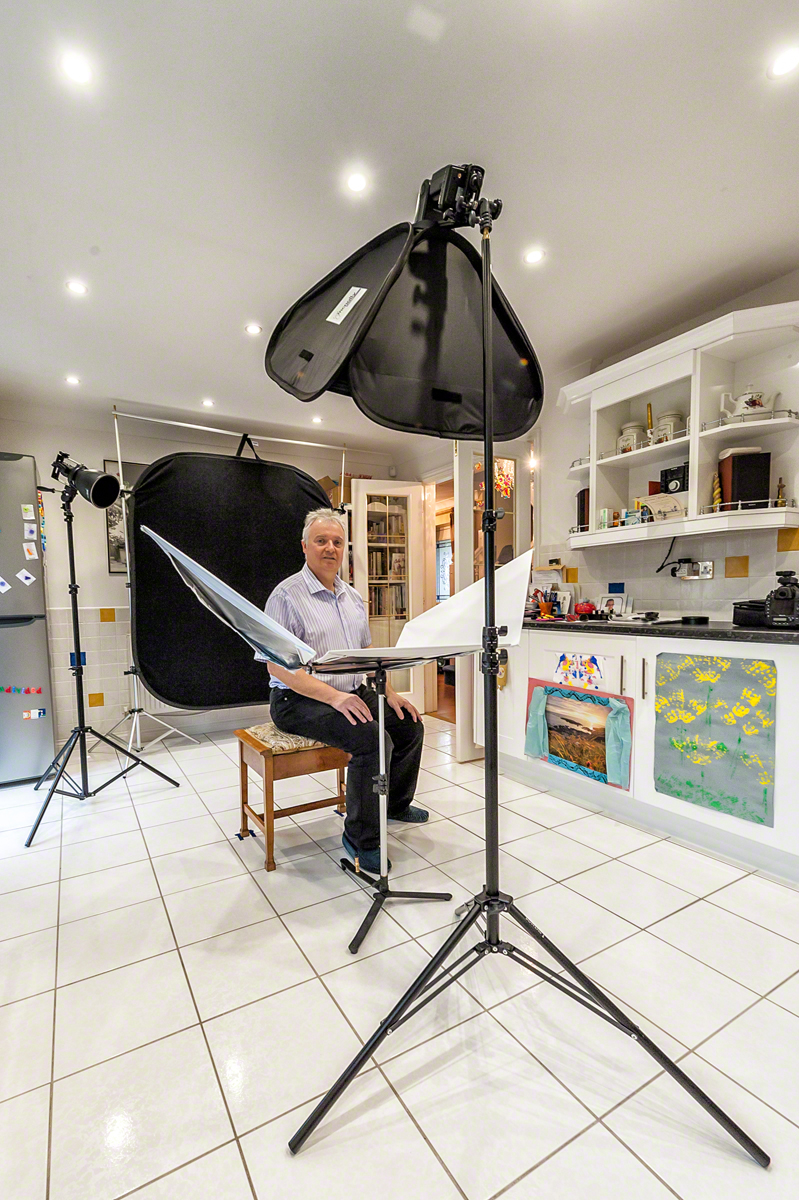
So onto the setup and test shots. I went with the D4 with 70-200 f2.8. This was going to be quite heavy for Helen, but she was confident that she could manage anything I threw at her. I decided not to shoot tethered. It was just one portrait and the image on the back of the D4, particularly with the 3 channel histogram, was more than sufficient to judge framing and exposure. I used my favorite portrait set-up of the Lastolite Triflector and Nikon Speedlight fired through a Joe McNally Ezybox with soft white interior and 2 layers of diffusion. For separation I used a second speedlight (an old SB800, in SU4 mode at 1/32 power) fired through a Bowens grid-spot attached via the rather superb Interfit Strobies XS Int326 gizmo. As usual, the camera was connected to the key light using a PocketWizard Flex Mini TT1 and Flex TT5 set up with the AC3 Zone Controller set to -2/3 exposure compensation, with ISO 200, 1/160th second and f8. Finally, my favoured Lastolite black velvet panel, suspended from a suitable stand, completed the picture.
So That’s how it’s Done!!
We have daylight balanced LED lighting in our kitchen, so I left those on during the shoot. The only slight problem was teaching Helen to use the back-focus button (I have all my cameras set up this way for my wildlife photography) instead of half pressing the shutter release, but she picked this up really quickly, and didn’t need reminding to focus on the forward eye.
Until next time,
R.
Feb
06

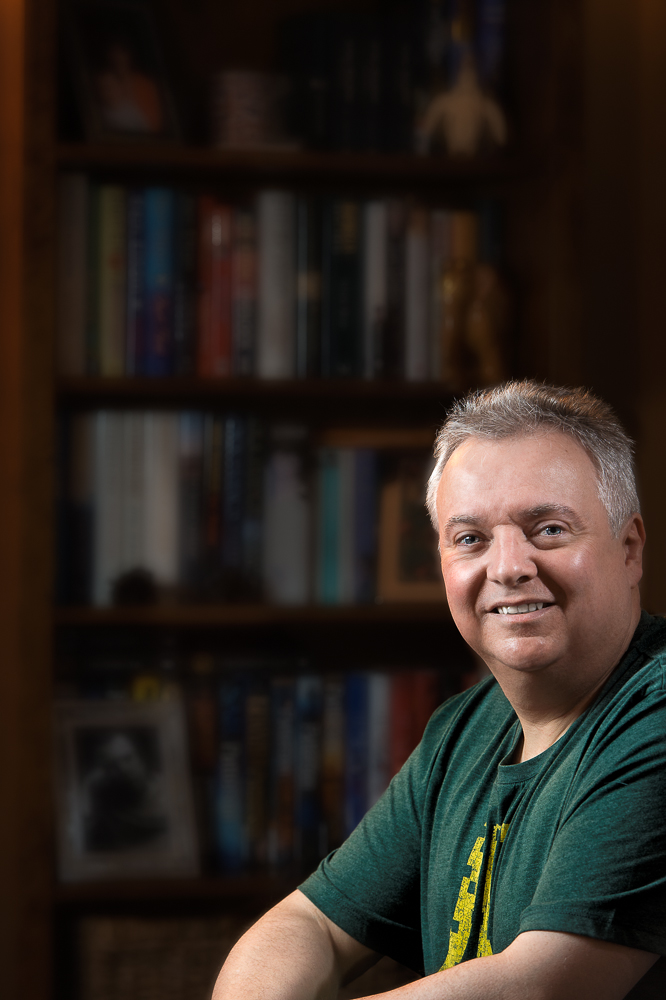
Relaxing at home…
Another Year Older..
Both the Doctor’s Images, and the Doctor himself, are another year older. It has bugged me for some time that my current photo has me with such long hair. Did I ever tell you that story? I really dislike having my hair cut. Just always have done. I only go to have it cut with my family, to places I’m used to. Once happy with a hairdresser I would always go there, even on my own. My spouse, on the other hand, is very fussy. Hairstyle is a business issue as well as a personal one. Picky doesn’t come into it. And she changes hairdresser quite often, which leaves me high and dry. Can’t go back. Too embarrassing to explain why my wife has changed. Nightmare. Several months will go by, and then another few, whilst the new stylist proves themselves and then I can join in. Meanwhile I turn into 60’s man. Work colleagues recognize this pattern. Anyway, we are back where we need to be with Sam again, and my hair is a reasonable length. So time for another picture.
Choosing a Setting
Actually, I quite like the relaxing at home in the library look (although, as you will see, the reality is somewhat different), so I will go with a repeat of that. I thought briefly about a plain black or grey or white background, but then thought something less clinical would be better. I thought about a 2 strobe setup, and whether to employ the same methodology as previously described in The Making of a Self Portrait, but decided against it. Instead, as can be seen from the production shot below, I used a softbox and a grid-spot this time.
 This was no ordinary softbox, but a Lastolite Ezybox 30 inch from their Jo McNally range. As you can see I’m using part of my lounge with a single bookcase, which through careful positioning, and by using a 70-200mm f2.8 zoom, has been made to look like a whole library. As you can also see from the production shot I am using my famous home-made grid spot, the ones made of black straws and cardboard, for the hair light rather than using window light.
Finding the Focus
This was not as easy as it might have been because I was doing this as a self-portrait. Our weekends are very busy and no helper was available. I had a remote release in play and used manual focus via trial and error to find my focus point. I started out using f2.8 to blur the bookcase as much as possible, but this just made critical focus impossible to find on my own, so I moved out to f5.6 which gave sufficient depth of field. My radio flash triggers worked well but I was having a problem with my remote release. If not pressed firmly and precisely downwards, the button caused only one flash to fire, and at first this seemed to weird to be true. This gave an interesting and very dramatic effect (because it was the grid spot) but this was not to be too arty. Common sense would indicate that it must be a flash trigger problem, though this didn’t seem to be the case and after a while I was able to choose one or both flash to fire at will based on how I pressed the button on my remote trigger. So what about the outcome? Well I have chosen 2 shots below as possible to use, and by the time you read this one will be posted in my About page.

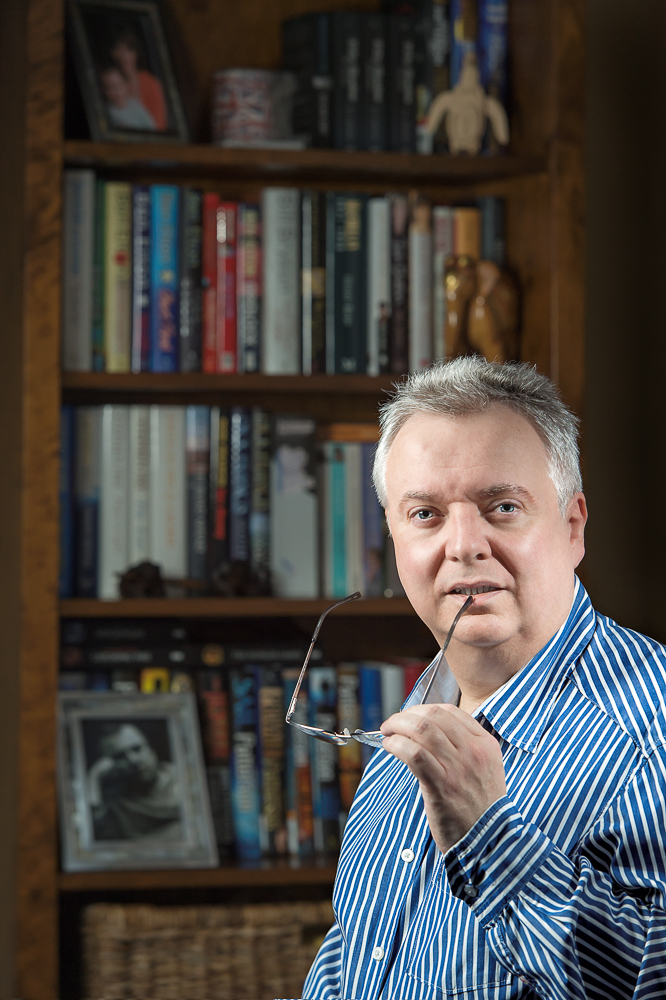 The images were relatively straight forward to edit, but I did use the opportunity to play with onOne Software’s Perfect Portrait 2 which is now much faster and easier to use than previously. There are many things to like, particularly the way in which it uses Bezier curves to select the mouth and eyes. This is so much faster than the previous method which used a mask. Skin smoothing is a real doddle and it is possible to get a really nice skin tone and texture even if the original is quite red for instance. Perfect Portrait 2 comes as part of Perfect Photo Suite 7 which again is worth a look. Comparing these images with last year’s picture, the background blur is much less at f5.6 than that achieved with my 85mm at f1.4, but this is to be expected given that I was much closer in on the previous image. Background blur varies with both the camera to subject distance (a shorter distance gives more background blur) and subject to background distance (a longer distance gives more background blur). So in essence self-portraits, with a lot of background blur, are better taken by someone else!! Well at least focussed by someone else. I have decided to use the more casual looking photo for my about page, and to blur the background a little more in Photoshop using CS6 field blur from the blur gallery.
Blurring the Background in Photoshop
 This is trickier than most people think by the way. If you blur the image substantially, for instance to remove most of the texture from the books, you will end up creating a large halo around the figure on the background layer. So when it comes to mask out the blur over the person, so that they remain sharp, what happens is there is still the halo blur of the figure in the blurred background. You can’t get rid of it, so what do you do? The trick is this:
Copy the layer that you are going to blur, prior to applying the blur, twice. Now, turn off the upper layer and apply the blur to the background layer beneath it, leaving the bottom most layer unblurred and untouched, until it appears satisfactory (in fact go a bit further than you think you need to, you can always fade it back later on). On the background layer (the middle of the 3), use the clone stamp tool to carefully clone appropriate background detail into the halo around the figure, effectively losing the outer rim of the blurred figure. Clone-in until the entire halo has been removed. Now turn off this layer and turn on the top layer. Mask out the figure using whatever technique you normally use. These days I use the quick selection brush to create the selection and then finesse in refine edge to create the mask. This creates a sharp-edged cut out that can then sit in the blurred background. Turn on both the blurred and the untouched background layers and select the blurred layer. Dial down the opacity to taste and you’re done.
In the interests of full disclosure, I have also darkened the background a little too.
Cheers,
R.
Recent Comments