
Aug
26
Photographing Osprey
Birds of Prey / Field Craft / Garden Birds / Nikon D4 / Nikon D810 / Photography / Wetland Birds Posted by Robin
/
2 comments
Photographing Osprey

Full Gas: Osprey Leaves with Trout..
I’m just back from an osprey shooting workshop in the Scottish Highlands. Photographing osprey is a new experience for me, and there are a number of differences in approach to assimilate. But first let me describe the workshop in general terms, before moving into the particulars of the photography, and telling you a secret or two about my personal journey in photography!
Images In Nature
My long-time shooting buddy Geoff and I had booked the Osprey Workshop with Images In Nature earlier in the year. Images in Nature, run by Lee Mott, offers small group nature photography workshops and tours. We stayed in the Osprey Hotel where we were very well looked after by proprietor Sue and her husband John. Lee is a hugely personable, experienced and knowledgeable photographer. He talked us through what to expect the night before, showing us pictures of the venue, describing the hides and, of course, discussed camera settings and the itinerary.
Itinerary and Venues
Photographing 0sprey involves an early start as you ideally need to be in-situ before sunrise. We were to meet outside the Osprey Hotel at 4:40 am and drive the 11 miles or so to the Rothiemurchus Estate in the Cairngorms National Park, Aviemore. The purpose built hides are based in the Rothiemurchus Fishery where they look over a purpose built pond, well stocked with rainbow trout, for the osprey to dive for and catch. You can book the hides at Rothiemurchus independently if you wish, and the Wild Scotland link gives you a sense of what is available. I can, however, unreservedly state that these are the best designed hides that I have shot from in the UK.
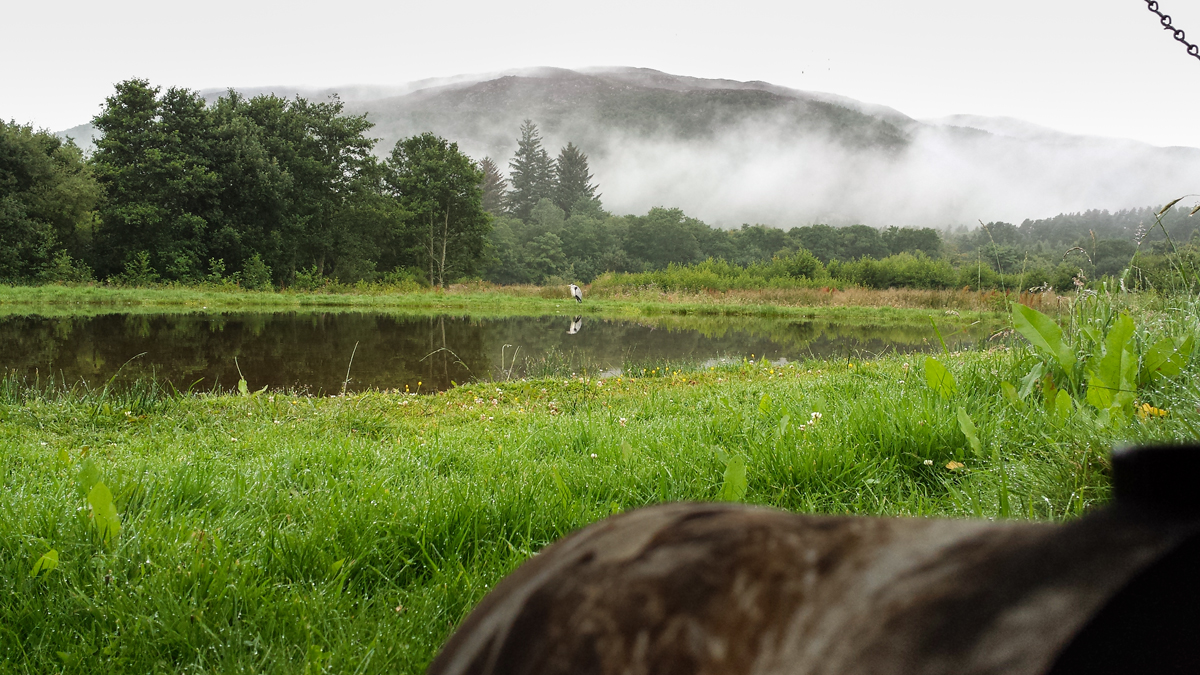
View from the Hide..
On arrival at the fishery, we had a quick coffee and were installed within the hides by 5.30am. There are 4 hides around the fishing pool. The best hide choice depends on the prevailing wind direction because the osprey prefer to take off into the wind (as it helps with lift) and, hopefully, it also helps the photographer to be positioned to see the bird moving towards the camera rather than away from it. During our time at Rothiemurchus the conditions were very still, so we picked one of the middle hides to see what happened. The scenery is spectacular giving multiple possibilities for decent backgrounds and different shot styles. Osprey are not the only visitors to the pond, we had a visit from a field mouse, a family of mallard, rooks, kingfisher and several heron so there is always plenty going on in-between the drama of the osprey diving shots.
After the morning shoot, it was back to the hotel for a fabulous full Scottish breakfast (thank you Sue) and then back to the Rothiemurchus estate to shoot red squirrel, and more traditional garden birds, in the forest in the afternoon.
Key Technique Issues for Photographing Osprey
There are a number of issues to consider, namely, camera settings, fieldcraft and good lens technique.
Camera Settings
Ok, we are only talking Nikon here (I can’t speak for Canon shooters, but if you do shoot Canon you may find these Arthur Morris links useful – Getting the Right Exposure, Camera Settings, Tele-Extenders).
Autofocus Settings
AF-C priority selection = release. Dynamic AF area 9 points. AF activation = AF on only. AF Point selection = 51. AF Continuous and Focus Tracking with Lock on (3-normal). Back button focus is mandatory (well not mandatory, but certainly a lot easier). It’s only fair to say that Lee disagreed with me on the Focus Tracking setting, which he prefers to be set to 1-short or off altogether. I find that I sometimes lose the focus point on the bird and then my focus snaps to the background, or something in front of the bird, before I can get it back again, losing me time and plenty of good shots. For me Focus Tracking is best left on 3-normal or even 5-long (which I use for my red kite shots). If I had Lee’s experience and skill I could probably get away with 1-short, but that’s the benefit of being a professional, you get loads more practice! Use what works for you. It goes without saying that you will be shooting above a 1/500th second so Vibration Reduction should be set to off.
Aperture, Shutter Speed and ISO
As I have mentioned in my blog before, exposure is a perennial difficulty when shooting birds in flight, especially ones like osprey with an intrinsic high dynamic range against a rapidly changing background. I like to shoot manual for this, and so too on this occasion!
At 5.30am in mid-August it is pretty dark so you are dancing a very thin line in order to get useable pictures. Lee’s, very sensible, approach is to start off wide open at 1/500th second with whatever ISO gives a decent exposure. Clearly you risk subject movement at a 1/500th second but, in a way, this can paradoxically enhance a shot with an osprey taking off from the water because it gives a dynamic sense of movement and action with blurring of the wing-tips and water splashes, but still good potential for tack sharp eyes and fish. As the light improves you can increase shutter speed up towards 1/1600 and then reduce ISO to reduce noise. I tend to make 1/1000th second shutter speed my initial priority and then reduce ISO and increase shutter speed in tandem. It’s a percentage game really. Finally, if the sun comes up (it doesn’t always) you can also increase aperture from f2.8, f4.0 or f5.6 (depending on what lens/teleconvertor combination you have) up to about f7.1 for optimal depth of field. On two of the days we had mostly dull and overcast weather and I never got out of f2.8 on my 300mm Nikkor.
Avoiding blown highlights remains something of a tricky issue, and even shooting manual, you have to take account of changing contrast levels in the scene and leave more leeway as the contrast increases. So in dull flat light you can expose further to the right than you can in bright sunlight for a given exposure reading taken from an average tone in advance. As I have said before, I will often use a patch of grass, but this is not always available, and the direction that it is lit from (and how wet it is) can all give a misleading result. I don’t think there is a hard and fast answer to this. On this occasion I knew more or less where the osprey were going to dive and I used the whole scene to take my initial exposure via matrix metering, leaving 1/2 to 1/4 of the histogram width in leeway (i.e. shooting markedly to the left) according to the contrast in the scene. On other occasions I might use spot metering, it just depends on what’s around to take a reading from.
In the interest of full disclosure, we had a heron at the poolside for the majority of the shoot and this was perfect as a cross check for blown highlights. Still, heron images beats endless photos of an empty perch by a huge margin!!
Lens Choice
The Rothiemurchus setup is really excellent and the birds are fishing very close to you. I used my 300mm f2.8 on my D4 (better for me on this occasion, given the light, than the D810, at least until the sun came out!) without any teleconvertor assistance. This was perfect! In fact, I could probably have used my 70-200 f2.8. The wingspan of the osprey can be up to 6 feet so it is really easy to get clipped wings as they fly past. It may be that a 70-200mm with a 1.4x tc would be the perfect setup to begin with – but hey, I’m addicted to sharpness, so what can I say, I used the 300mm!
Fieldcraft
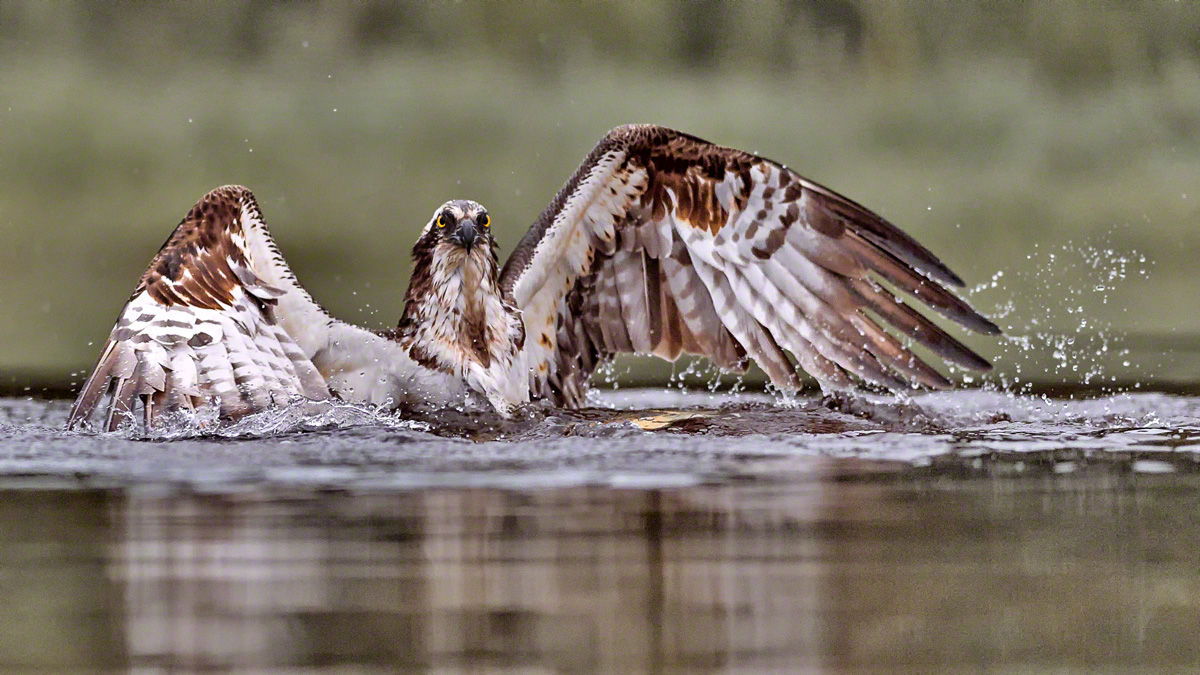
Osprey Landing..
The Rothiemurchus Fishery setup is particularly helpful for photographing osprey because they provide an experienced gillie to spot for the photographers. The gillie watches the osprey and keeps the hides informed on what the osprey are doing via two-way radio communication. The gillie tells you when they are circling over the pond and when they are diving. These guys are all very experienced (we had 3 different gillies over the 3-morning shoot, all excellent) and they don’t waste your time getting unnecessary hopes up. They all know the osprey behaviour well and can often recognize the different birds by sight. The heron can be problematic photo-bombers if they are standing opposite the hides. The gillies would even tell us when it was safe to leave the hide to move them away. It took me a while to realise that this was an opportunity for heron flight shots (but it was 5.30 am after all!).
It’s really important that you do not track, and photograph, the osprey in flight before they dive for fish because this tends to spook them and that bird will not return that day. Luckily, during the osprey season, there are many local pairs of birds with young to feed so you do typically get quite a few opportunities. It is crucial to wait until the osprey has hit the water, then you get focus and keep it as the bird exits the water and flies away with the fish (hopefully). The osprey will be in the water for a few seconds as it has to kill the fish and then manipulate it into a carrying position before exiting. The osprey can move through 180 degrees during this process so it’s worth waiting until you get a pleasing composition in the water, rather than wasting buffer capacity taking shots of the back of the osprey’s head. Once the osprey start to exit the water things start to happen really fast. The wings are enormous and it’s very easy to underestimate how far up the frame they will travel as the bird flies off. Using the central focus point makes sense because you have the fish to worry about at the bottom of the frame and the wings at the top, plus it is the most sensitive focus point in low light.
Gimbal Head Technique
Have you ever had that experience where something you thought you understood (and worked well for you) was completely wrong? Well this happened to me on this shoot, and here’s how! On Friday 25th September 2009, Geoff and I attended our very first raptor shoot with Mark Sisson (another phenomenal wildlife shooter and author). Arguably the very starting point of my journey into wildlife photography! I was using my new gimbal head for the very first time with my 70-200mm f2.8 VRI with 1.7x teleconvertor on my D3, and was having a great deal of difficulty getting a sharp shot! This was a tad disappointing given that I was using my best kit and the raptor wasn’t even moving! Mark came over and suggested I try a few things, namely switching my gimbal head from right facing (as I had it) to left facing. The benefit of this would be that I could lean down on the gimbal with my left hand to steady the shot.
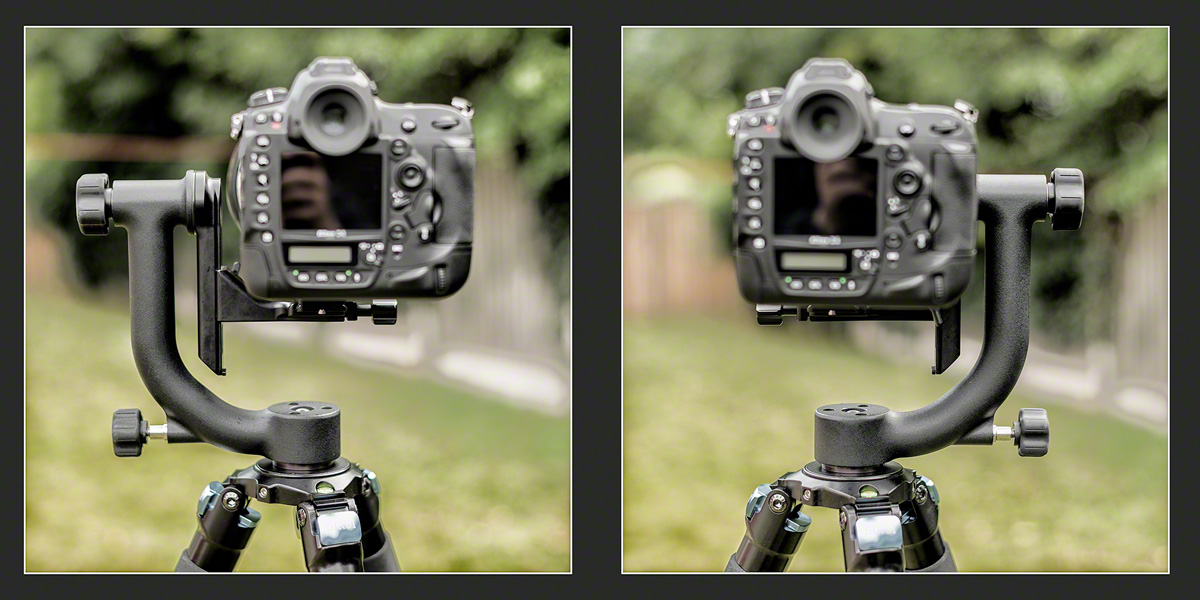
Left-Facing and Right-Facing Gimbal Positions..
This worked out pretty well for me and I’ve used it ever since. I went on to learn that steadying the lens with a hand on top was also useful, and a rubber eyecup to make it more comfortable to press the camera against your eyebrow also helped long-lens technique. Mark definitely put me on the road to better long lens technique, and I’ve been getting sharp shots with very long lenses ever since. But left facing is NOT the best for me, right facing is! Thanks Lee, for pointing this out, not least because I didn’t want to hear it, and you kept going irrespective of my arrogant unwillingness to listen! Here’s the crucial thing. I’m right eyed! This means that I sight with my right eye to the viewfinder but, if the gimbal is left facing, I cannot see a lot of what is coming in from my left-hand side because my open left eye is hampered by the locking ring and upright arm of the gimbal head.
In retrospect it’s all too painfully obvious. I have frequently been reliant on colleagues calling the arrival of wildlife subject matter that I haven’t yet seen. I’ve been amazed that they spot things so quickly when I don’t, I just thought I must be slow, or old, or needing stronger glasses, but actually, there may have been a more obvious reason all along — I was blind-sided by my gimbal head!! Actually, if you think about it, right-eyed people are at a disadvantage anyway because there is more camera body to the left of the viewfinder which tends to obscure the view from the open left eye anyway, so a left facing gimbal head just makes things worse.
I think that the proof of the pudding was that I had no trouble at all sighting a (very small in the frame) kingfisher hovering over the pool, focussing and getting some sharp shots. See them below. The other clear advantage of using the gimbal head right-facing is that you have better access to the lens controls for VR-On and Off and Manual focus adjustment. I found myself more willing to adjust manual focus in the moment as it had been quite awkward with the left-facing setup.
The Images
Heron (the Vital Bit-Player)
Osprey (the Main Event)
Kingfisher (Proof I CAN Still Learn New Stuff)
The Ducks (Who Can Resist Them?)
So, in summary, I had a great time with Images in Nature and would recommend them to anyone interested in an immersive wildlife photography experience. Thanks again Lee!
Enjoy your photography,
until next time (woodland birds and red squirrel coming soon..),
R.

Aug
03
Preserving Highlights whilst Shooting in the Midday Sun
Sandwich Terns and Gulls at Cemlyn Bay
I was recently out shooting at Cemlyn Bay and Lagoon on Isle of Anglesey. This area is famous for its Sandwich Terns and I’d popped along with a view to taking a few Tern and Gull images. The day we picked to go was bright and sunny, and we were there late morning, all of which was less than ideal. When I’m shooting wild birds in flight, I always spend a few moments working out the correct exposure, because I cannot stand reviewing my images to find blown-out highlights. Getting a good general exposure that encompasses preserving highlights, without unnecessarily under-exposing the rest of the shot (in other words shooting to the right) can be crucial to ensure a reasonable result when the birds are flying in and out of various lighting conditions.
The Aperture Priority versus Manual Exposure Shooting
Many, perhaps most, wildlife photographers shoot aperture priority and use exposure compensation. I have found that, although I have a fair idea what my D4 might think is a correct exposure, and therefore what exposure compensation I might need to dial in, in a range of circumstances, this method is completely impractical for judging exposure when photographing birds in flight. The reasons for this include:
- The relative size of the bird in the frame changes as you track it.
- The colour and brightness of the background may change.
- The lighting on the bird may change as it flies under cloud, landscape or building shadows.
- The position and brightness of the highlights on the bird may change.
All of these factors make preserving highlights particularly tricky as you need to make very complex judgements, at high speed, whilst also trying to keep the bird in the frame. You are effectively fighting the camera in this situation and there is just, for me anyway, too much to do at the same time.
Setting up for Manual Exposure Shooting
This is my process for preserving highlights. Firstly I find an area of mid-tone, usually a patch of grassy field, then with my camera set to manual exposure I zero the meter in the viewfinder and take a test shot. Clearly if the subject will be in the sunshine, your base exposure should be set using a grassy field that is also lit by sunshine. If there is no mid-tone available you could also just take test shots of your subject instead, but this will take you longer.
The chances are that, if shooting a white gull for instance, even having taken a good base reading, there will still be some blown highlights if the bird is in the bright sunshine. This being the case, I adjust my shutter speed (upwards) or ISO (downwards) until they are gone. Usually, with my bird photography, I will be using my 600mm at f4 and looking for at least 1000th, preferably 1600th-2000th, second to freeze the wing tips.
In and Out of Sunshine
In the situation where there is a major shadow in the overall scene, and the birds are moving in and out of that shadow, you can take additional test shots to establish the exposure for that too. Again, according to circumstances, you might use a decrease in shutter speed or, more likely, an increase in ISO. Once you have established the settings for the shaded area it is easier, using the in-viewfinder information, to alter the exposure by the exact amount needed during actual shooting. Equally, if you were shooting at f8 in the sunshine for example, you could open up the aperture instead using the same method, though this will change your depth of field.
Shooting in Overcast Weather
Preserving highlights in overcast weather may be more straightforward in the softer light. Nevertheless when shooting in overcast weather, it is still sometimes the case that you take a base exposure and still get a small amount of apparent highlight clipping. If you have been shooting raw files this is easily retrieved in post production. It is up to you whether you take this chance or not, but my advice would be that, in this situation, you don’t delete any shots because of the blinkies as they may well be salvageable. For myself, I would still try and find an exposure to preserve the highlights if possible.
Cemlyn Bay Shoot

May
26
Time Flies When You’re Having Fun
Time flies when you’re having fun (or very busy at work), and perhaps especially when you have a day out at Martin Mere Wetland Centre. It’s huge, but well laid out, with a number of handy, and very well specified, public hides from which to mix with twitchers and shoot long lens wetland birds. I can hardly believe that it was the 9th of April 2013 that I was last there, it’s now nearly 7 weeks and I haven’t published any of my images yet.
Routes Round the Martin Mere Wetland Centre
The handbook, or walkabout guide, contains a route map, several suggested routes and some very handy information on a variety of species. There is a nature trail map, some photographic plates and a Wildlife check-list to tick off your sightings. The Marsh harrier, Whooper swan, Bewick’s swan, Pink-footed goose and Tree sparrow are filled in at the head of the list to get you started. We did in fact see a Pair of Marsh Harrier’s last time out, but not this visit. I think that my favorite part of the handbook is the fold-out back cover that contains 121 colored drawings of ducks, geese and other birds to help you with identification. WWT Martin Mere is one of nine unique wetland visitor centres in the UK run by the Wildfowl & Wetlands Trust. All the paths have a tarmac surface so they are an easy walk and reasonably clean to lie on to get a good low angle for birds in ponds. Martin Mere Wetland Centre opens at 9.30 am and closes at 5.30 pm in the summer and 5.00 pm in the winter. The grounds are open for one hour after the building closes but visitors must then leave through the exit gates.
Images from the Hides and Ponds
Post Processing…
Some time is inevitably spent trying to work out what I have photographed, not always with any success. I get swept along by the photography, so tend not to remember to take a note of the species names where those are noted at the pools. So for this reason I am indebted to Belinda Barker, office manager at WWT Martin Mere Wetland Centre, for putting names to quite a few of the images you see above.
Otherwise, getting the correct exposure is most of the battle with images of water birds. The brightness of the water or the sky tends to lead to underexposure which can mean blocked up blacks. Post processing involved the usual passage through Photoshop Lightroom 4 for tonal range, contrast and vibrance, with a brief foray into Photoshop to further improve the mid-tone contrast and some very careful multi-pass sharpening.
Best wishes,
Robin.
Recent Comments