28
2013Drop Collision Photography, Paddling About in the Water of…
The Machinery for Drop Collision Photography
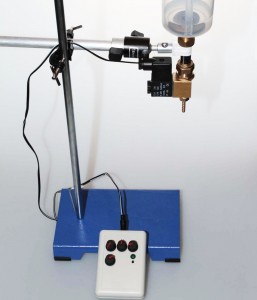
First off, I was alerted to this new drop-image possibility by a review in Amateur Photographer (January 26th edition). The kit in question is the SplashArt Kit Mark II, manufactured by High Speed photography Ltd, 31 Roebuck Lane, Buckhurst Hill, Essex IG9 5QN. Their website is www.phototrigger.co.uk. Tel: 07905 836280. My pal Geoff was similarly taken and, without further ado, purchased said item and brought it round for a test shoot for which I supplied the set and the lighting.
There are 4 dials on the control box, with line markers but no scale markings or labeling, so it all seems like guesswork to start with. From left to right (and top to bottom) the dials control; the size of the first drop, the time delay between drops, the size of the second drop and the camera delay adjustment. There is a small micro-switch that controls the mode (1 drop, 2 drops or 3) and is responsible for firing off a round of drops and triggering your camera. As others before me have said, the apparatus is reminiscent of the retort stands we used to have in school chemistry lessons with an additional gizmo attachment at the end. The drop container looks like a small sandwich box of the type popular in supermarkets now, though this does not impede its functionality. Un-clipping the top to add colourants to the drop mixture will move the retort stand however, so you will need to refocus if you do.
For lighting the drop collision photography I used 2-3 SB900 strobes set to 1/128 power fired through a translucent (clear) plastic A4 ring binder cover (with the ring binder removed) to backlight the drops. I would have liked to use a translucent plastic sheet similar to those used on light-boxes or x-ray viewers, but I did not have time to source this for our shoot. I angled both strobes at 45 degrees, to begin with, both at the same height. I quickly realized that a diagonal spread of light would be better so moved one of the lights onto a light stand.
The Technique
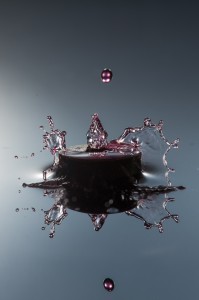
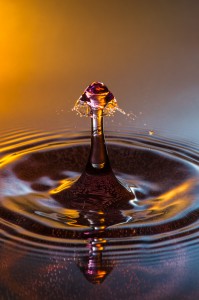
In order to start our drop collision photography, we set the SplashArt kit to 1 drop mode to find the focusing point. First time out I used the knife-edge method, but I have now found a better way. I used the dual threaded spigot that comes with my flash brackets. It has a thread each end and is shaped like a small metal reel. It is reversible so that it can be attached to two sizes of thread and then acts as the spigot that you clamp your bracket onto in the same way that you would use the top of a formal light-stand. I placed this in the drip tray and fired off a series of drops adjusting the position each time until the drops fell inside the small threaded end. This works much better because you don’t need a second person to hold it still whilst you focus and can get a more accurate result. When using a macro lens it is quite difficult to get the whole splash in focus, and this way you know where the front and back of the drip will fall, so you can focus on the front edge, back edge or in between according to what you prefer to be most sharp. As you can see, this drop was slightly to the right of the threaded hole at this point (greater splash to the right). It was also a 2 drop scenario because we hadn’t yet switched the SplashArt kit to single drop mode. You will notice that the drop is red colored. We didn’t start off this way, we began with clear water in the tray and the dropper, but this shot from later on in the shoot was necessary to reposition the camera focus following moving the drip container in the process of putting pink food colouring into the top and stirring it.
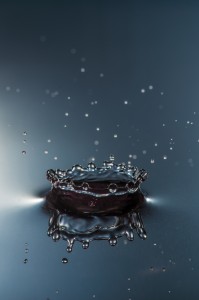
The next logical step was get a feel for where the drops fell in the two drop mode and how much camera delay would be required to get a pit, crown, or a pole.
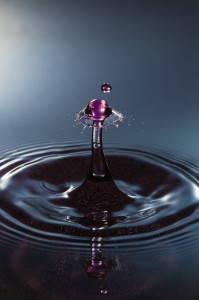
Once this is done, the next step is to control the spacing between drops so that there is a collision. The size of the drops that collide seems important and I think that similar settings on the dials for the first and second drops (first and third dials) helped me get a satisfactory result with the SplashArt Kit. The sign that you are approaching the correct timing between the drops is when you start to see some action at the tip of the pole, for example:
Once this point is reached a smaller further closing of the gap between drops may be necessary, and thereafter just plenty of trials, until you get some attractive results. All the shots you see here in the slide show were made first time out with the SplashArt Kit Mark II. One session of 4 hours or so got us all these shots (minus a coffee and brief lunch break of course). There is a lot of variability between shots. I don’t know whether this is because the timer cannot perfectly control the drip valve, or whether there are timing issues with the flash. My SB900 strobes, as usual, were fired using my trusty Flex Mini TT1 with AC3 controller and TT5 trigger combination. This gives on-camera control of the distant flash which makes for less walking round the studio (kitchen) and speeds things up a little. I suspect that there is no particular issue with the flash timings (but can’t completely rule it out) as at no point do I see a double drop image which means that both flashes trigger at the same time. Not bad when the flash duration is 1/38500 of a second!!
More on the Lighting
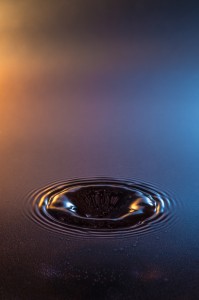
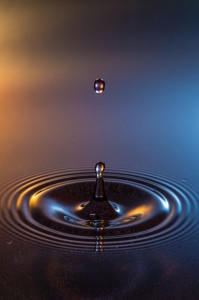
As you can see from the slide show, and the production images, I have used a selection of coloured gels on the strobes along with changing up the position of the strobes relative to the translucent plastic background. I must admit that my selection of gels is a bit limited, but the combinations were:
- White on White
- CTO (orange) on White
- CTO on Blue
- CTO on Red
I have also got green gels (to colour match for flourescent lights) which might also have looked good but I didn’t think to try. Needless to say there are a couple of approaches to white balance settings in this situation. You can use tungsten or cloudy settings for, instance, to produce a uniform rich yellow or blue colour. Alternatively, as I did here, you can use the preset flash white balance to produce an overal neutral result but then gel the flashes to produce the colours. This is my preferred approach because, although it requires multiple strobes, you do get greater flexibility.
It would be possible to set up a single coloured, or patterned multicoloured (perhaps printed out on a home inkjet printer), background, and reverse light that to get similar results to the multi-strobe effect.
For water drop collision images you do really need to backlight. For milk images you can front light, and for the closeups you see in the slide show this was really necessary to counter some of the shadows produced by side lighting. In fact I ended up using three strobes. A single backlight and two front lights. The front lights were camera right at 45 degrees and camera left at 45 degrees but much higher up to light into the extensive crowns. We might have been ok with a single front strobe placed centrally and above the camera in order to throw the shadows behind the splash.
More on the Fluids
Since my first attempt at drop collision photography, I have been reading Corrie White’s Comprehensive Water Drop Photography Guide. You will find a lot more detail on what you might do to water to thicken it, and some further tips on lighting milk etc. What I have realized is that it is easier to get spectacular crowns, and some really interesting graphic shapes, using the thicker substrate of milk, than it is with water. In fact, as Corrie points out, there are some things that you just can’t do with water alone. Clearly thickening water with sugar or guar gum also has side-effects to the look of the resulting solutions, so sticking with plain water is probably best. Nevertheless the old school physics fact that water is densest at 4 degrees centigrade is worth knowing and using here. So next time I will definitely try using very cold water and placing some ice cubes in the drip dispenser and into the drip tray.
Colourings
We only had red food colouring at our disposal this time out. Clearly there are many others that you could purchase fairly cheaply. I have heard that some people use printer inks, but this may be quite expensive. Red looks great in contrast to the white milk. One tip for the milk shots using coloured drops, you need to stir the drip tray in between trials to whiten up the milk again. You could also put colouring into the drip tray and experiment with the two colours mixing together in the drip stem. I really do think that you are limited only by your creativity.
Things to Try
- I really fancy having a go at splashes inside bubbles. Wow. Can’t wait.
- Splashes where the drip container is a crystal glass, or similar, and can be seen in the shot.
- Odd looking colour combinations.
- Several splashes composited into the same shot.
Until next time,
Robin.

John
I’m looking for some insight on camera settings. I just bought one of these Splash Kits and have been over the web to find some settings where to start. Some say shoot in total darkness, with different speeds from 1/250 to 1/2 sec. So any start up setting would be great if you could help. Right now I’m shooting D700 and or D600, with SB-900 and SB-800. The SB-900 is on a cord from the camera and the SB-800 is set as a slave.
Robin
Hi John,
Despite the advice that you should photograph the dials once you find the correct settings, you would never be able to replace the dials on the SplashArt kit to exactly the same position. Secondly, the timings will depend on the height of the dropper from the water tray, which might vary a little. There also seems to be some slight variation in timings around the mean anyway. So my advice is to follow what I did to come up with your own settings. Start with one drop and make sure you can get pictures reliably, then move on to two or three drops. Try starting with one flash triggered by cord. Set it to manual at 1/128th or 1/64th second. You don’t need to shoot in the dark but should avoid trying to do this in bright sunlight as you wouldn’t have enough flash power to overcome the ambient light. So choose a lighting level that is subdued but you can see what you are doing clearly. It is the flash speed that freezes the drop, so the shutter speed can be anything within the sync speed range. The setting you use just has to ensure that, in combination with your aperture, it kills the ambient light.
I always do a test shot without flash first to make sure that the frame is dark and the lighting comes only from the flash. The reason for using manual flash is that it is always the same. The reason for using 1/128th or 1/64th is that this gives the fastest flash burst and therefore the crispest and sharpest photograph. You will need to have your flash as close to the drops as is practical to ensure there is enough light, and titrate your ISO and Aperture to ensure the correct flash exposure, bearing in mind that the flash highlights are specular so a certain amount of blown-outness is acceptable. If you don’t want blown highlights you may find that the overall image is just too dark.
Just to give you an idea, I used Manual Flash at 1/128th second, ISO 200, 1/250th second, F22 with a 105mm Nikkor F2.8 VR. The rest is just patience. Once you get a single drop image right you can add in the second drop. Then adjust the timings so that there is a collision and then further adjust to get the overal results you want. I would say, that because of the variation of timings around the mean, always try a few shots before changing a setting. I don’t know whether it is the electronics that cause the variation, or whether it is the height of the water surface at the time you trip the trigger that matters, but something varies.
Hope this helps,
Let me know how you get on.
Robin.
Pedro
Hi Robin,
Excellent set of images, how much post processing has been done here?
Ordered my SplashArt Kit the other day, should be here Tomorrow or Friday, can’t wait to get shooting.
Like you I have plenty of ideas to fry, and no doubt fail initially, but hopefully should be able to get some decent images fairly soon.
Using a Canon 5D MK11 and a couple of Yongnuo YN560ii bought for the job, going to fire them as slaves from my 430EXii, or at least that’s the plan anyway.
What are you using for backgrounds, I’ve ordered some A3 sized opaque and frosted perspex, going to try shooting through that for defused light, and also use it to hang coloured card/patterned card to it.
What’s your views on the idea of the perspex.
PedroPedro
Woops,
i guess it would help if i actually read ALL the post before asking about the backdrop. Sorry.
Robin
Hi Pedro,
The perspex should work really well. Similarly I have used the translucent plastic covers that we have on A4 ring-binders to good effect. They can be purchased at many stationers and supermarkets very cheaply in the UK and doubtless elsewhere.
Let me know how you get on,
Cheers,
Robin.
kirit engineer
Sir
Where do we get this kit. In usa.
Pl do let me know sir
Great great work
Regards
Kirit
Robin
Hi Kirit, check out the purchasing options at the Photo Trigger website.
Best wishes,
Robin.