
Jan
05
New Year, New Profile Photo for LinkedIn
Photography / Photoshop / Portfolio / Portrait / Studio Flash / TDI News Posted by Robin
/
0 comments
The Making of a New Profile Photo for LinkedIn
The Reason Why…
I have been working on my social media profile for a few weeks now. I have a Google+ account, with a page for TDI, an Instagram account and most recently a LinkedIn account and now Twitter. I am in the process of getting to know the strengths and weaknesses of these, how they work, and how best to engage with them and will be linking. My LinkedIn account is really to support my other career as a psychiatrist but I have previously used the same (branding) image as for TDI and my other accounts. Thinking that I probably need something a little more formal, my wife agreed to help me take a fresh portrait for LinkedIn.
A New Fridge-Freezer, A New Problem
Towards the end of last year our built in Fridge-Freezer decided that it would start freezing everything in the fridge, as well as the freezer, and to make so much ice that the drawers in the freezer wouldn’t open at all. Fearing a fire, and not having enough time to source a reasonably priced built in unit, or re-fit it in the appropriate cupboard, we elected to have a free-standing unit instead. In fairness this has been a great success, my daughter has decorated it with magnets, and uses it as a noticeboard for maths puzzles for her poor old dad to write down and solve. But here’s the rub. I can’t easily move the kitchen table out to the side like I used to, because a third of that space is now Fridge-Freezer!! So using the kitchen as a studio to capture a new profile photo is a world more grief than it used to be. Still, I needed some exercise because the weather had trashed our planned cycle ride today (too much ice this morning, too much rain and gale force winds this afternoon). Plus my bike’s not well at the moment either. So moving a heavy table and running up and down stairs a lot seemed just the ticket.
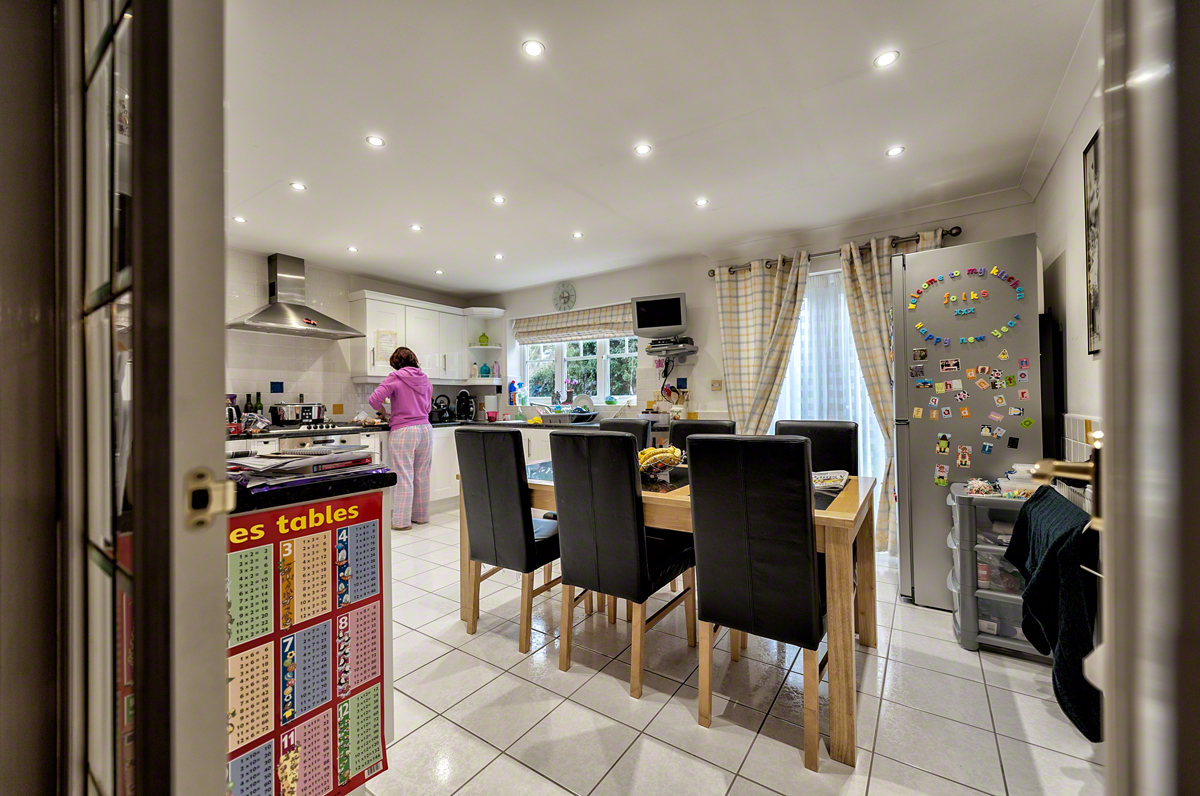
The Area to Clear, Ho Hum..
So here’s the thing, that kitchen table had to go out in the hallway. Would it go out through the doors? Could we lift it? If it was out in the hallway, could we get back in the kitchen? Was I going to be able to carry my equipment from upstairs past the obstruction? Who knew, we had to give it a try. After, that is, Helen had cleaned the floor!!
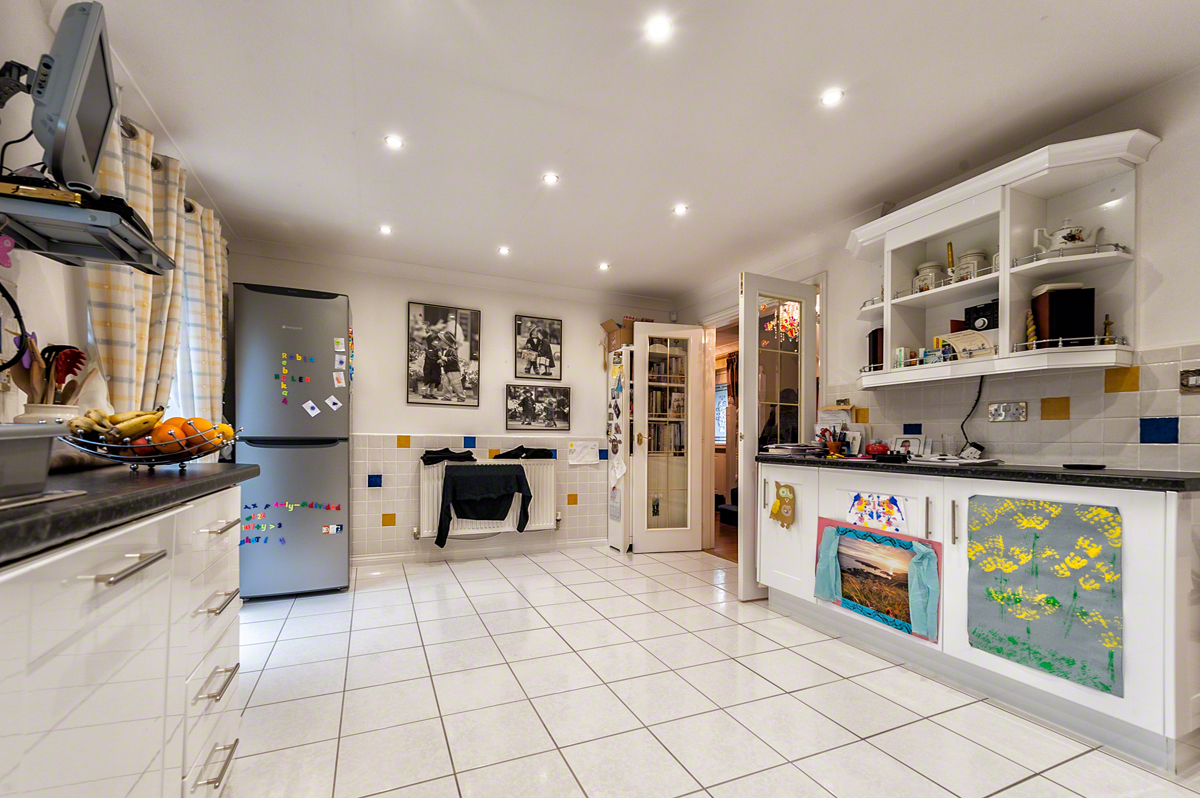
Phew, That Looks Better!!
After much shoving and scraping, and even more hoovering and washing, a space was made available in the now pristine cooking and dining area. So, whilst Helen moved on to pastures new, for further housework opportunities, I set about bringing the necessary equipment downstairs, and stockpiling it into the hallway. Hmm.. That’s a bit of a mess you’ve got there thought I. I wonder how long Helen is going to stay patient with you?

Hallway Carnage…
So onto the setup and test shots. I went with the D4 with 70-200 f2.8. This was going to be quite heavy for Helen, but she was confident that she could manage anything I threw at her. I decided not to shoot tethered. It was just one portrait and the image on the back of the D4, particularly with the 3 channel histogram, was more than sufficient to judge framing and exposure. I used my favorite portrait set-up of the Lastolite Triflector and Nikon Speedlight fired through a Joe McNally Ezybox with soft white interior and 2 layers of diffusion. For separation I used a second speedlight (an old SB800, in SU4 mode at 1/32 power) fired through a Bowens grid-spot attached via the rather superb Interfit Strobies XS Int326 gizmo. As usual, the camera was connected to the key light using a PocketWizard Flex Mini TT1 and Flex TT5 set up with the AC3 Zone Controller set to -2/3 exposure compensation, with ISO 200, 1/160th second and f8. Finally, my favoured Lastolite black velvet panel, suspended from a suitable stand, completed the picture.
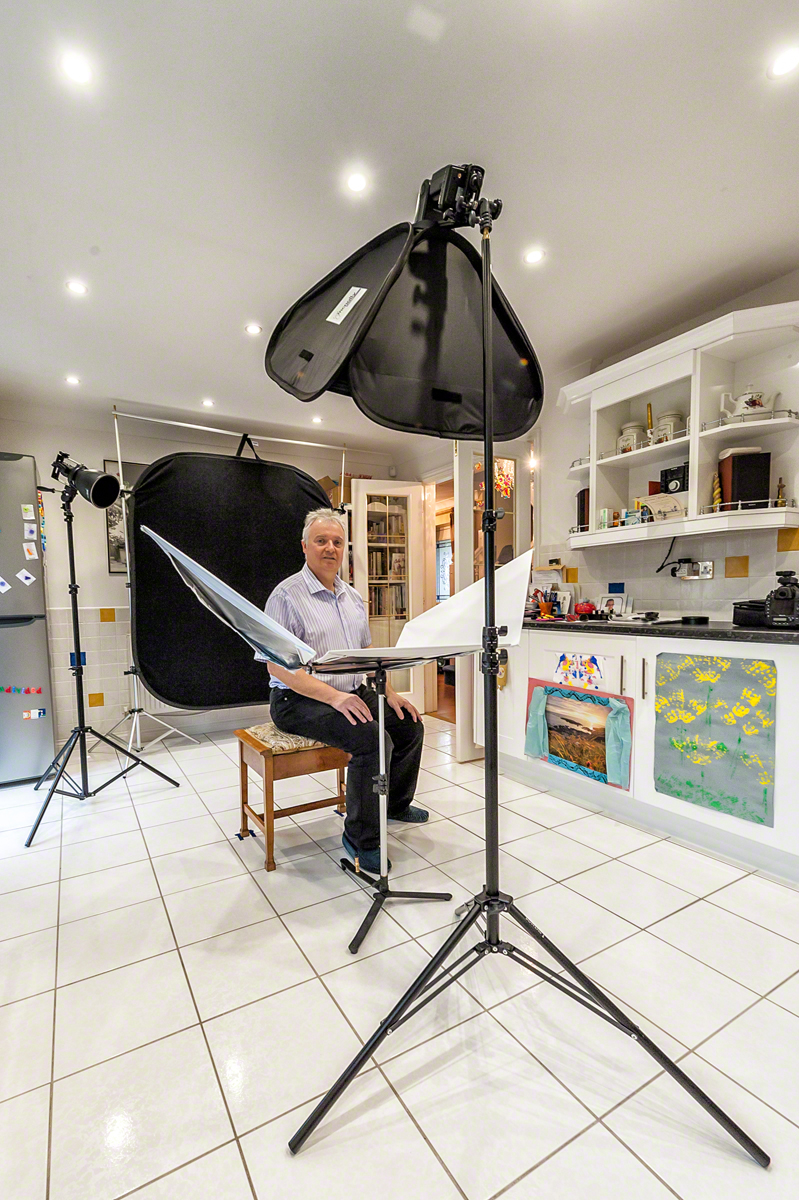
So That’s how it’s Done!!
We have daylight balanced LED lighting in our kitchen, so I left those on during the shoot. The only slight problem was teaching Helen to use the back-focus button (I have all my cameras set up this way for my wildlife photography) instead of half pressing the shutter release, but she picked this up really quickly, and didn’t need reminding to focus on the forward eye.
Until next time,
R.

Apr
08
Photographing Roses
Focus Stacking / Macro / Nature / Photography / Photoshop / Studio Flash Posted by Robin
/
0 comments
A Rose by Any Other Name
I hadn’t started out to do a studio flash session photographing roses, but on thinking about what background colour would suit a white and pink rose, I realized that it had to be bright white and not grey, so the available window light session that I had planned quickly turned into something else entirely.
Photographing Roses Against a White Background
 Photographing roses against a white background requires the same technique as for photographing a portrait, or anything else, against a white background. The background has to blown-out, but only just blown out, in order to avoid too much flare and contrast reduction from the resultant backlight. People sometimes talk about getting the background about 2-stops hotter than the foreground, which is another way to go, but I treat the background (which, by the way, needn’t itself be white!) like I would treat a snow scene. I will take a couple of shots with just the background lit, and increase the exposure, from metered, up a couple of stops or so, until it is just blown out. I will then turn the back-lights off and use the main light to get an exposure for the subject. For this shoot, I used 3 x SB900 strobes. 2 for the background, either side at 45 degrees, and one in a Lastolite Joe McNally Ezybox Hotshoe for the main light. I prefer to shoot manual as much as possible these days, so the Camera was set to 1/200 second at f11, ISO 200. The lens was a 105 mm Micro Nikkor on a D3, and I used 2 layers of diffusion in the softbox. All 3 flashes were set on manual, and the amount adjusted for correct exposure. I like this setup because nothing changes (except perhaps the ambient light), so all your shots are perfectly exposed and provided your strobes aren’t maxed out (1/1) you can take a small burst of shots if you need to, for instance with a moving subject.
Focus Stacking
 Photographing roses with a macro lens, close up, can lead you into problems with depth of field. This is often livable with, particularly if your shot includes quite a bit of stem and you are further back, but close-in you will have to make a decision about where to focus. I had just been reminded of the possibility of using focus-stacking in an article in Am Phog (Saturday 6th April 2013, Martin Evening’s Retouchers’ Guide), so thought I would give it a go here. By the way, Martin Evening’s books, ‘Adobe Photoshop for Photographers’, ‘The Ultimate Workshop’ and ‘Photoshop Lightroom’ are all very useful tomes if you get a chance to read them.
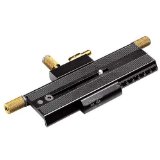
Focus stacking is often used in macro photography, especially for extreme close-ups of things like small insects. It is often not straightforward, however, and there are several gotcha’s to be aware of. It is best to use an uncluttered plain background because as the lens elements move, the relationship of the subject to the background can change, making the blend between layers harder to do manually (or trick the software and end up with a small areas of blur that really stand out). Having a lens that focusses internally helps (but doesn’t avoid the problem completely), and sometimes you get a better result by using something like a Manfrotto 454 Micro Positioning Plate. What this does is allows you to slide the camera and lens combination backwards and forwards by very small amounts using a thumb-screw. This can be much easier for small focus adjustments when you are very close in and the depth-of-field is only a millimeter or so, where the lens’s own focus ring gives too course an adjustment.

 For good focus stacking it is said to be best to use an aperture that represents the sharpest focus of the lens, which on my 105 is f8 or f11), in order to avoid diffraction effects. There are several good focus stacking software programs available, but I use Photoshop because I don’t do this very often and a bespoke software solution has not seemed warranted. The process is quite straightforward. Take a series of photographs (in this case of your roses) starting at the foremost focus point, working through to the rearmost focus point. Select the files in Bridge or Lightroom, then using the tools menu choose Photoshop –> Load Files into Photoshop Layers, or in Lightroom, right-click on the selected files and go to Edit In –> Open in Layers in Photoshop… Once the files are in a single Photoshop document. Select the layers and go to the Edit menu and choose ‘Auto Align Layers…’ using the Auto Projection method.
 The next step is to merge the layered images together. Go to the Edit menu and select ‘Auto-Blend layers’ making sure that the Stack Images button is set and the Seamless Tones and Colours also checked. From then on it’s just a matter of clicking Ok and waiting a while. As I have mentioned, you may not get perfect results and, for this reason, you may want to manually select appropriate images, stack them, and blend them manually yourself. This is not for the feint-hearted, but does give you a great-deal of control over the final result and this is what I did here. I suspect, but have not checked out myself, that it makes a difference to Photoshop that the images are in depth-of-focus stacking order, rather than in a random order. Sometimes you get a really excellent result, other times less so. At the point of capture it is not always clear which bits of an image are at which depth, so you can end up going backwards and forwards a bit.
Until next time,
R.
Recent Comments