
Apr
09
Shooting Red Kites at Gigrin Farm
Time-off is Precious!
It’s been a while, in fact, as I think about it, I haven’t been to Gigrin since I purchased my D4. The last time I was there would have been 7th April 2011, 3 whole years ago to the day. Since I adopted cycling as a new pastime there has been increased pressure on my photography time, to a point where it can be months between structured shoots. But this week, I’ve booked in a couple of days shooting, of which this was the first.
Facilities at Gigrin
Hides for Photography & Filming
There are a range of Hides for the photographer. The ground level hides are adequate for photography for those with compact cameras and DSLRs, whilst the tower hides have been built for photographers with more professional equipment in mind. The Gateway hide is around 4m closer to the kites than the towers. The tower hides have a partial roof as protection, and a bench fitted to the rear of the hide with coat hooks on the left-hand side. This arrangement is ideal for panning overhead and gives a superb view of the kite’s surroundings. Newcomers to the tower hides should be aware that there is a green line on the floor that marks the most forward standing position so as not to frighten the birds.
Disabled Access
Four of the hides are wheelchair friendly, with ramps and internal access, and there is parking for up to four vehicles right outside the hides for those unable to walk the 100m from the regular car park. There is even a wheelchair accessible photographic hide with the same roof arrangements as the towers.
The Red Kite Shop
In the handy Red Kite Shop you can purchase a range of goods including binoculars, note pads, mugs, bird feeders and Red Kite clothing (T-shirts, Sweatshirts, Fleeces, Caps) books, paintings and videos.
The Photography
Equipment
For our trip, we booked the larger tower hide, and I shot with my D4 and 600mm F4. To begin with I was using my 1.4 teleconverter as well, but, to be honest, that amount of reach really handicaps you because it restricts you to birds beyond the feeding zone where there is sufficient space in the viewfinder to pick them up and pan with them. You need too much precision to pick up birds in the middle distance, and this is unrealistic unless you are a seasoned professional wildlife photographer. Birds near-to will have their wings cropped, also not a good look! My pal Geoff was shooting with a D4 and a 200-400 F4, he had also started with a 2x teleconvertor but also found that he was better off without one.
Focusing
To begin with it is very difficult to track the birds. You must practice shooting with both eyes open (to help you lock on, and see the best action coming) and over half an hour or so you will find you can pick the birds up in the viewfinder more easily. Even then you are at the mercy of your camera for finding focus. Always use continuous auto-focus and the highest frame rate that your camera can manage. To make life easier we were both shooting with Gimbal Heads. I found it best to focus on the tree line first. This makes the acquisition rate much higher when you target a bird in flight because the distance is much closer to that of the bird.
Another problem comes with losing focus when the birds dive for food. Red Kites do not land on the ground (though interestingly one did just that on Monday, and it is the first time I have ever seen it), so they dive steeply and swoop down picking up their food (or prey) in one really fast action. I found that I would lose the birds on the way down, and when I found them close to the ground again I had lost focus. I think that one technique that may help you with this is to stop focusing once the bird dives, then pick it up again on the floor. This works because the Kite will be at about the same distance from the camera and you won’t have been risking a refocus on the background as you swing the camera downwards once the bird has gone. On Nikon professional cameras you can adjust the timing of the refocus pause, which can also help you stay on the target.
I find that the best technique is to pick up a Kite in the distance, then follow it until it has filled the frame, or done something interesting. It is very tempting to take thousands of photographs of very distant birds because they seem larger to your eye than they do to the lens, but by being patient you can get some good shots that fill the frame. Make sure to start shooting just before the kite is large enough in the frame because they move very quickly and you can end up with clipped wings. Be careful to avoid shots of the bird flying away from your viewpoint or turning away from the lens. Some of your best shots will be obtained once the birds have thinned out (and the other visitors have gone home). This is because you are sufficiently practiced by then, and there are fewer birds to contaminate your shots. If possible you want to get the kite with space to fly into the frame. It can help to use the central focus point because it is more sensitive and also guarantees space in the frame, which ever way the bird is travelling, if you focus on the head.
Finally, don’t forget to try some vertical shots, and shots with more than one bird. Odd numbers seem to work better than evens for this.
Settings
In a change to my usual practice of using a couple of manual exposure settings (one for light and the other for shade) described elsewhere, I used a different technique due to the very flat lighting conditions. I set my camera to auto-ISO, with a minimum speed of 1000th of a second, then set a manual exposure of 1600th second at f4. I took a couple of test shots (repeated through the afternoon) to judge the exposure compensation that I would need shooting against the white sky. This ranged from 0.3 – 1.0 stops as the afternoon wore on, but this gave great results and I didn’t need to worry when the sun came out for the odd shot.
I usually turn vibration reduction off for shutter speeds above 500th second, but (in the heat of the moment, against the breeze, I didn’t realize it was turned on – easily done when you’ve covered up the switch with a waterproof camo-cover) I’m pleased to say that it didn’t seem to make any difference to the image sharpness.
Post Processing
These days I’m using lightroom for initial adjustments, then adding a quick mid-tone contrast boost to the bird itself using Tonal Contrast in Color Efex Pro, followed by my 3 or 4-pass sharpening routines in photoshop. Though I must say that the Raw Pre-sharpener algorithms in Sharpener Pro 3 are just as good and much faster to implement.
Spoils of the Day…
Cheers,
R.

Jan
26
Alas No Cycling, But a Few Hours to Play…
Photoshop and the Art of Self Destruction
Last weekend I had a great ride on Saturday, 2,000 feet of climbing (and calorie burning), over 25 miles, including the famous Horseshoe Pass. The weather was cold and wet, with some wind, but a lovely lunch at Fouzi’s in Llangollen made up for the strain. I had been having some difficulty with my freewheel for several months, and there had been a few events where its slipping had caused problems starting off, especially at temperatures near zero. Last Sunday, I set off for another ride, but the freewheel failed completely. No forward motion, so alas no cycling. My friends walked back with me to the car, and we talked about what next. I had been hoping that I could manage through the winter and get a new bike in the summer months, but this plan has had to be trashed. Spares for the Marin have been hard to get, and a freewheel seems impossible to source at this juncture. So I have ordered a new bike from Halfords, and I’m waiting for it to arrive. I’m going for a Boardman Team CX this time. It should see me through the rest of the winter, once the frame size I require is shipped down from the Leeds store. But that is another story.
The weather has been awful today, so I guess it has been no hardship to stay at home, but I needed a diversion to make up for not having a regular hit of exercise on the Marin. So what was it to be today? I didn’t fancy a trip out to photograph landscapes or wildlife (the weather again), and my inside macro-brain was similarly uninspired. I caught sight of an old book on the shelf in my study, ‘How to Cheat in Photoshop CS3, The Art of Creating Photorealistic Montages’ by Steve Caplin. That’s it I thought, I’ll just play this morning, with Photoshop, just see what I can create. I didn’t have a plan, or any pre-conceptions, it was a spur of the moment thing. I thought about it for a while, and decided that I would edit a photograph of myself, and see what might be possible. That way, nobody would be offended.
Gold Finger…
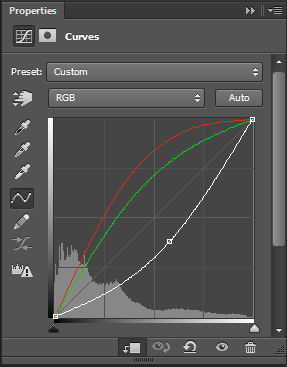
First off, how about some fun with Curves?

First convert the image to black and white using your preferred method, then, to get a metal effect, you need a curve with wiggles. From here it is simple enough to color the image with a second curve that does 3 things. Lift the red and green mid-tones and then darken the overall image.
Layer mask your image to taste and away you go. For this image, I made a cut-out of myself, and jumped it up onto its own layer, in order to simplify the masking. There was already quite a lot of contrast in the image, so I was able to do this fairly straightforwardly using the Quick Selection tool, rather than resorting to a channel mask.

Goldfinger, He’s the Man!
The Next Level
That was fun. It only took a few minutes, but was not intrinsically satisfying. I would definitely like my own weight in gold, but would want to earn it by doing something that was a real test. So what next? Play some more, it’s the only way!!
Having thought of myself as a golden statue, what about being a robot? Perhaps with something removed? What about some missing face? What about an explosion of some sort? Hmm. An idea was taking shape. Smoke and flame, that’s the stuff. Now, I can definitely step you through what I did next, but for this blog it might be sufficient just to show you the finished piece. I’m not claiming that this is perfect, I didn’t spend too long working on it, I way just experimenting after all. I’m certainly not sure that an exploding head merits such an inane smile. But hey, it’s a start.

Until next time,
R.
Mar
09
Shooting Garden Birds
Field Craft / Garden Birds / Nature / Photography / Photoshop / Slideshow Posted by Robin
/
0 comments
Frosty Mornings are so Cold

The Hide and Feeders
On a frosty Sunday morning in March (the 3rd 2013 to be precise) I had the urge to pop up my hide and go shooting garden birds. We do have feeders in our garden, to which we have a steady stream of Goldfinch visiting along with a variety of Tits (Blue, Great and this month Long-Tailed), but I had shot these before and was keen to try a different position in the garden. Our garden is L-shaped so there are a few different angles from which to shoot, and I have not yet tried them all. So the day before I visited one of our local garden centres and purchased some fresh feeders on sticks and placed them round the corner so as not to disturb the current visitors to our existing feeders. This turned out to be a very helpful strategy for reasons I did not yet fully appreciate. I did not particularly want to shoot Goldfinch, but rather a selection of other garden birds, but I expected them to make an appearance (ie the Goldfinch) round the corner if I put out more Niger seeds. You can probably see the three feeders on the right hand side, beyond the hide in the picture above. The feeders are stocked with, from left to right, high energy bird feed, peanuts and Niger seeds. You may also be able to see, by zooming in, that there are 3 perches attached to the poles underneath the feeders. Obviously the plan is to have the birds land on the organic looking perches for some of the shots. I can’t stand birds on feeder shots actually – but nevertheless everyone takes a few whilst your waiting for better shots on the perches – unless you are exceptionally disciplined.

A Gnarly Perch
Here is a close-up of one of the gnarly sticks used as a perch for shooting garden birds. Usually you need about 10m or so beyond the focus point in order to blur the background. For this reason, I positioned the perches so that, by shooting from the hide level, I would be taking in a background beyond the fence (mostly). It was a dull and overcast day, so the background was either distant tree foliage or dull sky. As it happened, towards midday the sun came out and I was treated to lovely blue skies as well. The day was bitter cold, so I set up with plenty of layers and my trusty flask of coffee in the hide and waited, and waited some more. The joy of shooting overcomes the feeling cold, but I was shivering for hours afterwards. Make sure you eat regularly to keep the cold out.
Happily there started to arrive a series to blue and great tits, mostly to the high energy feeder and the peanuts. Sadly, not one alighted on my special perches. Actually there is a bit to know about perch diameter. It is essential that the perches are not too wide as this hurts the bird’s foot musculature and they don’t stay on them very long. Moose Peterson says that being uncomfortable in this way also affects the bird’s eyes in an unhelpful way. So titrate the diameter of your perch to the size of your intended bird’s feet!! I wasn’t sure what to do. Was it just a matter of waiting (a very long time, as opposed to just a long one) or was there something that I could do to improve my odds?
Field Craft for Shooting Garden Birds
So here’s what I did. I took down the peanut feeder. It was getting a lot of traffic, but not so much the Niger seeds, and actually the peanut feeder had the least visually appealing perch. I also put an assortment of peanuts, meal worm and high energy feed on the top of the fence in the distance to see if I could encourage some birds onto that. Et Viola, a Great Tit landed on my gnarly perch. Boom he was gone. It was so unexpected I wasn’t ready and missed the shot. And then, something even more unexpected. Siskin. And at least 3 males. All loving the Niger seeds, greedily feeding on the built-in perches for minutes on end. Bright yellow and gorgeous. Visiting only from mid-March to mid-May, and completely unnoticed in the garden so far. Still no gnarly stick action though. But in-between plenty of birds on the fence in the distance, and still within reach of the 840mm combination of Nikkor 600mm plus 1.4x teleconvertor. These interventions did make a difference to my hit-rate on the organic perches, but even so these shots were few and far between. I could have put suet on the back of the thicker sticks, but I am loath to do this in case it shows up in the photograph.

Close-up of the Hide
So, what about the Hide? The hide is an F1 Fold Out Hide from Wildlife Watching Supplies. This is a cube shaped hunting style Hide with a built-in metal frame. It folds down to a small case that has two straps for easy carrying by hand, or on your shoulder, or back. It comes with pegs and guy ropes (although you usually don’t need to use the guy ropes). For shooting garden birds it really is very easy to put up, but if you are on your own it is necessary to peg the base out in order to pull up the roof frame. The hide is very well made and has viewing “windows” at the front and at the sides in addition to the rear. Each window has a cover attached by toggles (like an old duffel coat) and velcro’d on scrim netting. The inside is matt black coloured so provided you are wearing dull coloured clothes the animals don’t know that you are there. Clearly from this photograph you can see that the Hide cannot be said to be inconspicuous in my back garden, yet I am constantly amazed at how close birds, squirrels etc will approach. Sometimes too close for the 600mm to focus on!! I purchased my Hide with a handy portable chair (the C25 Fold-Out Chair). It has a handy shoulder strap, and a fabric pocket beneath the seat. The only down side is that there is no ground sheet, though I haven’t really found that one is essential.
The Photography
There was quite a range of lighting between the various places that the birds were landing so, at least until the sun came out, I was forced to select a pretty high ISO to keep the shutter speeds up to a reasonable level. I find that I can reliably shoot at a 160th with the 840mm set up on a tripod with gimbal head, and can get away with a 125th of a second on a good day. This meant sometimes rising to ISO 2500. When shooting garden birds that are fast-moving, I find it difficult to change the ISO at a moment’s notice, so this is something I tend to do in-between shots. I live in hope that practise will eventually make perfect for this issue. It’s certainly easier to change ISO with your eye to the viewfinder on the professional bodies like the D4. It’s strange, but I can adjust aperture and exposure compensation whilst juggling back focus and firing but really struggle with the left hand adjustment of ISO, which means I slightly lose control of the camera bracing and positioning is critical for rapid shooting within frame. But setting a high ISO in advance does let me increase depth of field for the brighter perches by stopping down, which I can do very quickly. Once the sun came out I was able to get down to ISO 200 for some of the shots again. Usually I shoot wide open at f4 or f5.6 with the 1.4x teleconvertor, but I have found it beneficial to stop down to f8 or f11 respectively to get slightly more feather and beak in focus, particularly when the bird is face-on.
The Photoshop
There isn’t a great deal to say about this. The images were prepared in Lightroom 4 and finished in CS6. All that was required was some mid-tone contrast adjustment via the ever amazing Color Efex Pro 4, and some sharpening using my usual sharpening actions in a 3-pass routine with additional local creative sharpening where required and sharpening for screen to finish. I must discuss sharpening as an issue in-depth some time.
Glad to be back in the warm,
Until next time,
Robin.
Feb
26
Context

A Single Drop…
I’ve seen a lot of fantastic drop collision photographs recently, both on the net and in magazines. It seems clear that there are at least two levels of water drop photography, the random ‘hit and hope’ style of droplet photography (without the collisions) and the more engineered droplet collision photographs made with the assistance of some complicated electronic hydraulic systems. Markus Reugals is perhaps the grand father of the more technical approach, and another fine water drop artist is Corrie White.
Having read a little about water drop photography, I decided to have a go at the hit and hope style which is much less technically demanding but more reliant on good timing and good luck. A little research indicated that I didn’t need too much equipment and if I was prepared to be patient I could still get some good results. All I needed was a plastic bag, some water, a drip tray, a small strobe, camera and tripod and I would be good to go. If I could throw in a coloured background in addition then the world was my oyster. The set-up would prove to be a little Heath-Robinson, but nonetheless effective for that. I knew that those nicknacks would come in helpful at some point, and if I was to consider purchasing some mechanical drop making machinary, I at least needed to know what other technical issues might arise.
Practicalities
Here’s how I went about it.
- Firstly I set up a turkey basting tray on the surface in the kitchen.
- Next I filled this with water and suspended a resealable sandwich bag filled with tap water about 35cm above.
- I placed a pin hole in one of the sandwich bag corners, and let it drip into the basting tray at a steady rate.
- Next I set up my flash heads. You need these to be very close to the water-drops to get good exposure because you want to use the lowest possible manual flash setting that your guns will provide. I used 3 Nikon SB900s on a Joe McNally Lastolite TriFlash, set to 1/128 power, though I could have got good results with just one flash head, albeit at a higher ISO. This gives me approximately 1/38500 of a second.
- Then I set an A2 sheet of coloured cardboard against the wall behind the tray and aimed the flashes towards it. In this way the droplets were both side and backlit both by direct flash and a coloured wash of light from behind. Ideally you would shoot through an opaque perspex to both soften and spread the light. Coloured gels can then be used to create interesting colour wash in the background and on the water surface.
- Finally I set up my D4 on a tripod with a 105mm Micro NikKor and focussed on the drops as they hit the water. To get better accuracy I placed a sharp knife blade in the exact position of the falling water droplets and focussed on that. You need to attach a remote release, and depending on the camera body and system you are using you may use the built-in light control or perhaps radio triggers. In this instance I used Flex tt5 radio triggers as the D4 does not have a built-in commander flash. Alternatively I could have used a separate flash gun to provide the remote control.

Splash and Drop…
Then all you have to do to start your water drop photography is watch the drips fall, and fire a few test shots to get the correct exposure. Obviously you need to obliterate the ambient light with the combination of shutter and aperture (I was using 1/250th second and f11) in order to avoid any ghosting. Watch out for your highlights. There is a tension between too much specular highlight and detail in the drops and the general brightness of the pool. After an initial trial I found that I was having to shoot downwards at too steep an angle. To counter this I needed to shoot from further back so I hooked up my 2x teleconvertor to the 105mm and this gave an effective focal length of 210mm and a greater distance from the droplet.There is a further issue with the positioning of the water droplets. I found it more convenient to have drops fall towards the front of the drip tray in order to have the frame filled to the top by the pool in the background. Otherwise the edge of the tray might be visible. I wasn’t brave enough to shoot into a pool with a meniscus!! Secondly there is considerable variation in the exact landing spot of the drops wich can easily vary by 5mm or more front to back, making critical focus a bit of a lottery. The higher the water in the tray, the flatter you are able to keep your lens. There needs to be some angle to ensure that the background does not include the edge of the tray (unless you have a 6 foot drip tray that is). Nevertheless the variation in focus drop to drop is countered by taking a lot of shots. Once you get your eye in, you can improve your success rate substantially. I did end up taking 765 shots in all, but there was quite a lot of experimentation to get my final set up.
Photoshop Embellishments…

Embellished Drop and Splash…
As lovely as this image was fresh out of the camera, it was crying out for that something extra to really make it pop. Looking carefully at the top of the splash column I could see that there was a specular flare highlight at the top. If I had used f16 or f22 this might have been substantial enough on its own, but in this instance it required a helping hand.I have used a few techniques here. First of all I created a starburst in Photoshop (white on a black background), and then I sized and placed it into position on a separate layer. Change the blend mode to screen to drop the blacks out and Robert is very definitely your mother’s brother!! Photoshop has a lens flare feature (Filter | Render | Lens flare) but how do you get this into your image? Again the trick is to create a new layer. Fill it with black. Create your lens flare on the black layer (I used the flare for a 105mm prime). Change the blend mode to screen, reposition and set the opacity to taste to finish.
Sharpening is another interesting issue. If your droplet shot lacks that critical crispness, and quite a few will do, one way to counter this is to use octave sharpening. I first learned about this technique in a book by Lee Varis called Skin. The edition of the book that I have was published by Sybex in 2006. The book claims to be the complete guide to digitally lighting, photographing and retouching faces and bodies, and it really does do a good job at this. There are a few useful sharpening techniques that I would recommend you check for yourselves but the octave sharpening routine has general applicability above and beyond portraiture. The point of the technique is that you use multiple sharpening layers (4 in this case) to minimize the visibility of wide halos. Unsharp mask values are set, in order, at radius 0.5px, 1.0px, 2.0px and 4.0px all at an amount of 500%. Each layer has a luminosity blend mode, and the opacity is set at 100%, 50%, 25% and 13% respectively.

Starburst…
There are plenty of online tutorials on how to make a starburst. The basic technique is to start with a white line on a black background. Apply motion blur to the line to get a lovely fade effect on the ends, then copy, rotate and resize the line to get the final effect. If you save your creation you can use it again at any point where a convincing starburst is required. If you create a large starburst, you can reduce the size without loss of quality.Over the last few days I have been experimenting with an electro-mechanical dropper and can confirm that there will be a part 2 to this article. Wow!! Here’s a taster, until next time…
And For Next Time…

Something for the Future…
Cheers for now,
Robin.
Recent Comments