09
Shooting Red Kites at Gigrin Farm
Time-off is Precious!
It’s been a while, in fact, as I think about it, I haven’t been to Gigrin since I purchased my D4. The last time I was there would have been 7th April 2011, 3 whole years ago to the day. Since I adopted cycling as a new pastime there has been increased pressure on my photography time, to a point where it can be months between structured shoots. But this week, I’ve booked in a couple of days shooting, of which this was the first.
Facilities at Gigrin
Hides for Photography & Filming
There are a range of Hides for the photographer. The ground level hides are adequate for photography for those with compact cameras and DSLRs, whilst the tower hides have been built for photographers with more professional equipment in mind. The Gateway hide is around 4m closer to the kites than the towers. The tower hides have a partial roof as protection, and a bench fitted to the rear of the hide with coat hooks on the left-hand side. This arrangement is ideal for panning overhead and gives a superb view of the kite’s surroundings. Newcomers to the tower hides should be aware that there is a green line on the floor that marks the most forward standing position so as not to frighten the birds.
Disabled Access
Four of the hides are wheelchair friendly, with ramps and internal access, and there is parking for up to four vehicles right outside the hides for those unable to walk the 100m from the regular car park. There is even a wheelchair accessible photographic hide with the same roof arrangements as the towers.
The Red Kite Shop
In the handy Red Kite Shop you can purchase a range of goods including binoculars, note pads, mugs, bird feeders and Red Kite clothing (T-shirts, Sweatshirts, Fleeces, Caps) books, paintings and videos.
The Photography
Equipment
For our trip, we booked the larger tower hide, and I shot with my D4 and 600mm F4. To begin with I was using my 1.4 teleconverter as well, but, to be honest, that amount of reach really handicaps you because it restricts you to birds beyond the feeding zone where there is sufficient space in the viewfinder to pick them up and pan with them. You need too much precision to pick up birds in the middle distance, and this is unrealistic unless you are a seasoned professional wildlife photographer. Birds near-to will have their wings cropped, also not a good look! My pal Geoff was shooting with a D4 and a 200-400 F4, he had also started with a 2x teleconvertor but also found that he was better off without one.
Focusing
To begin with it is very difficult to track the birds. You must practice shooting with both eyes open (to help you lock on, and see the best action coming) and over half an hour or so you will find you can pick the birds up in the viewfinder more easily. Even then you are at the mercy of your camera for finding focus. Always use continuous auto-focus and the highest frame rate that your camera can manage. To make life easier we were both shooting with Gimbal Heads. I found it best to focus on the tree line first. This makes the acquisition rate much higher when you target a bird in flight because the distance is much closer to that of the bird.
Another problem comes with losing focus when the birds dive for food. Red Kites do not land on the ground (though interestingly one did just that on Monday, and it is the first time I have ever seen it), so they dive steeply and swoop down picking up their food (or prey) in one really fast action. I found that I would lose the birds on the way down, and when I found them close to the ground again I had lost focus. I think that one technique that may help you with this is to stop focusing once the bird dives, then pick it up again on the floor. This works because the Kite will be at about the same distance from the camera and you won’t have been risking a refocus on the background as you swing the camera downwards once the bird has gone. On Nikon professional cameras you can adjust the timing of the refocus pause, which can also help you stay on the target.
I find that the best technique is to pick up a Kite in the distance, then follow it until it has filled the frame, or done something interesting. It is very tempting to take thousands of photographs of very distant birds because they seem larger to your eye than they do to the lens, but by being patient you can get some good shots that fill the frame. Make sure to start shooting just before the kite is large enough in the frame because they move very quickly and you can end up with clipped wings. Be careful to avoid shots of the bird flying away from your viewpoint or turning away from the lens. Some of your best shots will be obtained once the birds have thinned out (and the other visitors have gone home). This is because you are sufficiently practiced by then, and there are fewer birds to contaminate your shots. If possible you want to get the kite with space to fly into the frame. It can help to use the central focus point because it is more sensitive and also guarantees space in the frame, which ever way the bird is travelling, if you focus on the head.
Finally, don’t forget to try some vertical shots, and shots with more than one bird. Odd numbers seem to work better than evens for this.
Settings
In a change to my usual practice of using a couple of manual exposure settings (one for light and the other for shade) described elsewhere, I used a different technique due to the very flat lighting conditions. I set my camera to auto-ISO, with a minimum speed of 1000th of a second, then set a manual exposure of 1600th second at f4. I took a couple of test shots (repeated through the afternoon) to judge the exposure compensation that I would need shooting against the white sky. This ranged from 0.3 – 1.0 stops as the afternoon wore on, but this gave great results and I didn’t need to worry when the sun came out for the odd shot.
I usually turn vibration reduction off for shutter speeds above 500th second, but (in the heat of the moment, against the breeze, I didn’t realize it was turned on – easily done when you’ve covered up the switch with a waterproof camo-cover) I’m pleased to say that it didn’t seem to make any difference to the image sharpness.
Post Processing
These days I’m using lightroom for initial adjustments, then adding a quick mid-tone contrast boost to the bird itself using Tonal Contrast in Color Efex Pro, followed by my 3 or 4-pass sharpening routines in photoshop. Though I must say that the Raw Pre-sharpener algorithms in Sharpener Pro 3 are just as good and much faster to implement.
Spoils of the Day…
Cheers,
R.
07
It’s Finally Here, My Boardman Team CX 2014
Did I Mention that I’ve had a New Bike?
The Story So Far
If you have been following my blog you will know that my Marin Bear Valley mountain bike died recently (see Alas No Cycling…), and that I have ordered a Boardman Team CX from Halfords. Well I’m happy to say that it has arrived, and after a few teething problems, which Halfords sorted out for me without any fuss, it is all set up and ready to go.
I Like to Tinker
When I picked the bike up, the lad in the store said “I’ve set the brakes up as best I can, but they are rubbing”. “This should settle down over the first hundred miles or so”. Well, as you might imagine, I wasn’t going to be satisfied with brake pads wearing out as a solution to poor adjustment, so I had a go myself when I got home. It turned out that the reason for the rubbing on the front disc brake was a warped disc, so no amount of adjustment would fix that. With the appalling weather that we have been having in the UK recently, it was a few days before I could take the bike out for a run round the block but, when I did, the gears made a lot of noise and not all of them were available. More tinkering required. The cable tension on the front derailleur was too loose causing insufficient travel, and the low and high stop screws for both the front and rear derailleurs also needed setting. The trouble was, the rear caddy was bent inwards towards the wheel, so if you made the mistake of trying to pedal backwards, the chain fell off. Time for a trip back to the store!!
In fairness when I took it back the engineer, who really knew his stuff, sorted the gears out on the spot, and was a pleasure to watch working. I hadn’t mentioned the disc brake issues, but he noticed and adjusted them both anyway. He swapped the front wheel out for one with a straight disc, and he was even dissatisfied with a tiny misalignment of the handlebars, and sorted that out too.
It disheartens me that so many things these days are not right first time, never mind first time, every time, but I suppose that the next best thing is prompt and effective remediation, and Halfords have certainly done that. The Boardman Team CX 2014 was very good value for money and the Halfords’ deal includes 3 years annual servicing.
Second Time Out
My second ride was much more successful. The gears were running smoothly and the bike was rattle-free (unlike the Marin) and pretty comfortable over the bumps. I realized that my riding position needed attention (the saddle height was too low, and needed to slide back slightly) and the front tyre pressure needed raising. The riding position is much more comfortable than the Marin ever was, with the consequence that I can now see much further down the road without hurting my neck. Just waiting for the weather to improve, and I can get back to building my fitness again.
Making the Best of a Photo Op
Purchasing a new bicycle is a rare occurrence for me (the last one being 20 odd years ago), so it seemed too good an opportunity to miss to photograph the CX. Now, had I had my wits about me, I might have researched how to do this skillfully beforehand. But hey, that’s not how to live on the edge, I can learn through doing. Better still, if I start this just before we are due to go out as a family, I can get some added time pressure and regular shouts to get a move on because it’s time to have my shower (thanks Helen!!). Perfect. No really.
The Shoot
Once again the weather was torrential and gale force, so the photography had to take place inside. I did not have an assistant, so I had to be a bit creative. Whole bike shots were out of the question, but detail shots seemed possible. I wanted an uncluttered background so I used one of my Lastolite (double sided black and white) panels. Lighting was an issue because I didn’t have time to set up flash, and because I was using the door frame between the kitchen and hallway to prop the bike up, I had to cope with a crossing cast because our kitchen has daylight balanced LED lighting, whilst the hallway has tungsten. In the event this worked out quite well because, if I turned off the hall lights, the white Lastolite panel was dimly illuminated by the kitchen lights (avoiding the cast) and which also brought the bike forward in the image, as it was brighter in the frame.
Camera and Lens
I was short of time so it boiled down to this. Do I go with my micro nikkor 105 f2.8 or my 28-300 f4.5-5.6 zoom? Given that the light was poor, plus I want to be able to play with depth of field, the macro lens gets it. So D3 plus 105. Why not D4 plus 105, with its better low light capability? Because the 105 was already on my D3 so that was quicker!
So, with no prior experience of shooting velocipedes, this is how it turned out.
Let me know what you think,
R.
01
Where Have I Been, What Have I Done?
Hi there, it’s good to be back. What have I been up to you may ask. Well this morning I’ve been trying to restore my Android phone back to decent health, but that’s another story entirely.
Some time back, the parents of one of my daughter’s dance peers invited us round for a meal. Bill is a big cycling fan, and does tens of thousands of miles a year on his road bike. Feeling somewhat impressed, and fueled by good company and more than a little vino, I mentioned that I had been a keen cyclist for a few of my adolescent years. This, of course, was far too many years ago to mention, and had been replaced by an incredibly sedentary lifestyle thereafter. I am, after all, paid to sit still and talk to people on a daily basis. Bill said that he, and a group of like-minded souls, went off for a ride most Sundays and that I should come along. Of course, I didn’t expect to hear anymore about this (indeed was probably hoping that I didn’t hear anymore about it…), but a couple of weekends later the posse called round at the house, and, in the rain and wind, off we went.
That First Ride
I have an old Marin mountain bike. It’s about 20 years old, and, hasn’t really seen much action at all over the time I have had it. It has mostly sat in the garage gathering dust and rust. The one time it did have a bit of excitement was when we were driving back to Ipswich from our honeymoon in the Lake District. The bikes were on the top of the car (at least for a while) until I knocked them off driving under a low car park barrier. What a mess. Still the bikes were largely unharmed, which is more than I can say for the car and my self-esteem. Back in 1992, the Bear Valley was a reasonable bike, priced at about £600. I had always found it uncomfortable, and riding it gave me numbness in the fingers. My longest ride, in East Anglia, had been 35 miles along the flat and this had taken all day. This day, I was to manage 6 miles. 3 miles there and the same again back. Nearly killed me! How could these guys go so fast without any apparent effort? I’m so short of breath!!
Further Progress
Well, not to be put off, that was the start of my regular exercise plan over the summer. We’ve had some cracking weather, and I’ve lost a stone and a half in weight, which can’t be bad. My blood pressure seems to have dropped a bit as well. The Marin now has slicks, instead of off road tyres, SPD pedals, and I have mountain bike shoes that clip on to them, and upgraded brake pads. The worn front and rear cones have been replaced with units from Australia and Spain respectively (there aren’t many of these old parts left in the world), and I am now familiar with “the chain whip”, “cassette removal tools” and “dry lube” to name but a few. I’ve even had to fix a puncture whilst being out on the road. Oh, and the other thing I realized was that large backsides need a decent saddle. I got one of those as well.
The Cat and Fiddle Challenge 2013
We were out on a ride one evening over the summer when Bill mentioned that there was going to be a “minor” 55 mile sportive coming up on the 6th October 2013, and I might be ready for something a little bit harder by then. Perhaps this goal would help me stay motivated to keep going with my training? So I signed up. It was only £25 and all I had to do was to increase my mileage by 10 percent a week, and the job, as they say, would be a good-un. This proved harder than I thought it would be however, with most rides on a Sunday being in the 20-30 mile range, and my mid week evening rides being in the 10-20 mile range. I was feeling stronger, but I had to know, could I even get close to 55 miles? One Sunday morning I got up early and did a 40 miler on my own, less embarrassment that way. It was mostly flat though, and I really struggled with the last five miles. Not to be beaten, a bit nearer the time, I attempted the Horseshoe Pass to test out my climbing abilities. I managed it with a couple of stops, but I was very unprepared for the challenge that lay ahead. The problem was, that I just didn’t know it yet, which, as it turned out, was probably just as well.
The Challenge
“Rourkie’s Cat & Fiddle 55 mile Cycle Challenge” has been running since 2002 in order to raise money for Cystic Fibrosis. It is organized by Brian Rourke Cycles, and starts near to the showroom in Cobridge, Stoke-On-Trent. One of the big pulls for the event is the opportunity to ride with Tour de France legend Sean Kelly.
The Week Before
I purchased some Gels (sugary drinks in a packet to give you energy when you are flagging), some new water bottles, a bar bag and a Saris Bones RS carrier for the car. For the first time, I also ordered some lycra. Having lost a stone in weight, this was going to be marginally less embarrassing than when I started. Having the correct clothing is vital for this sort of ordeal, sorry, I mean event. And hey, I would never see these people again. I could avoid Stoke-On-Trent for the rest of my life if needed!
The Day Before
I thought it would be a good idea to wash the Marin, and check the tyres. Oh NOoooo!!! Two broken spokes on the back wheel. What to do? Quick check on the internet, then dash out to try and buy replacement spokes. I was in luck, I had the spokes but no tools to remove the Cassette from the back wheel. Hadn’t known that this would be a problem. Another dash over to Bill’s place for assistance with the repair, then back home again to put it all back together. Then off to a party (was this really sensible?). Thanks to Nikki and Dave, it was indeed. Just don’t ask Bill and Ieuan about the Karaoke!
The Ride Itself
Fortunately there is no specific start time, you can register and leave any time between 8.00 am and 9.30 am. We had to set off early anyway, because our road was going to be closed that morning for a marathon, though, as it happened we had a little difficulty locating Brian Rourke Cycles so we were nearer the 9.30 to start. The weather was beautiful with sunshine for much of the day. Whilst we were registering, a couple of guys had their, very expensive, road bikes stolen, one of them virtually in front of his eyes. I guess this can happen at any venue with so many high-end products on show, but it was terrible to see the distress and disappointment. And so we set off.
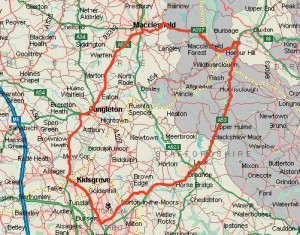
Three of us, myself, Bill and his son Ieuan set off together and the first few miles out of Stoke-On-Trent had several short climbs, but we soon settled into rolling countryside. The support crew were soon setting off round the course and would pass us from time to time shouting encouragement and holding a plaque with “Go Dad!” on it out of the window. I was feeling pretty pleased with myself at this point and had somehow managed to completely forget about the 7 mile climb ahead. About 20 miles in to the ride we dropped down an incline to some traffic lights, before turning right onto the Cat & Fiddle climb itself. It’s not as steep as the Horseshoe Pass, but it is so so long, seeming to go on for ever. About a mile and a half into the climb we came across some time trialists starting their race against the clock, setting off at 2 minute intervals. It was after this that it dawned on me that at my present speed (pretty slow) it was going to take me the best part of two hours to master this hill! Ieuan had set off on his own, just to see just how fast he could complete the climb and I didn’t see him again until much much later.
We stopped at the Peak View Tea Rooms for a coffee, cake and a sandwich or two. The support team had seen Sean Kelley who had been there much earlier. After another mile or so we passed the Cat & Fiddle Inn and then dropped down, via the A54 descent, onto the A53 for the Axe Edge Moor Climb (5 miles). To my horror, at this point I developed a migraine, probably as a result of the gels I’d been using having too much caffeine in them which I’m a bit sensitive to. In the event this probably worked in my favour because, with the visual disturbance and headache, I had to climb very steadily taking one pedal turn at a time, which took my mind off things. Fortunately, the brufen kicked in and I could continue apace. After Axe Edge Moor, there was another short climb into Leek and all seemed fine with the world. Only 10 miles or so to go. How hard could it be? Buoyed with enthusiasm, and more gels (Isotonic and sans-caffeine this time), we set off again after a short stop. But then came Ladderedge. Ouch. Three quarters of a mile at 6.3%. I’d always wondered what that would be like on a bicycle, back in the days when I worked in Cheddleton, and now I knew. Horrible.
On to Brown Edge. Bill and Ieuan shot off like scalded cats leaving me to plod my way up another monster climb at 5.6%, and finally Norton le Moors climb and Smallthorne Bank. Bill said I looked like a man who had used up every nano-joule of energy as I rolled up to where they waited for me at a set of lights. I felt like I had used up a few extra joules of energy that I had borrowed, and now had to pay back. And then, as if by magic, we were back where we started.
The Finish
The finish came unexpectedly for me as I don’t think we came back quite the same way we went out, but I’m easily lost. I was surprised and vaguely disappointed that we were home. Whether it was the gels, the migraine, the exhaustion or the endorphins, I felt euphoric. Beaming, I couldn’t get the smile from my face. According to Strava, I was the slowest round the course, but who cares. I had completed 4,000 kc worth of exercise. 1,226 m of climbing and 55 miles along the road. Awesome. Bring on the next challenge!!
What Next?
I suppose that my main goal, over the winter, is not to lose all of the fitness I’ve gained over the summer, and most of all, not to gain too much weight again. I definitely find that when I’m riding regularly that my appetite is reduced, but when I’m not it is huge. It’s much harder to find good quality cycling time in the winter months when the days are short and the weather terrible, but I’ve got the bug now – that’s for sure.
Until later,
Robin.
26
Time Flies When You’re Having Fun
Time flies when you’re having fun (or very busy at work), and perhaps especially when you have a day out at Martin Mere Wetland Centre. It’s huge, but well laid out, with a number of handy, and very well specified, public hides from which to mix with twitchers and shoot long lens wetland birds. I can hardly believe that it was the 9th of April 2013 that I was last there, it’s now nearly 7 weeks and I haven’t published any of my images yet.
Routes Round the Martin Mere Wetland Centre
The handbook, or walkabout guide, contains a route map, several suggested routes and some very handy information on a variety of species. There is a nature trail map, some photographic plates and a Wildlife check-list to tick off your sightings. The Marsh harrier, Whooper swan, Bewick’s swan, Pink-footed goose and Tree sparrow are filled in at the head of the list to get you started. We did in fact see a Pair of Marsh Harrier’s last time out, but not this visit. I think that my favorite part of the handbook is the fold-out back cover that contains 121 colored drawings of ducks, geese and other birds to help you with identification. WWT Martin Mere is one of nine unique wetland visitor centres in the UK run by the Wildfowl & Wetlands Trust. All the paths have a tarmac surface so they are an easy walk and reasonably clean to lie on to get a good low angle for birds in ponds. Martin Mere Wetland Centre opens at 9.30 am and closes at 5.30 pm in the summer and 5.00 pm in the winter. The grounds are open for one hour after the building closes but visitors must then leave through the exit gates.
Images from the Hides and Ponds
Post Processing…
Some time is inevitably spent trying to work out what I have photographed, not always with any success. I get swept along by the photography, so tend not to remember to take a note of the species names where those are noted at the pools. So for this reason I am indebted to Belinda Barker, office manager at WWT Martin Mere Wetland Centre, for putting names to quite a few of the images you see above.
Otherwise, getting the correct exposure is most of the battle with images of water birds. The brightness of the water or the sky tends to lead to underexposure which can mean blocked up blacks. Post processing involved the usual passage through Photoshop Lightroom 4 for tonal range, contrast and vibrance, with a brief foray into Photoshop to further improve the mid-tone contrast and some very careful multi-pass sharpening.
Best wishes,
Robin.
26
Context
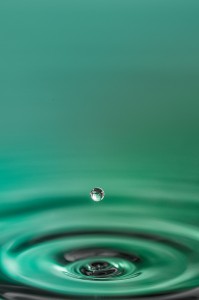
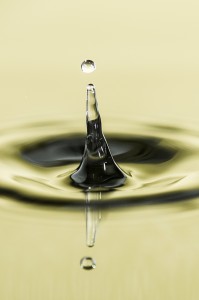
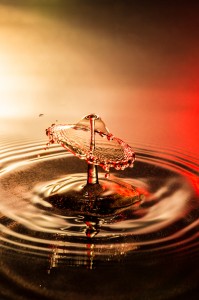
I’ve seen a lot of fantastic drop collision photographs recently, both on the net and in magazines. It seems clear that there are at least two levels of water drop photography, the random ‘hit and hope’ style of droplet photography (without the collisions) and the more engineered droplet collision photographs made with the assistance of some complicated electronic hydraulic systems. Markus Reugals is perhaps the grand father of the more technical approach, and another fine water drop artist is Corrie White.
Having read a little about water drop photography, I decided to have a go at the hit and hope style which is much less technically demanding but more reliant on good timing and good luck. A little research indicated that I didn’t need too much equipment and if I was prepared to be patient I could still get some good results. All I needed was a plastic bag, some water, a drip tray, a small strobe, camera and tripod and I would be good to go. If I could throw in a coloured background in addition then the world was my oyster. The set-up would prove to be a little Heath-Robinson, but nonetheless effective for that. I knew that those nicknacks would come in helpful at some point, and if I was to consider purchasing some mechanical drop making machinary, I at least needed to know what other technical issues might arise.
Practicalities
Here’s how I went about it.
- Firstly I set up a turkey basting tray on the surface in the kitchen.
- Next I filled this with water and suspended a resealable sandwich bag filled with tap water about 35cm above.
- I placed a pin hole in one of the sandwich bag corners, and let it drip into the basting tray at a steady rate.
- Next I set up my flash heads. You need these to be very close to the water-drops to get good exposure because you want to use the lowest possible manual flash setting that your guns will provide. I used 3 Nikon SB900s on a Joe McNally Lastolite TriFlash, set to 1/128 power, though I could have got good results with just one flash head, albeit at a higher ISO. This gives me approximately 1/38500 of a second.
- Then I set an A2 sheet of coloured cardboard against the wall behind the tray and aimed the flashes towards it. In this way the droplets were both side and backlit both by direct flash and a coloured wash of light from behind. Ideally you would shoot through an opaque perspex to both soften and spread the light. Coloured gels can then be used to create interesting colour wash in the background and on the water surface.
- Finally I set up my D4 on a tripod with a 105mm Micro NikKor and focussed on the drops as they hit the water. To get better accuracy I placed a sharp knife blade in the exact position of the falling water droplets and focussed on that. You need to attach a remote release, and depending on the camera body and system you are using you may use the built-in light control or perhaps radio triggers. In this instance I used Flex tt5 radio triggers as the D4 does not have a built-in commander flash. Alternatively I could have used a separate flash gun to provide the remote control.
Then all you have to do to start your water drop photography is watch the drips fall, and fire a few test shots to get the correct exposure. Obviously you need to obliterate the ambient light with the combination of shutter and aperture (I was using 1/250th second and f11) in order to avoid any ghosting. Watch out for your highlights. There is a tension between too much specular highlight and detail in the drops and the general brightness of the pool. After an initial trial I found that I was having to shoot downwards at too steep an angle. To counter this I needed to shoot from further back so I hooked up my 2x teleconvertor to the 105mm and this gave an effective focal length of 210mm and a greater distance from the droplet.There is a further issue with the positioning of the water droplets. I found it more convenient to have drops fall towards the front of the drip tray in order to have the frame filled to the top by the pool in the background. Otherwise the edge of the tray might be visible. I wasn’t brave enough to shoot into a pool with a meniscus!! Secondly there is considerable variation in the exact landing spot of the drops wich can easily vary by 5mm or more front to back, making critical focus a bit of a lottery. The higher the water in the tray, the flatter you are able to keep your lens. There needs to be some angle to ensure that the background does not include the edge of the tray (unless you have a 6 foot drip tray that is). Nevertheless the variation in focus drop to drop is countered by taking a lot of shots. Once you get your eye in, you can improve your success rate substantially. I did end up taking 765 shots in all, but there was quite a lot of experimentation to get my final set up.
Photoshop Embellishments…
As lovely as this image was fresh out of the camera, it was crying out for that something extra to really make it pop. Looking carefully at the top of the splash column I could see that there was a specular flare highlight at the top. If I had used f16 or f22 this might have been substantial enough on its own, but in this instance it required a helping hand.I have used a few techniques here. First of all I created a starburst in Photoshop (white on a black background), and then I sized and placed it into position on a separate layer. Change the blend mode to screen to drop the blacks out and Robert is very definitely your mother’s brother!! Photoshop has a lens flare feature (Filter | Render | Lens flare) but how do you get this into your image? Again the trick is to create a new layer. Fill it with black. Create your lens flare on the black layer (I used the flare for a 105mm prime). Change the blend mode to screen, reposition and set the opacity to taste to finish.
Sharpening is another interesting issue. If your droplet shot lacks that critical crispness, and quite a few will do, one way to counter this is to use octave sharpening. I first learned about this technique in a book by Lee Varis called Skin. The edition of the book that I have was published by Sybex in 2006. The book claims to be the complete guide to digitally lighting, photographing and retouching faces and bodies, and it really does do a good job at this. There are a few useful sharpening techniques that I would recommend you check for yourselves but the octave sharpening routine has general applicability above and beyond portraiture. The point of the technique is that you use multiple sharpening layers (4 in this case) to minimize the visibility of wide halos. Unsharp mask values are set, in order, at radius 0.5px, 1.0px, 2.0px and 4.0px all at an amount of 500%. Each layer has a luminosity blend mode, and the opacity is set at 100%, 50%, 25% and 13% respectively.
There are plenty of online tutorials on how to make a starburst. The basic technique is to start with a white line on a black background. Apply motion blur to the line to get a lovely fade effect on the ends, then copy, rotate and resize the line to get the final effect. If you save your creation you can use it again at any point where a convincing starburst is required. If you create a large starburst, you can reduce the size without loss of quality.Over the last few days I have been experimenting with an electro-mechanical dropper and can confirm that there will be a part 2 to this article. Wow!! Here’s a taster, until next time…
And For Next Time…
Cheers for now,
Robin.
07
My Love of Photography
Have you ever thought much about why you like photography? Or indeed why you take the pictures you do? No? Well nor me, until earlier this week. A few events have made me reflect on what it is to take differing types of pictures, in different ways and at different times. I’m still thinking so bear with me, this is difficult.
Like many men, I suspect, I get a thrill from handling my camera and using it to photograph, but recently I’ve become aware that this is by no means a constant in my picture-taking. More on this aspect later. For me there are three main image making scenarios. Firstly, I’m setting out to take pictures, and I’ve got something specific in mind. Perhaps I’ve planned a trip or perhaps I’ve been thinking about a particular picture I can take at home, either way there is planning involved and the end point is to produce some images that I am pleased with. The better they can be, fresh out of the camera, the more satisfied I am. Secondly, I’m in a social situation, but I have taken my camera along to record the event. Here there is no planning involved and actually, depending on the precise circumstances, I may or may not take any photographs. I think that this depends on how sociable the act of engaging in the process of photography is likely to be for the people I’m with, because human contact, not image making, is the primary purpose. Mind you if it is a large gathering and I feel anxious, I do sometimes hide behind the camera to give a purpose to my social interactions. Thirdly there are situations where planning to go somewhere socially with others, where photographs may be expected to be taken, happen and these are somewhere in between the first two scenarios given above. So where is this preamble leading?
I like to Snap!!
It seems to me that there is a lot of pretentious nonsense spoken about photography. Some image makers espouse a notion that every image has to be carefully considered, of high technical quality whilst also having a competent and pleasing aesthetic. Photographs must tell a complicated story, requiring the viewer to have superior imagination and narrative understanding. Photographs must involve an ordeal to achieve, either through the hoops that must be got through just to be there, perhaps at sunrise or after dark, or perhaps involving a hike up a mountain or travel in dangerous settings, in order to have enduring value as an image. I hear things said like “If you snooze you lose” and “You don’t take a picture, you make a picture”. And yet, on the flip-side, many people are much more concerned with gathering mementos of their everyday lives, often using a mobile phone camera these days, to share with their friends of Facebook or other social networking sites. Many of these pictures have little aesthetic merit but huge sentimental value and there is nothing wrong with that. Well, what is best? Who is correct?
An old friend of mine, now pardon my rudeness, once said “Eat shit.., 10,000 flies can’t be wrong”. We were adolescent at the time, and I think the comment was more for its intrinsic shock value than about making an important point, but this phrase has stayed with me because there are many trends, fads and innovations out there that lead to huge numbers of people doing something a little unusual that is initially disparaged. The advent of colour television, mobile phones and Betamax video all spring to mind as technologies that initially led to criticism for the early adopters. For flies, eating excrement is a natural and purposeful enterprise. They are able to extract nutrients that sustain them, from the copious waste that humans cannot use. Not an obvious pastime, but not at all crazy once you are in possession of the full facts. I’m not seeking to draw a parallel with the many photographs that get taken on mobile phones, for these images do also sustain, at least the spirit if not the physical health and can be a vehicle to greater technical proficiency. Put another way, 10,000 people taking poor quality i_snaps can’t be wrong. And they are not, they are purposeful, and the images meaningful to them. Of course there is a severe limit to how much you can learn from photography with a camera phone, as they have few controls and little precision, though I expect that to change in years to come as manual controls sneak in to camera phones, or phones sneak in to better cameras. After all, the very best camera is the one that you have with you and several successful books have been published on the back of this (for instance the excellent “The Best Camera is the One That’s with You: iPhone Photography” by Chase Jarvis).
So what is a Snap to Me?
In my old Collins Gem English Dictionary from 1998, in a very different time, a snapshot is an informal photograph, whereas a photograph is a picture made by the chemical action of light on a film (my how that has changed!) and an image is something altogether more general and complex. It’s a mental picture of someone or something, an impression that people have of a person or organization, a representation of a person or thing in a work of art, an optical reproduction or even a metaphor. We can see right away that the pretentious crowd are using the correct word for their impression of the way photographs should be made, but what about the happy snappers? Looks like they are correct too, with an emphasis on informal. And this, at its crux, is why I like snapping. It’s the informality of it all. To be in situations where others are comfortable with your taking pictures. To not have to worry too much about the quality or purpose of a picture. To make it just because you can. To create and keep memories of events and people for when you are old (or gone). To be accepted for what and who you are, to be at peace with yourself, enjoying the moment. This is the time I take pleasure in my camera. This is what I enjoy. It is not that I don’t enjoy my more technical photography, it’s just that it is different. That is a much more professional endeavour. It is do-or-die. The stakes are immense. You have to get things right. The camera is a tool to be wielded with skill and accuracy. Like computer programming, there are no half measures, no in-between. It works or it doesn’t. You have a moment, if you are lucky a few moments, but you have to be on time and on task. The rewards are high but so are the costs, in that the perfectionists are correct at least.
Is it really this Black and White?
As with many things in life, however, there are situations in-between the extremes. Grey areas exist, betwixt these poles, in which people have options. A third way if you will. A more personal way or style if you like. Once you have the technical skills to take successful photographs, you don’t lose them, or fail to implement them, just because you are in an informal social situation. These skills do contribute to the less formal pictures you take, making them better timed, technically proficient, better framed, more interesting with better background narrative. The informality of the situation helps you concentrate on your technique and encourages you to play more. Try things you might otherwise not have done in a more formal setting, where failure is not an option. Your missed opportunities will be fewer if you have good technique, your personal memories will better reflect how you felt at the time (remember the camera looks both ways) and there is a chance that your pictures will hold the attention of others for more than a microsecond.
Conclusions
Realize that picture-making settings vary considerably, and be comfortable with that. Learn what you can, through rigorous image making opportunities, but use these skills to take personal pictures that have meaning for you. Be snap-happy, and proud.
Cheers, till next time,
R.







Recent Comments