
Feb
21
A Few Days Out
Birds of Prey / Field Craft / Garden Birds / Nature / Nikon D4 / Nikon D810 Posted by Robin
/
1 comments
A Few Days Out
Setting the Scene
It’s been quite a while since I could afford the time, and the cost, of having a few days out of my local area, just for the purposes of shooting wildlife! This trip had been planned for a few months and you often have to book very early just to get places. My pal Geoff and I have often gone with Natures Images (Mark Sisson and Danny Green) in the past, and their workshops are universally fantastic! This time we booked with Nature Photography Hides (Mark Hancock) for the hides in South West Scotland. We had used Mark’s hides in Worcester to shoot Kingfisher previously (on a Nature’s Images workshop), so knew they would be of good quality. The plan was to work with the Sparrowhawk hide, the Red Squirrel reflection pool and the Buzzard Hide. Unfortunately the reflection pool was frozen so our host, Alan McFadyen, swapped us to one of his personal hides to shoot Kingfisher in order to avoid disappointment. As it happened, that was to work out very well indeed! Alan was a great host, and very personable, and the hotel we stayed in (the Selkirk Arms Hotel in Kirkcudbright) were fantastic. Great food, and they pulled out all the stops to provide early breakfast and packed lunches for our demanding schedule.
Day One
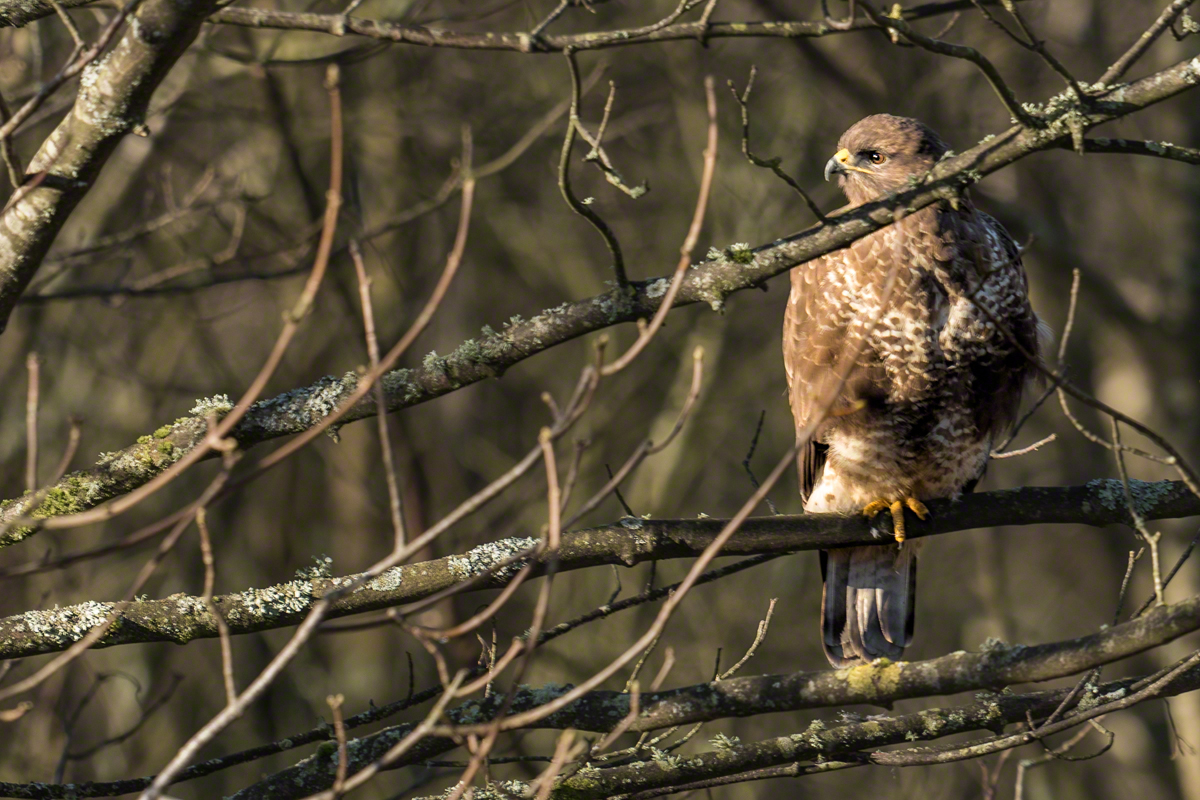
We met with Alan in the small village of Ringford at 7.15am and moved on to the hides from there. We negotiated the Buzzard hide for the first day, and made our way up a short climb, through the snow, to a hide looking out into an initially very foggy scene.
And my was it cold!! The mist cleared to reveal a really beautiful view of the valley and yes the Buzzard did arrive and sit on an awesome perch. He was there for 20 minutes and we never took a shot!! There is a serious learning point here, which is this: Having taken due note of all necessary advice, sometimes you just have to go for it! We knew that he tended to be very twitchy before eating, and would usually fly off if he detected any lens movement from the hides. We were advised to wait until he had flown to the rocks to eat the rabbit or mice on the rocks. Unfortunately he had obviously eaten before arriving and had no interest in the free meal on the rocks. He was very twitchy on the perch and we might have only got one shot before he flew off. We will never know. The main thing is that we did no harm!
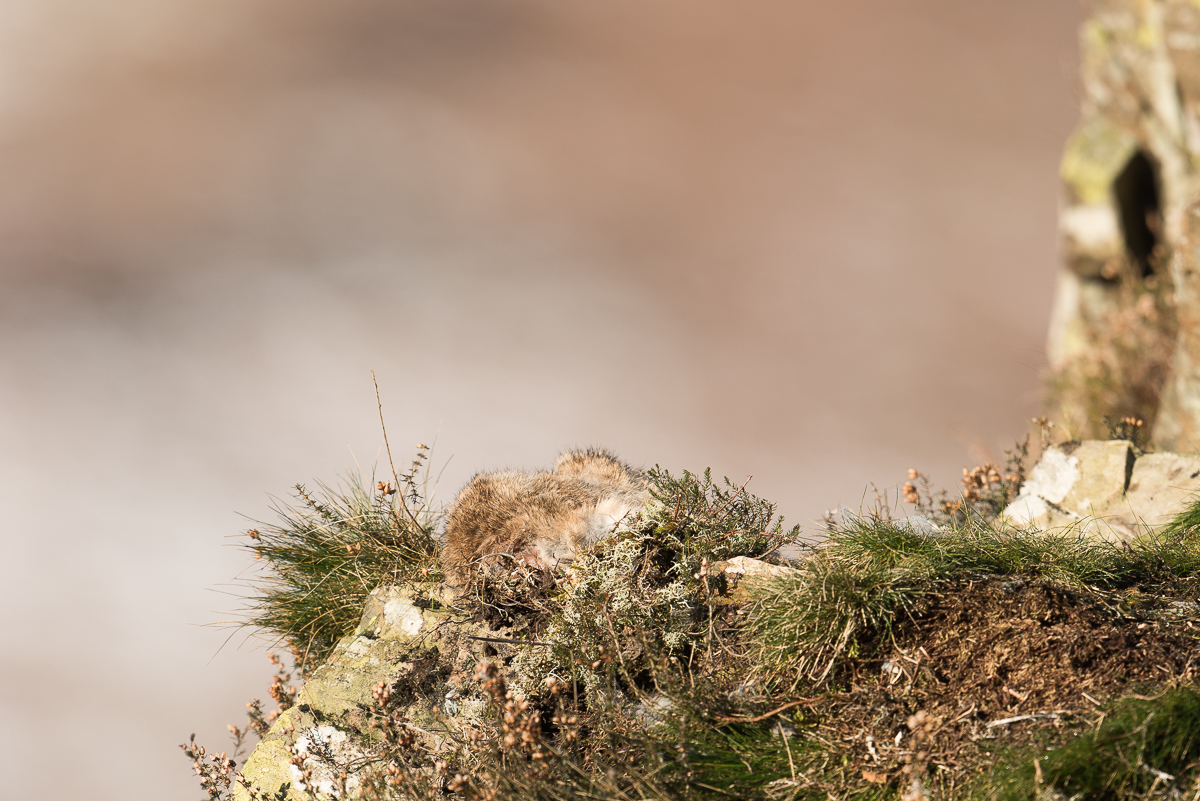
Feed on the Rocks
The Buzzard retreated to the distant tree line and seemed happy as Larry, preening and sunbathing. Just too far away for anthing other than a context shot. I would have struggled even for that were it not for the mega-resolution of the remarkable D810.
Buzzard in the Trees
Day Two
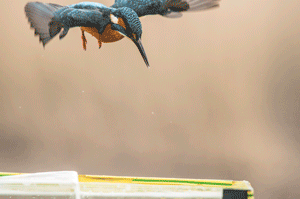
This was the bonus day of our plan for a few days out. Kingfisher diving shots. Wow! Alan has a couple of hides down in a secret location by the river estuary. One hide is actually in the river at high tide! Fortunately for us, we were in the dry hide as there is quite a large tidal surge during the day. Yet again the weather was perfect, sunshine but frosty and cold.
An Early Fright
We met Alan at the hotel and he asked what lens I’d be using. 600mm I said. He looked horrified. Haven’t you got anything smaller? 200mm is all you will need!! Fortunately I had my 70-200mm f2.8 VR2 with me, plus teleconvertors, and Geoff was using his 200-400mm f4. Drama over. I was concerned about the quality though, and whether I’d get enough background blur with this kit. As you can see by the final shots below, I needn’t have worried. Most of my shots were taken with my 1.7 teleconvertor, and if I hadn’t been shooting full frame then I wouldn’t have needed one at all. A zoom definitely helped too because I could swap from wider to narrower view depending on whether the Kingfisher was on the perch or diving into the tank.
So How does it Work?
It would take a remarkable amount of patience, luck and time to catch Kingfishers fishing in their completely natural habitat, so photographers increase their chances with a staged set that includes perches and fish tank. Et viola, now you have a place, and a 2 hour window of time, in which you can see a Kingfisher fishing. The utilitarian looking setup shown below is perfect for the job.
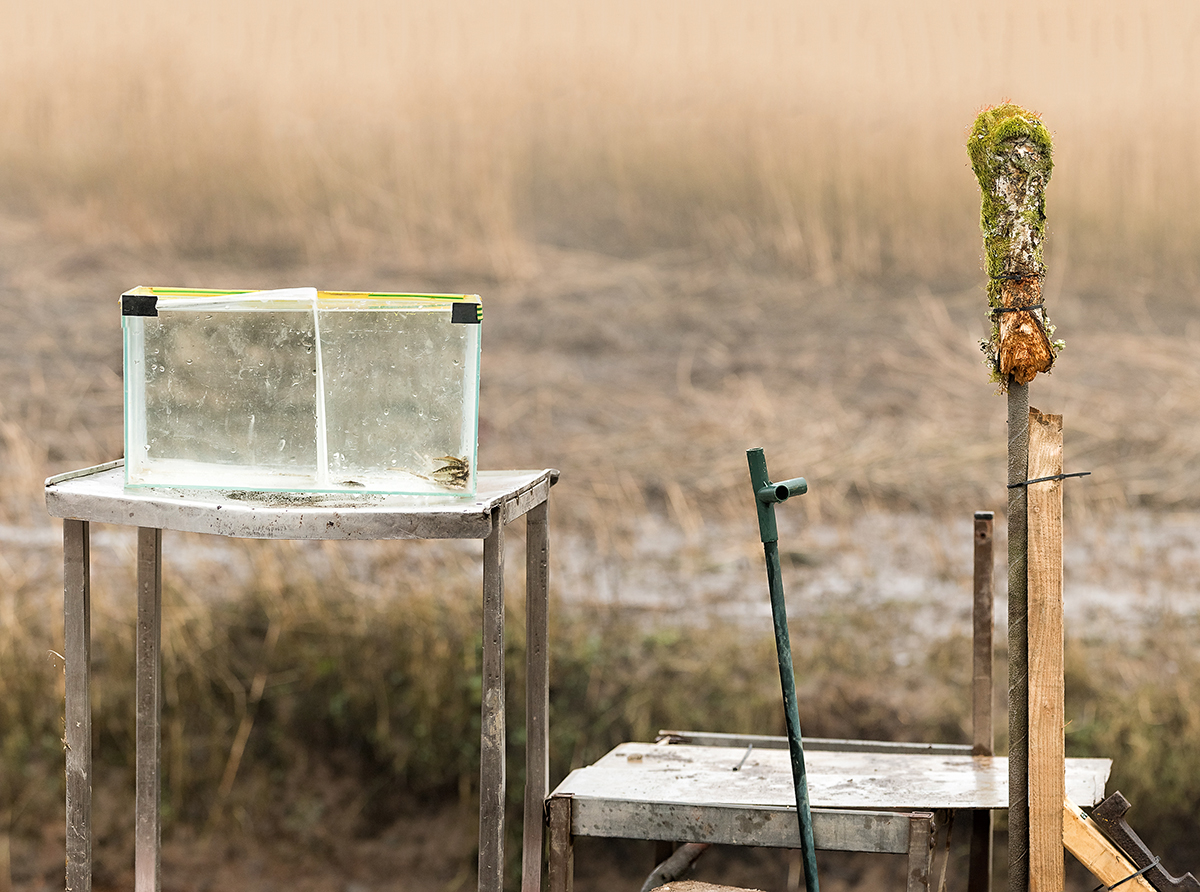
Riverbank Set for Kingfisher Fishing
As you can see, the river bank sits below and in front of the tank and perch. Beyond the tank you can see the reeds which are sufficiently far away to provide a very blurred out background when you are focused on the fish tank or perch. You can see the fish bait in the bottom corner of the tank.
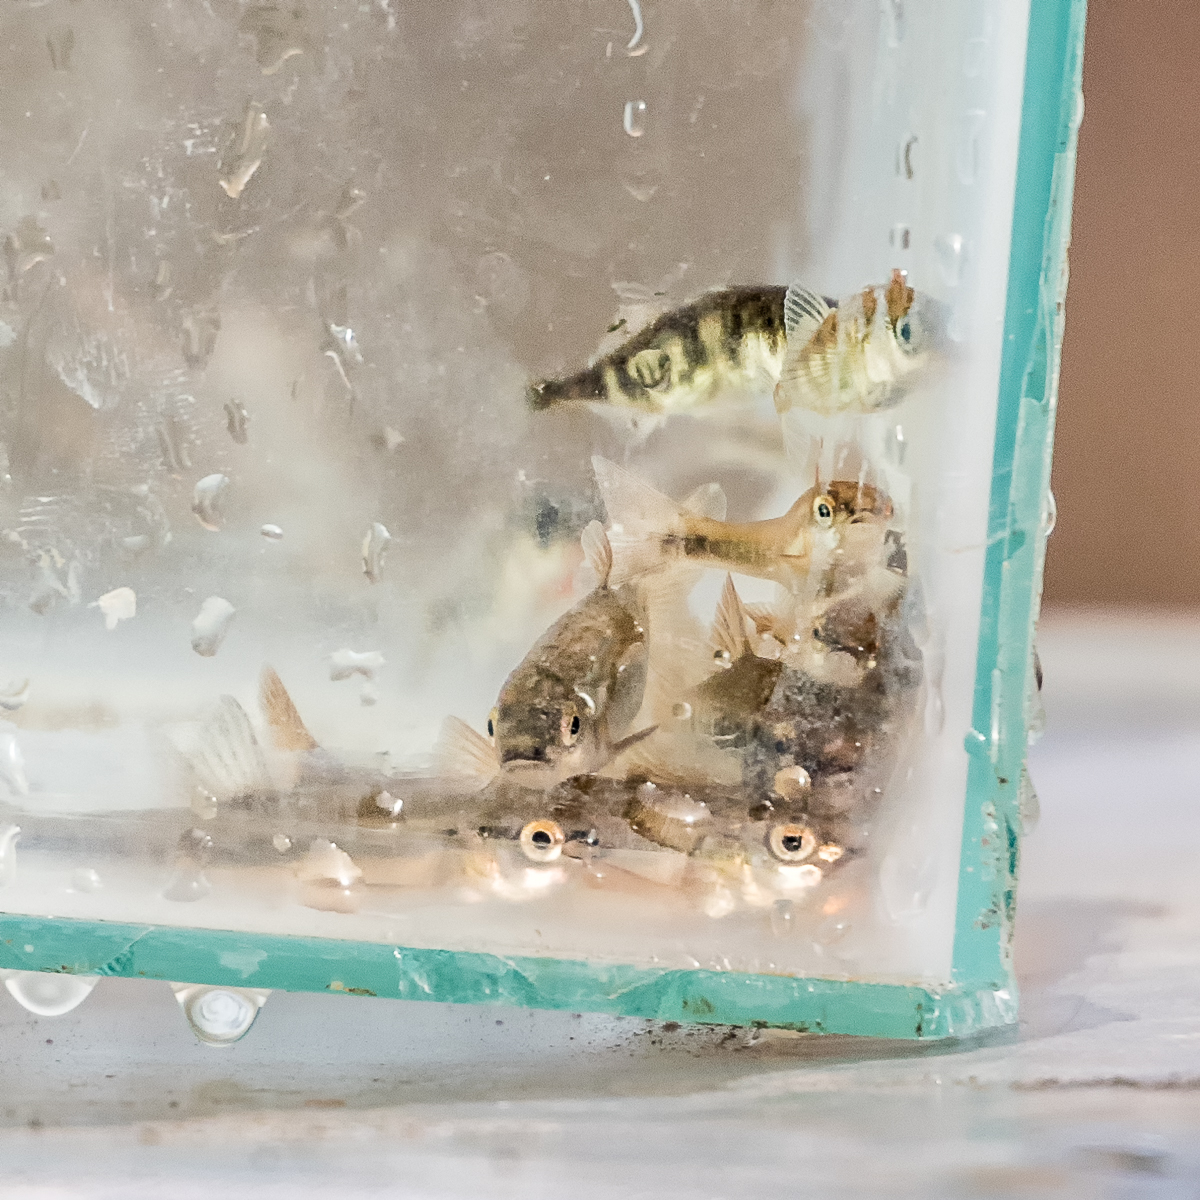
Kingfisher Bait
Taking a Shot
It took me all day to realize what I am about to tell you now. So if you want to know how to take diving Kingfisher shots, listen up!!
The Kingfishers know the deal. There are fish in that tank, and like an expensive fish restaurant, they can choose which one they want. Every two hours or so they need to feed, so along they come, as regular as clockwork. They land on the side of the tank and take a good look, they peer in, and look round, apparently sizing things up then — whoosh — with a splash they are in the tank and emerging with a fish. At least that’s what it looks like. But actually, that’s not what just happened, not even close!
To take an effective image of a diving or hovering Kingfisher you need a few things in place:
- An exposure of 1/2000 second or faster to freeze the motion
- To test the exposure in advance to ensure that you don’t get any blown highlights, or blown colors, on the Kingfisher itself
- Pre-focus on the mid point of the tank
- Your fastest frames per second set in camera
- A wide-enough field of view to capture the action
1/2000 Second Exposure
This can be a bit of an ask at the beginning and end of the day. Depending on your maximum aperture, your ISO might have to go way up. Let’s consider some scenarios. I was shooting a full frame Nikon D810 with my 70-200mm f2.8 zoom Nikkor. I ended up using my 1.7x teleconvertor which gave me sufficient reach for a reasonable crop on the perch shots, and a wide enough crop on the tank. This gave me an aperture of f4.8 which at the start of the day meant an ISO of 2500, 1/2500 second and a reach of 340mm. Had I been shooting cropped sensor then I would have had an effective reach of 300mm at f2.8 and an ISO of 1000 with 1/2500 shutter speed would suffice. Either scenario means minimal depth of field so precise focusing is essential.
I had my D4 available, and, despite the phenomenal dynamic range of the D810 sensor at low ISO, the D4 beats it from ISO 400 upwards. Did this matter? Actually, no it didn’t. What you need to remember is that at dawn, and dusk, the light becomes flatter and much less contrasty so dynamic range is less of an issue than noise is. Interestingly, despite the poor reputation of the D810 for noise at high ISO, it is still 2 years newer than the D4 and the difference is less than I might have expected (for noise).
Check Exposure
This is also crucial. The Kingfisher has very bright and iridescent colors that are very easy to blow out. This is one of those circumstances where you really need to use your 4-channel histogram display (RGB, R, G and B) to check than none of the channels are blown. You have a couple of choices here. Take a few shots to ascertain the best exposure value and then switch to manual mode. The down-side of this is that you will have to check the light levels during the day and adjust accordingly. This can be especially problematic if the sun is in and out behind clouds. Alternatively you can shoot aperture priority with negative exposure compensation. This is what I did in fact, using -0.7 ev exposure compensation. Again there is a caveat, which is that if the light becomes very contrasty (eg. in bright sunshine) you might need to increase the exposure compensation. If the light is very flat though you may have to reduce it, or even use positive exposure compensation . There’s no substitute for experience here unfortunately.
Pre-focus and Its Implications
You know where the edges of the tank are, and you know that the Kingfisher will fly in between them. Manual focusing is arguably the best, and Alan had a suitable target for us to pre-focus on. With manual focus you help optimise your frames per second because the camera doesn’t have to waste time focusing.
Focusing Target
I didn’t use manual focus though. This was because the perch and the tank were at different distances from my shooting position in the hide. With this in mind, I used my back focus button and set my shutter to release priority. This gives you the best of both worlds. You can pre-focus on the mid-point of the tank (it just so happened that there were some glue drops on the outside of the tank in the middle of the side face which worked perfectly), and fire at will when the Kingfisher dives. Or you can auto-focus on the bird on the perch if it lands there when it emerges from the tank.
Fastest FPS and Gotcha’s
I really wanted to use my D810 which gives 5 fps at full frame 36mp. Partly because it still feels very new, and I’m getting to know what it is capable of and also because I hoped for a few images that could be printed full detail at A2. I suspected that I would use the D4 first when the light was low, and the D810 when the light was better and the contrast higher, to optimize both noise performance and dynamic range. But actually, a new priority presented itself that meant I was willing to use the D810 from the start (see below). I only used the D4 at the end of the day when the light was really terrible and I needed to get my frame rate up (or so I thought).
I have a battery pack on my D810, and at Dx crop (15mp) it can shoot 7 fps. At full frame I was only getting 3 fps at the start of the day and, what I didn’t realize until I got home was that, I had my camera set to backup the main SD card to the secondary CF card (as opposed to overflow which I normally use). There’s no doubt in my mind that this slowed down the frame rate at full size, but was less of an issue at 1.2 crop (24mp) which then gave me 6 fps which was much more satisfactory.
A Wide Enough Field of View
I mentioned above that the Kingfisher appears to go off the side of the tank directly into the water, but that this is not what actually happens. In reality, faster than the human eye can register it, the Kingfisher flies up into the air and then dives down into the water to get the fish. The problem is that you just can’t see it so you don’t realize where you need to point your camera to get the best shots. Here’s an example of the sort of issue that occurs. First frame the Kingfisher is barely in shot, next frame he’s half into the water, so at 6 fps you are nowhere close to a satisfactory shot. It’s just happening too fast.
This took 1.5 seconds, start to finish
Here I’m burst shooting for 10 consecutive frames at 6 fps. You would need to be precise to a level of approximately 1/100 of a second in your timing to get the bird central in your frame every time. So what’s the trick? Well it boils down to this. To have a fighting chance you need your camera set to its fastest frame rate, and a wide-enough angle of view to improve your chance of getting an image in frame within any particular 1/10 second.
How do you do this? My advice is shoot portrait orientation with the base of your frame about twice the width of the tank to start with. Move wider if you still are not getting anything and shorter as you get better with your timing. The more pixels you have the better, but there is a tension between your number of pixels and your frame rate, and the size of the bird in the frame and your success rate. Simple as that!
Finally, how do you know when the Kingfisher will dive? Actually this is very straightforward, but can be easy to miss. The Kingfisher points his beak towards the fish a few times first and then gives a single longer neck stretch towards the fish and flies. As soon as you see that longer neck stretch start shooting and keep going until the Kingfisher has left the scene.
Putting it all Together
In the final analysis it just takes practice, once you have your settings. In reality you only need one good shot for a day’s shooting, so try to be patient. There’s a lot of waiting around between the bursts of action, but that’s wildlife for you! Don’t forget that Kingfisher are protected and don’t try any of this without the proper supervision. Definitely never approach a Kingfisher nest in the UK with your camera!
D4 or D810?
I think that you can use either camera successfully. There is clearly a difference between 6 fps and 10 fps in terms of the number of successful frames you can catch, but you can shoot a wider area on the D810, at 24mp, thereby increasing your success rate, so in the end there is not as much difference as you might think between the two. I was forced to switch to my D4 at the very end of the day in order to minimize noise, but I would still have come away with sharp shots even if I hadn’t switched.
Final Day
And what of the challenges on the final day? We were blessed with lovely weather yet again. A backdrop including some snow and woodland, fearsome cold (of course) and the expectation of a Sparrowhawk called Mad Max. Unfortunately Max didn’t show, but lots of other cool birds did. The Woodpeckers were spectacular. Did I have any problems, well yes in the sense that I needed to use my beanbag rather than my tripod, which works well enough, but I’m less used to it. The balance point on my Nikkor 600mm is on the focus ring, a terrible design flaw in my view, meaning that when you turn the camera to portrait orientation, the focus changes if the lens isn’t lifted completely off the bean bag (easier for body builders, less so for me), so you have to refocus. The 600mm Nikkor is a full 5kg in weight, even without its camouflage kit. Also, I had not brought my extension rings.
Extension rings I hear you ask. Are you crazy? You shouldn’t be shooting macro with a 600 you fool!! No, quite so. Here’s the thing. Some of the perches were set up for shooting with a 70-200mm or 70-300mm lens and they were just too close for the 600 Nikkor which has a minimum focus distance of 5m (autofocus), 4.8m (manual focus). You can bring this forwards (at the possible expense of infinity focus) by using an extension ring! Old-school, but useful..
And for the portrait shots..
Don’t forget that you can follow me on twitter or G+, but for now, until next time..
R.
Recent Comments